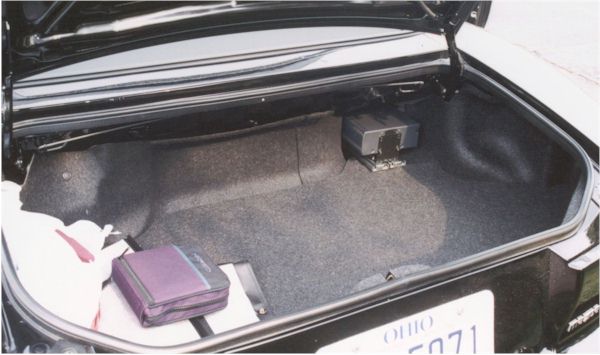
These are installation instructions for placing an Alpine S620 horizontally in the small space beside the gas tank and behind the passenger seat in an M2 Miata. Horizontal installation is preferable as the changer is more skip resistant when mounted this way. When finished, the changer is fully accessible from the trunk and there is no lost trunk space. This might work in an M1 if the spare tire has been relocated - I don't know how big the space beside the gas tank is in an M1.
Parts list:
Tools required:
Parts notes:
Step 1 Changer and slide dry fit

Build the changer and slide assembly in a suitable area of your home. The middle of the living room is not recommended. This "dry fit" makes sure all the pieces fit. Better to find potential problems now than when you've got your head and shoulders stuck in the trunk of the Miata.
Attach the changer mounting brackets to the changer using the supplied hardware, orienting the brackets so the "feet" extend under the changer. Use the middle attachment holes on the brackets and the bottom holes on the changer. This alignment is to allow the changer to clear the shock mounting bolt. Using the #10 bolts, nuts, and lock washers, attach the floor mounting plates to the bottom (widest section) part of the slides making sure the heads of the bolts are "inside" the slides. Orienting the slides with the opening end towards you, attach one of the floor mounting plates to the closest attachment point using the 3/4" bolts with the spacers. Attach the second floor mounting plate to the slides at the middle attachment point. The main function of the second floor attachment plate is to ensure the slides stay parallel to each other.
Once the floor mounting plates are attached to the slides, attach the changer to the top (narrowest part) of the slides using the #8 bolts, nuts, and lock washers, once again making sure the bolt heads are inside the slides. The changer should be attached to the slides as close to the opening end of the slides as possible with the front of the changer oriented so it will face into the center of the car.
Step 2 Trunk preparation
Remove the liner from the section of the trunk you're going to be working in. The piece of the liner you're concerned with extends from the rear passenger side corner of the trunk to about a third of the way across the front wall of the trunk. It's held in place with 2 little plastic fasteners. If you look closely, the head of the fastener is actually in two pieces. The center portion pulls out easily (but it doesn't come all the way out), and releases the whole thing to pull out of the car. If you don't pull the center section first, getting the fastener out is very difficult.
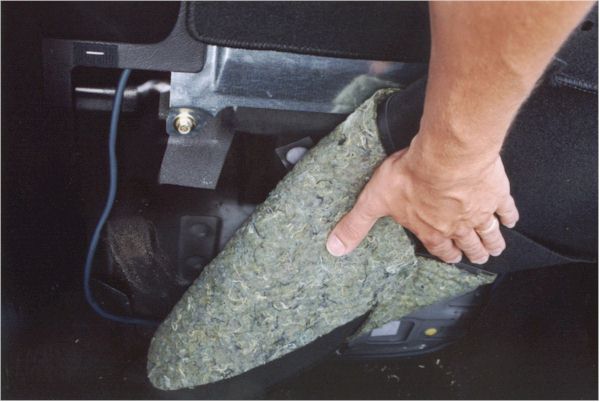
Once the section of liner is removed, you can see the empty space the changer's going to fill. You'll notice a piece of insulation on the floor of the space - it can be removed, or, if you're so inclined, cut to fit around the floor mounting plates. I chose to cut it to fit - the Miata needs as much sound deadening as it can get.
Step 3 Changer connection cable installation
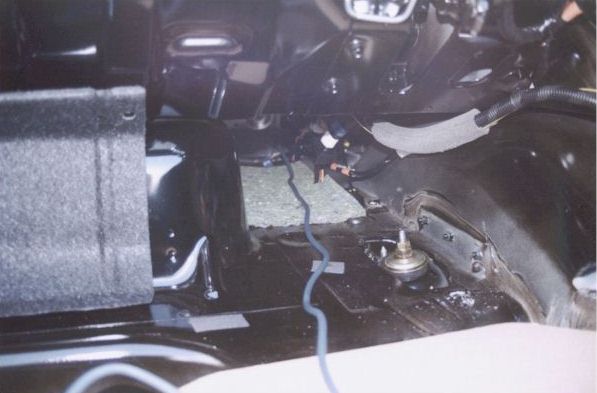
Run the changer connection cable from the center dash area to the trunk. Make sure you get the cable installed with the right connectors in the right places. To run the cable invisibly, you'll need to loosen the carpet that's behind the passenger seat. It's held in place with a different type of fastener than the trunk liner was - these just pull straight out. There's probably a special tool to remove them but I just persevered with my fingers. The fasteners that hold down the front edge of the parcel shelf covering need to be removed all the way across the car. (more on this later) Then you need to remove just enough fasteners from the vertical piece of carpet to allow you to run the cable behind it. The cable can be run to the front of the car under the edge of the center console without removing the console. Getting the cable up to the back of the stereo is best accomplished with the stereo head unit removed from the dash. Whether you start from the back or front is up to you.
Step 4 Mounting hole location and drilling

Place the changer and rail assembly in the car, making sure the back of the rails are far enough into the space that the entire assembly fits into the well. The visible end of the changer should be approximately flush with the front wall of the trunk and the changer shouldn't rub against the car anywhere.
Mark the floor of the trunk for drilling the floor mount plate attachment holes using the assembly as a template. Remove the assembly and ensure that there are small dimples where you've marked the hole locations. The drilling will go much more smoothly if there are dimples in the metal. Using the flexible shaft on the drill and the 3/32" bit, drill the holes for the #8 sheet metal screws.
Step 5 Final positioning
Remove the front (the one with the spacers) floor mounting plate from the rails. Turn the plate over and place the #10 nuts in the depressions. Use a small piece of duct tape to hold the nuts in place. Put a small dollop of silicon sealant in each of your freshly drilled holes, then position the floor mounting plate and screw it down. With the floor mounting plate securely fastened, position the changer/slide assembly on the mounting plate and bolt it into place making sure the changer clears all obstructions as it slides.
Step 6 Securing the far end of the slides
Now you need to drill the holes for securing the other end of the slides and, of course, install the screws.
First, remove the wind blocker. Then roll back the carpet covering the parcel shelf. You'll see a hole in the sheet metal that's in about the right place to allow the 12" drill bit to be used to makes the holes to screw the slides down. You'll likely need to two people to do this - one to hold the drill, and one to position the bit in the right holes in the slides. Once the holes are drilled, the challenge is to get the #10 x 1" sheet metal screws positioned in the holes so you can then use the long screwdriver to secure them. If you can figure a way to get some silicon sealant into the holes, you should do so. (I couldn't.) The rails should be secured from moving, but you don't want to tighten them down so far that they are bent enough to impede the slides' action.
Step 7 Final installation notes
The excess changer connection cable can be bundled up and stuffed behind the structural member that's on the right side (as you look into the changer opening) of the space. Make sure you leave enough slack cable to allow for full extension of the slides. You might want to tie the cable that comes out of the changer to the bracket so that the cable is centered in the opening and so cannot catch on other wires/cables and/or bolts.
Once the changer's been tested, you can put the carpeting back in place and re-install the wind blocker.
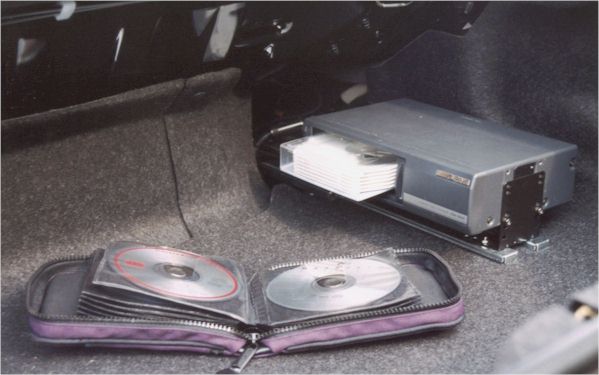
You'll need to trim some of the trunk carpet around the slides and then trim the trunk liner to create an opening for the changer to finish the installation.
With that, it should be ready to go. WooHooHooHoo!!!!
| Back to the Garage |
20 February, 2002 |