R&R of a Miata Differential Pinion
This is not a difficult procedure to undertake it just requires patience, correct tools and how to use them. All the torque specs listed here are from the 97 factory shop manual. This procedure is also valid for the smaller 1.6 Miata diff except the torque values are different and you’ll need a 6-7 inch micrometer instead.
Required Tools
0-1 inch Dial Indicator and Magnetic Base
7-8 inch micrometer
5 inch Bench Vice
Torque Wrench
Hammer
Punch or Flat Head Screwdriver
Supplies
Thread Locking Compound
Silicone RTV
Lots of Shop Rags
Paint Pen (Bright Color)
The dial indicator and micrometer I used where bought from ENCO. They are not the best out there but they are adequate for this task.
Dial Indicator:
http://www.use-enco.com/CGI/INSRIT?PMAKA=628-3040&PMPXNO=948573&PARTPG=INLMK3
Micrometer:
http://www.use-enco.com/CGI/INSRIT?PARTPG=INSRAR2&PMAKA=600-2027&PMPXNO=949703
Procedure
Removing and Installing
the Differential and Ring Gear.
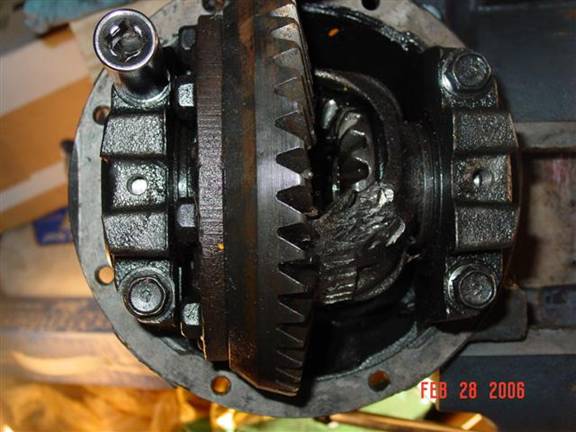
I’m going to begin after the differential carrier has been removed from the car and the aluminum housing has been removed from it to expose the gear set.
Note: It has been pointed out that you might want to measure the backlash before disassembly, see page 6 for measuring backlash. This way you will be assured a noise free rear end if it is set the same as before. I have always just set it to within spec and haven’t had a problem but it couldn’t hurt.
So you should have this in your vice. Notice the labels so that we are on the same page on what I am calling things.
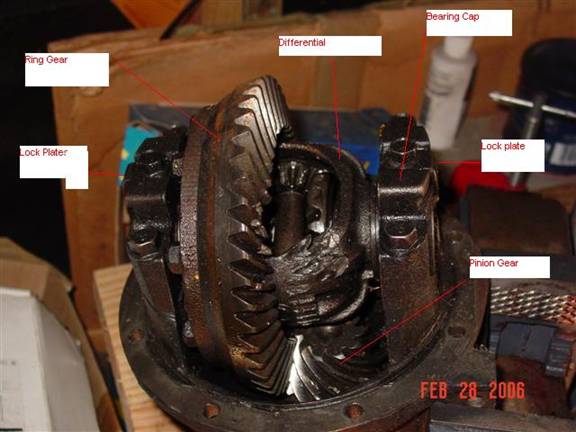
Side View
Now mark with the paint pen one of the bearing caps so that you know which one goes where.
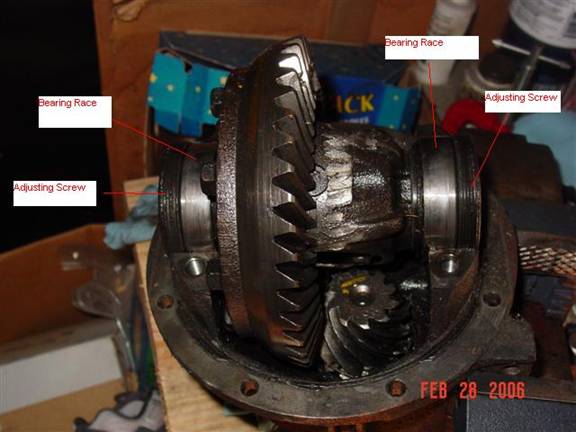
Next remove the lock plate from both sides then remove the bearing caps and adjusting screws. STOP!! At this point mark the bearing races so you know which goes where, do NOT mix them up.
Now lift out the differential/ring gear and place it in the vice
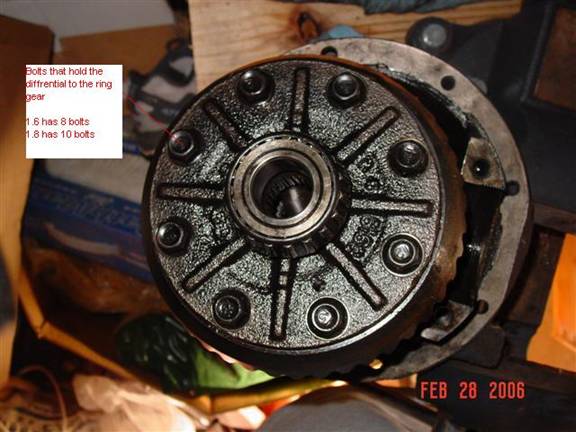
Remove bolts and use a punch to tap the ring gear from differential.
Now put the ring gear on your new differential apply thread lock to the bolts and torque them in three stages (i.e. 1/3rd the torque then 2/3rd the torque then torque to spec) in a cross pattern.
Torque spec = 51-61 ft-lb
Take the diff/ring gear assembly with bearing races (NOTE: the bearing races are matched with its bearing so make sure they go back on the side they where removed from) and place it back in the carrier.
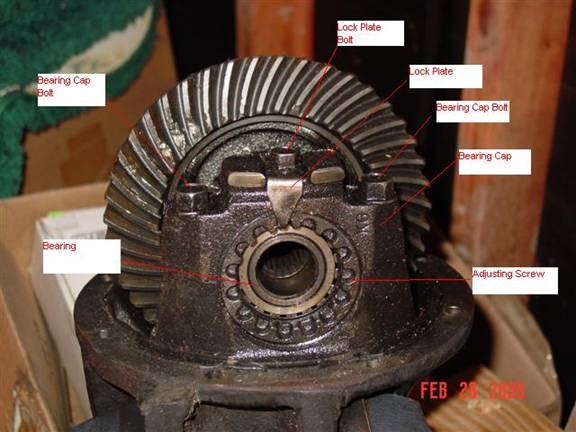
Now place the adjuster screws in place and install the bearing cap. Move the adjuster screw to make sure the threads are threaded correctly.
Tighten the bearing cap bolts to 27-38 ft-lb.
It should look like this. (Sorry I left the socket on the upper left bolt)
Now the fun begins!!
Checking and Adjusting
Backlash
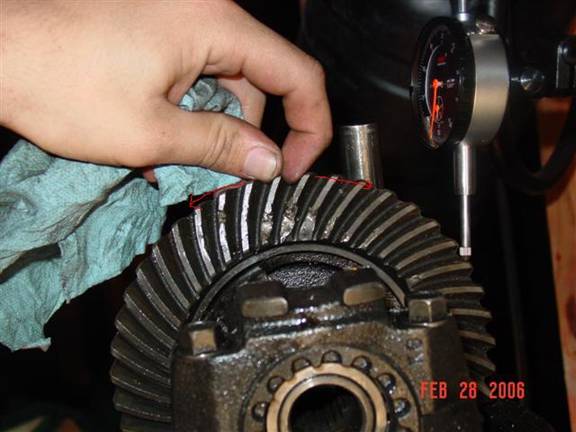
Take your paint pen and place 4 marks on the ring gear every 90 degrees (i.e. if the ring gear is a clock at 12, 3, 6, and 9)
Take your dial indicator and magnetic base and set it up like this. (NOTE: the dial indicator must be at a 90 degree angle to your measuring surface to get accurate readings.)
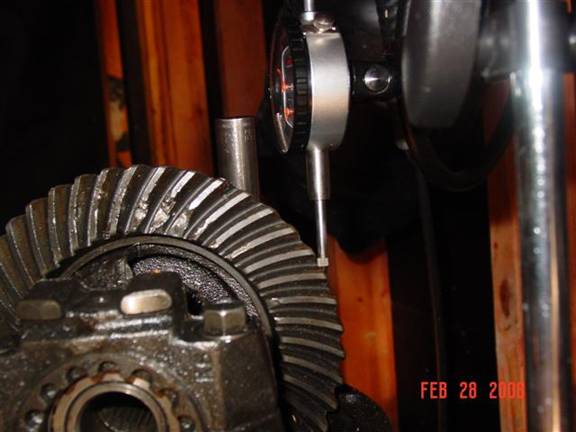
Lock the pinion shaft; I used a c-clamp and my work bench.
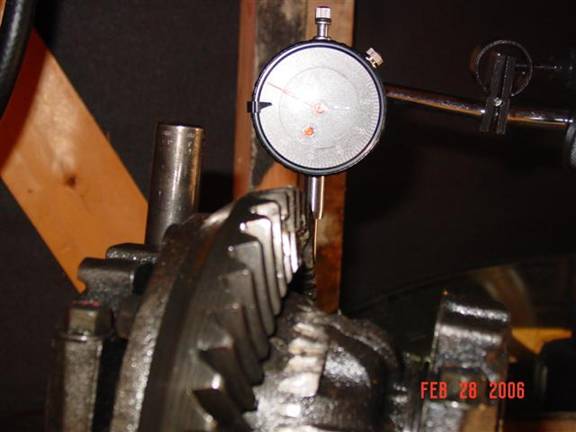
Now move the ring gear back and forth with your hand (remember the pinion shaft Must be locked) and measure the movement of the ring gear with the dial indicator. This is the backlash.
Go ahead and measure at the four positions you had painted on the ring gear previously. All the values should be in this range
Backlash = 0.0036-0.0043 inches
If they are, stop now and go buy a lottery ticket its your lucky day! Then when you get back skip ahead to adjusting and setting bearing preload.
If the backlash is not in spec this is what you do.
If it is less than spec it means that the ring gear is too close to the pinion gear. So you want to move the adjuster screws accordingly.
If it is more than spec then you need to move the ring gear closer to the pinion gear.
Remember that there are two adjusters one on each side I found it easier to turn both by the same amount. i.e. If you want to move the ring gear to the right. You would screw the right adjuster out and the left adjuster in by the same amount. I would start out at a ¼ turn in the direction you need and see what that gives you.
To adjust I used a punch and a hammer to tap the adjusters in the direction needed.
Now go back and measure again just like before at all 4 places. Repeat until you are in spec for all 4 measurements.
Adjusting and Setting Bearing Preload
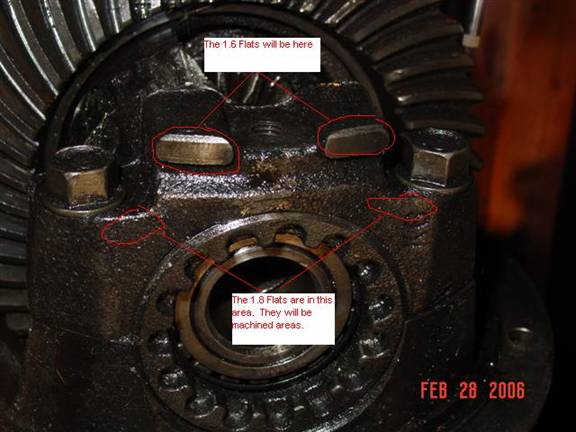
Here are the measuring flats.
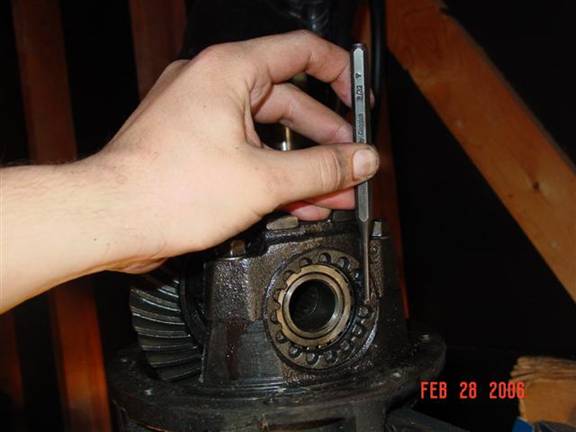
Now take your 7-8inch (6-7 inch if 1.6) micrometer and place it across the flats at a diagonal like shown. (I didn’t have a set of 6-7 inch micrometers for the 1.6 differential but the lines should give you an idea what I’m talking about.)
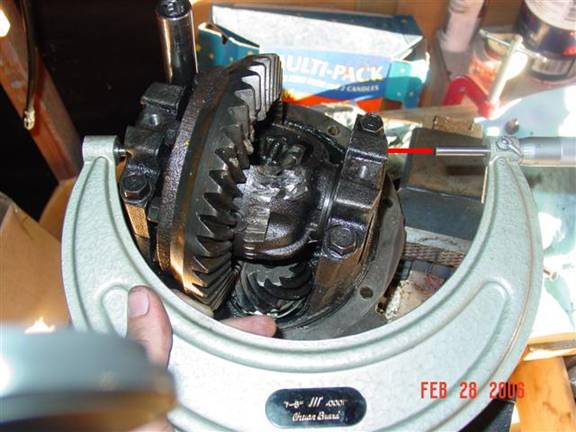
Now measure the other diagonal.
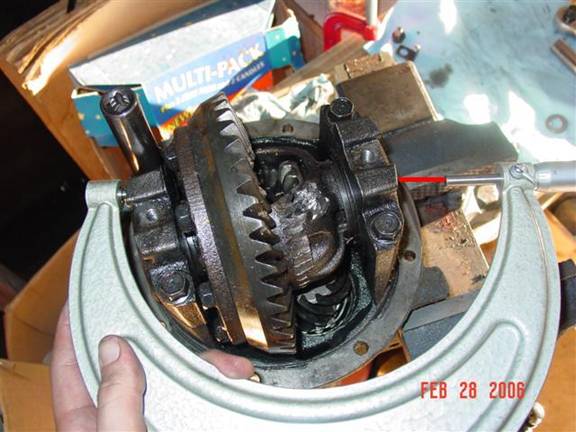
The Distance should be 7.3004-7.3031 inches for 1.8 differentials
If both diagonals are within spec skip ahead. If you also skipped the last section stop now go back to the store you went to earlier and buy ME a lottery ticket this time!
If they are not in spec here is what you do.
If it is less than spec this means the towers are too close together. To spread them out you screw both adjusters IN the same amount so as not to affect the backlash.
If it is more than spec the towers are too far apart so you want to adjust both of the adjusters OUT by the same amount.
Measure and repeat until you get inside the specified range.
Next thing you’ll want to do is go back and recheck the backlash. If you moved both adjusters the same amount when you were adjusting the preload it should still be in spec. If not go back and fix it then recheck the preload.
Once everything is in spec and rechecked, bolt on the lock plates and torque to 13-19 ft-lb.
That’s it now just bolt everything back on the car and enjoy your new diff. Remember to use RTV when bolting the carrier back to its housing
Differential Specs:
1.6 Specs
Ring Gear 51-61 ft-lbs
Backlash 0.0035-0.0043 inches
Distance between bearing caps(bearing preload) 5.9105-5.913 inches
Bearing cap torque 27-38 ft-lbs
lock plate bolt torque 13-19 ft-lbs
1.8 Specs
Ring gear backlash (0.0036-0.0043)
Bearing preload (7.3004-7.3031)
Bearing cap bolt torque (27-38 ft-lb)
Lock plates on bearing caps (13-19 ft-lb)
ring gear to the differential (51-61 ft-lb)
|
2 October, 2006 |