$6.00 -
Faux Chrome for your Miata Interior
For many Miata owners,
there is an abundance of accessories available for our vehicles. With so
many available to choose from, it becomes difficult to make all the modifications
we want - while keeping our wallets from becoming too thin.
With the inspiration
of Gary Madison, and his car Hakuna - I completed a series of small interior
modifications that makes the interior of a black Miata truly shine!
This set of instructions
will allow you to add a chrome like finish to any or all of the following:
• Vent Rings
• Defroster Vents
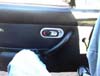
• Door Handle Cups
MATERIALS
Here is what you will need:
• Plasti-Kote
Chrome Bumper paint
• Cotton Swabs
• Cotton Balls
• 600 Grit Sandpaper
• Cup of Water
• Masking Tape
• Safety Pin
• Rubbing Alcohol
• Coat Hanger (or Drapery Hook)
• Black Permanent Marker (Sharpie!)
STEP 1: REMOVING
THE PIECES
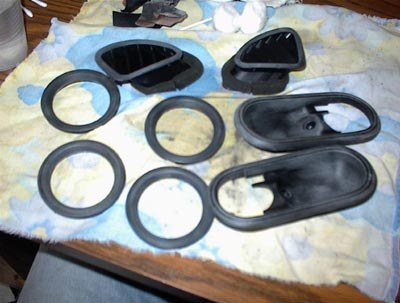
To start off, you will need to remove the pieces from your interior that
you wish to refinish:
Door Cup Handles
Removing the door cup handles will require only one screw, which is very
noticeable at all times.
Vent
Rings
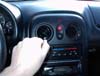 In
order to remove the vent rings and defroster vents, I suggest using a
bent coat hanger. Bend the coat hanger to have a small hook like end.
Insert the coat hanger into the vents, turn it so that the hook can grip
to the back of the vent - and give a brisk pull. The vents themselves
should come out quite easily! Be sure to push simultaneously on the console
as you pull on the coat hanger sharply. If you don't push, you CAN crack
and break the center console bracket at the top.
In
order to remove the vent rings and defroster vents, I suggest using a
bent coat hanger. Bend the coat hanger to have a small hook like end.
Insert the coat hanger into the vents, turn it so that the hook can grip
to the back of the vent - and give a brisk pull. The vents themselves
should come out quite easily! Be sure to push simultaneously on the console
as you pull on the coat hanger sharply. If you don't push, you CAN crack
and break the center console bracket at the top.
(I used a drapery hook
myself, but anything similar works quite easily.)
The rings themselves
will be attached to the entire "tube" like vent assembly. To
remove it, use a small flathead screwdriver to gently pry apart the ring
from the rest of the vent assembly. (Do not be overly concerned if you
break any of the tabs. On two of my vents, I snapped one tab each, and
the pieces fit back together and hold as good as ever.)
Defroster Vents
Use the same technique as described for the vent balls - above.
STEP 2: SANDING
THE PLASTIC
 Now
that you have the pieces off, you will want to sand them down to prepare
them for painting. I strongly suggest cleaning them all off though using
rubbing alcohol and swabs / cotton balls. This way, you will be removing
any substances that can cause a bad finish in the end.
Now
that you have the pieces off, you will want to sand them down to prepare
them for painting. I strongly suggest cleaning them all off though using
rubbing alcohol and swabs / cotton balls. This way, you will be removing
any substances that can cause a bad finish in the end.
Now, you will want
to sand the existing finish off of the areas that will be painted. If
you look closely at the finish, you can see that it is quite porous or
"bumpy". Your goal, is to sand this finish off and make it as
smooth as possible for the paint. In order to do this, you will want to
dip your sandpaper in water before and during your sanding. This will
help you achieve a smoother finish as well as control the dust that normally
comes off when sanding plastic.
STEP 3: MASKING
THE DEFROSTER VENTS
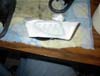
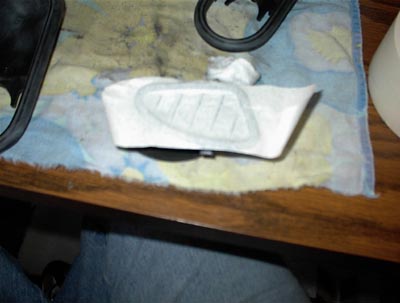
 As
displayed in the picture at left you will want to mask off the inner portion
of the defroster vent. For mine, I used two complete layers of masking
tape, as you see in photo one. Once the tape has been applied to the entire
top, you will then need your safety pin. Although rather tedious, this
is essential to control the paint and prevent it from running down the
vent slants! Now, use the pin to score the tape along the edges so that
your masking job looks like mine does in photo two, seen below. Don't
worry if you can't get it right the first time, just do it again until
you do.
As
displayed in the picture at left you will want to mask off the inner portion
of the defroster vent. For mine, I used two complete layers of masking
tape, as you see in photo one. Once the tape has been applied to the entire
top, you will then need your safety pin. Although rather tedious, this
is essential to control the paint and prevent it from running down the
vent slants! Now, use the pin to score the tape along the edges so that
your masking job looks like mine does in photo two, seen below. Don't
worry if you can't get it right the first time, just do it again until
you do.
Finish masking the
defroster vents by completely covering the sides and bottom with your
masking tape.
STEP 4: PAINTING
TIME!
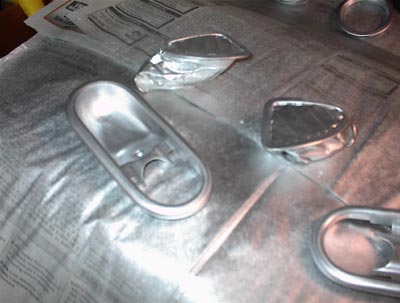
 Layout
some newspaper or a drop cloth so that your painting area is covered.
If you can create a booth, than that is best. You simply want to avoid
having a lot of dust flying around, because it can settle and ruin the
appearance of your paint's finish.
Layout
some newspaper or a drop cloth so that your painting area is covered.
If you can create a booth, than that is best. You simply want to avoid
having a lot of dust flying around, because it can settle and ruin the
appearance of your paint's finish.
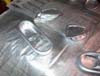
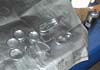 Once
you have the painting area all set, simply lay out the pieces so that
they can be easily sprayed in quick light motions. Shake the can according
to directions printed on the label, and work from about 14 to 18 inches
away using side to side motions. Apply one coat, then let dry for approximately
one half hour. Then, apply the second coat and allow a couple hours to
dry.
Once
you have the painting area all set, simply lay out the pieces so that
they can be easily sprayed in quick light motions. Shake the can according
to directions printed on the label, and work from about 14 to 18 inches
away using side to side motions. Apply one coat, then let dry for approximately
one half hour. Then, apply the second coat and allow a couple hours to
dry.
If you have gotten any over spray on the
defroster vent slants - simply cover them up using your black marker!
STEP 5: RE-INSTALLING!
Well, you have everything painted, so now you just need to get them all
back into your car! Simply reverse the methods of how you removed each
piece, and you are all set.
MAINTENANCE
Well, to be honest - I cannot offer any solid advice for keeping these
pieces in their best condition. I have only had them installed since December
1, 2001. I suspect that over time, thanks to the fingernails of myself
and passengers - the door handle cups may become a bit scratched. My car
so far though has made it through a few long nights out with no signs
of wear.
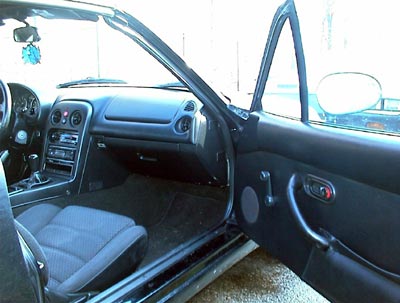
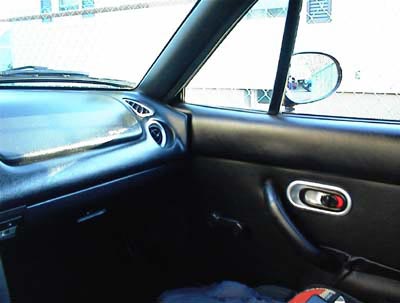
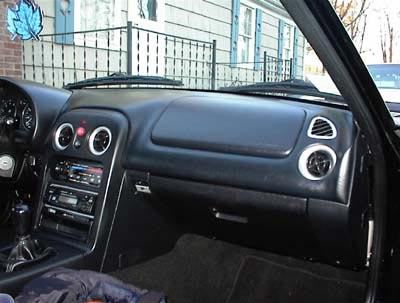
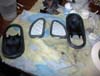
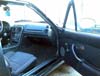
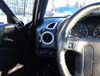
BEFORE PHOTOS
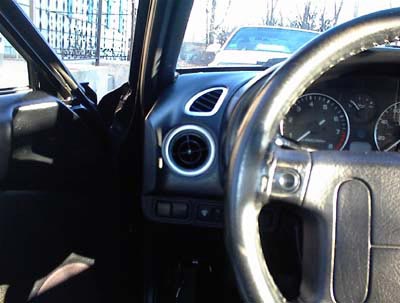
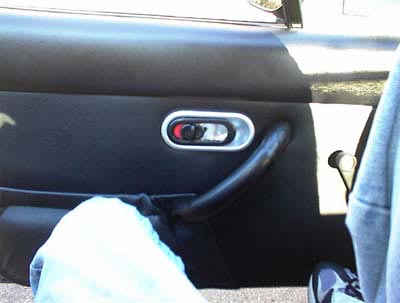
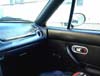
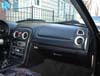
AFTER PHOTOS

SPECIAL THANKS
This modification came completely from Hakuna's interior. Gary Madison
was the source - and his car the inspiration! To review his write up and
images, please visit his web site: http://www.pacificsites.com/~hakuna/miata.html
To reach me, simply
email me at: eric@ericlander.com
 In
order to remove the vent rings and defroster vents, I suggest using a
bent coat hanger. Bend the coat hanger to have a small hook like end.
Insert the coat hanger into the vents, turn it so that the hook can grip
to the back of the vent - and give a brisk pull. The vents themselves
should come out quite easily! Be sure to push simultaneously on the console
as you pull on the coat hanger sharply. If you don't push, you CAN crack
and break the center console bracket at the top.
In
order to remove the vent rings and defroster vents, I suggest using a
bent coat hanger. Bend the coat hanger to have a small hook like end.
Insert the coat hanger into the vents, turn it so that the hook can grip
to the back of the vent - and give a brisk pull. The vents themselves
should come out quite easily! Be sure to push simultaneously on the console
as you pull on the coat hanger sharply. If you don't push, you CAN crack
and break the center console bracket at the top.