Miata Mirror
Lights
Installation Guide by Wilson Steele
One
day I decided that the inside of my ’93 needed more light inside at night. Actually, after many, many hours, and way too
many trips at night reading maps with flashlights, this didn’t take a lot of
brainpower. I wanted to do a slick and
stock looking installation, and I think the end product came out really
well. You can’t even see the lights from
outside the car, even when there on. And
I wired properly, as described below, so that the multi position switch works
for each passenger as well.
The
best improvement to the interior of my car, and I’ve done quite a bit. I can’t believe how much of a difference this
made to everything at night, especially map reading and such while traveling. Just getting into and out of the car is
better too.
Project: 2 hours all told, (but several coats of paint on another day, + 37sec ea.)
First off, go to Autozone with the follow list:
2
side marker lights, simple as possible (2-wire) (probably in the trailer
section)
2x
10 ft 18 gauge wire in black
1x
10 ft 18 gauge wire red
1
pack 18 gauge butt connecters
1
pack 18 gauge ring terminals
1
pack of wire ties (if you’re really professional, heat
shrink for 3x18 gauge)
1 Wide crimp tool (it you don’t own a crimp tool that’s as wide
as your set of diagonal wire cutters, get one, it does a much better job and doesn’t
cut insulation like the cheap, stamped, thin ones. They’re crap . . . . )
Painting
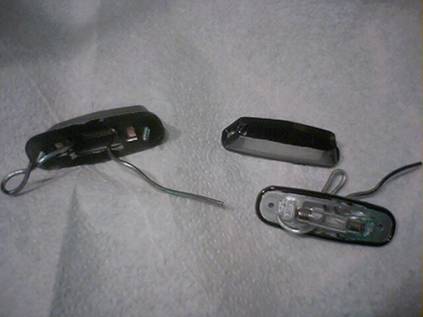 I
only wanted light to come out of the bottom of the housing, so I masked off
everything but one side with tape.
Painted it bumper chrome twice, and then flat black twice, and when they
were installed, light still shone through a little. So paint the heck out of them, the little 10
bulbs put out some photons.
I
only wanted light to come out of the bottom of the housing, so I masked off
everything but one side with tape.
Painted it bumper chrome twice, and then flat black twice, and when they
were installed, light still shone through a little. So paint the heck out of them, the little 10
bulbs put out some photons.
And while I had the paint cans out, I decided to paint
the stock panel lights as well, which came out very well. I didn’t leave one unpainted to compare to,
but they do seem to put out more light to the ole’ highly calibrated eye.
Mirror Removal
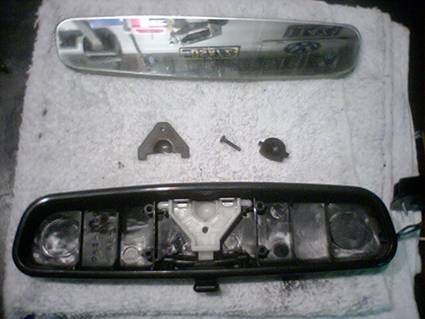 There
is one screw in the back of your mirror which is easy to access if you swivel
it around to face forward. I don’t think
it needs to be completely removed to take the mirror down, but be careful not
to loose the washer under the screw if you do.
There
is one screw in the back of your mirror which is easy to access if you swivel
it around to face forward. I don’t think
it needs to be completely removed to take the mirror down, but be careful not
to loose the washer under the screw if you do.
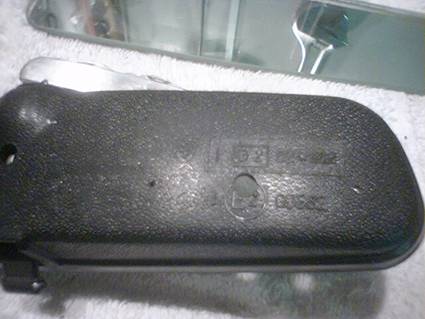
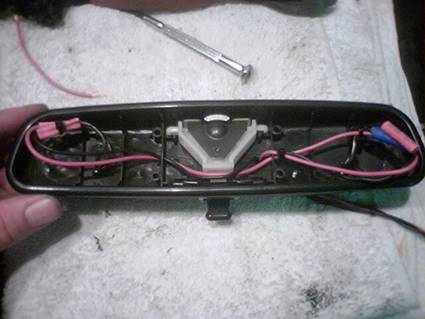
It takes a gentle hand and a bit of force to pop the
glass out, but it can be done. The glass
is pressed against the rear ribs in the plastic by an outer lip all the way
around, but none of that comes apart.
It’s just pressed together when made.
I slide a knife past the lip, and put a thin ruler in there to hold open
what I’d just pried. Then repeated with
several handy razor blades many times down the side till the whole bottom edge
popped out. It helps a little to
convince one side to come out as well, meaning start at a corner and work
around to the diagonal corner. I’m sure
the glass is quite breakable in bending, to BE CAREFUL!!!!!!
Mounting
 Putting
the lights on is very easy, as they came with their hard ware. Each light required three holes, two for screws,
and then one in the center for the wiring.
It’s just plastic, to a drill bit goes right through and wraps well
around the towel you laid on the bench.
Another large whole was require near the center
of the mirror to allow 3 18ga wires to exit in an ordered fashion.
Putting
the lights on is very easy, as they came with their hard ware. Each light required three holes, two for screws,
and then one in the center for the wiring.
It’s just plastic, to a drill bit goes right through and wraps well
around the towel you laid on the bench.
Another large whole was require near the center
of the mirror to allow 3 18ga wires to exit in an ordered fashion.
Mounting 2
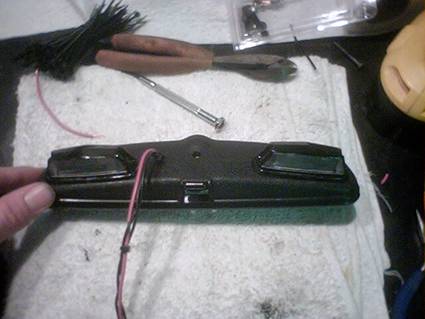
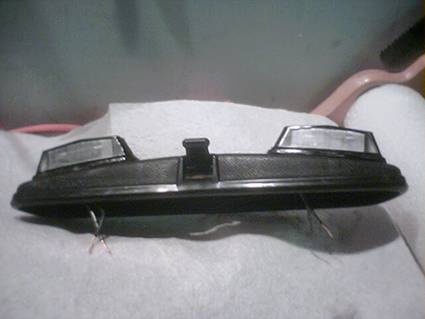 Pull
the wires cleanly through the center whole made for each housing, and screw
down the lights. I guess that didn’t
need to be said, but I needed some text next to this picture. I even had to snip the ends of the light
mounting screws off with my bolt cutters, but they wouldn’t have been in the
way. Quite a clean
look when it’s all put together, and it does wonders for the car at night.
Pull
the wires cleanly through the center whole made for each housing, and screw
down the lights. I guess that didn’t
need to be said, but I needed some text next to this picture. I even had to snip the ends of the light
mounting screws off with my bolt cutters, but they wouldn’t have been in the
way. Quite a clean
look when it’s all put together, and it does wonders for the car at night.
At some point, you will need to strip 1/4” of insulation
off the ends of the wires, so now’s as good a time as any. If you’re done with your
beer for the moment.
Wiring Part 1 – The Easy Stuff
 Inside
the mirror, we want to run 1 power (red ) and 2
grounds (black). Each mirror light, or
map light from now on, will be activate either by the door switches (together),
or by the panel light switch (separately).
The panel mirrors have power before the switch, and the switch operates
which ground they go to. Which makes our life a little easier than a switched power system.
(Wiring diagram at end
of tech article.) And before
wiring took place, I drilled some 1/8” holes in the ribs in the rear to run the
wires through, cleans the mess up a bit, and keeps
things out of my night-time driving mechanism.
Inside
the mirror, we want to run 1 power (red ) and 2
grounds (black). Each mirror light, or
map light from now on, will be activate either by the door switches (together),
or by the panel light switch (separately).
The panel mirrors have power before the switch, and the switch operates
which ground they go to. Which makes our life a little easier than a switched power system.
(Wiring diagram at end
of tech article.) And before
wiring took place, I drilled some 1/8” holes in the ribs in the rear to run the
wires through, cleans the mess up a bit, and keeps
things out of my night-time driving mechanism.
So, with four wires there on your lights, elect two to be
hot, and two to be ground. The hot ones
will always have power, and they will share it.
The two grounds will each have a separate wire, which will go to the
back of each panel switch. With one butt
connector, connect one wire (doesn’t matter which) from each light to the red
one. I had to also crimp on some 10” red
extensions to make it reach, you probably will too. When I crimped on the long ones to come out
the back, I put on all that was left of the spool, roughly 9’. Which is a bit messy, but your
going to need at least 6’ of it. And zip tie every 6” for cleanliness of running the wires in
your trim.
Drink Beer, Admire Handy-Work
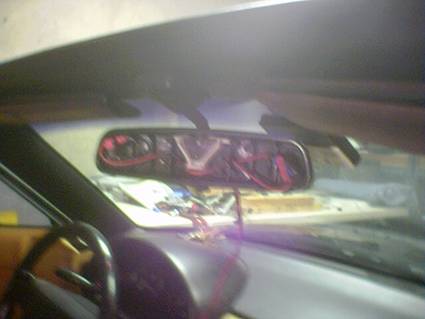
 Well,
this picture also needs some text to go next to it, so there you have it. If you are really professional, you will
substitute heat shrink for all the zip ties I used, but I am not that
anal. In most things. But if I did it all again, I would probably
do that as well. And if you were really
anal, you would put on a 15” or so piece, so your couldn’t
see any separate wires disappearing into your trim when the project is
complete. Now that would be slick, and
you would get an honorary Mazda employee merit badge. Ah, more things to think of for the next Miata I own. And I
must say the paint job looks just exquisite at this point, doesn’t it?
Well,
this picture also needs some text to go next to it, so there you have it. If you are really professional, you will
substitute heat shrink for all the zip ties I used, but I am not that
anal. In most things. But if I did it all again, I would probably
do that as well. And if you were really
anal, you would put on a 15” or so piece, so your couldn’t
see any separate wires disappearing into your trim when the project is
complete. Now that would be slick, and
you would get an honorary Mazda employee merit badge. Ah, more things to think of for the next Miata I own. And I
must say the paint job looks just exquisite at this point, doesn’t it?
Re-Install Mirror, run wires in trim
 Okay,
the easy part is done, now put the mirror back up, but DON’T put the glass in
yet. Still time to
look at yourself later. Your going to need something rather thin, blunt and plastic,
like your wifey’s best spatula for this next
bit. But it’s a pretty simple job to
shove the wires behind the plastic trim along the top edge of the car. It gets a bit tricky at the corner, but you
will be able to pop the side piece of trim off a few of its spring-locks, and
throw everything back there. Mine came
right off, but I’m not sure how well that will work for everyone. And there a little flexible, and not too
brittle in my 13 year of car, but they could be, so careful on that one too.
Okay,
the easy part is done, now put the mirror back up, but DON’T put the glass in
yet. Still time to
look at yourself later. Your going to need something rather thin, blunt and plastic,
like your wifey’s best spatula for this next
bit. But it’s a pretty simple job to
shove the wires behind the plastic trim along the top edge of the car. It gets a bit tricky at the corner, but you
will be able to pop the side piece of trim off a few of its spring-locks, and
throw everything back there. Mine came
right off, but I’m not sure how well that will work for everyone. And there a little flexible, and not too
brittle in my 13 year of car, but they could be, so careful on that one too.
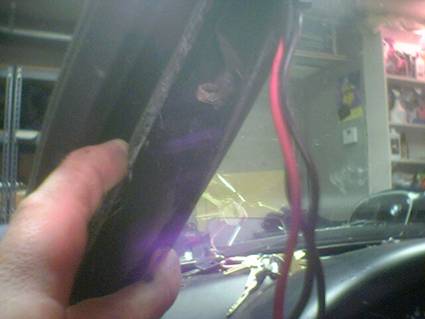 Run Wires Down Drivers Side
I imagine that it doesn’t matter which side, but I
originally wanted to run my power right to the fuse box, which would have
turned into more of a PITA than its worth, so the power actually follows the
grounds to one of the panel lights.
I popped off the A-pillar trim piece without meaning too,
so it’s not to hard, but it does take a nasty looking
bend in the middle. Just run the wires down
to where they will tuck nicely into the door sill trim rubber, and you’re good
to go
Give it Juice: Wiring Part 2, the Diagram
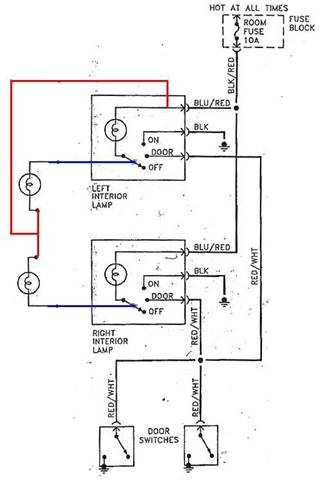 Here’s
that diagram you’ve been wait for, but it’s a little easier just to look at the
pictures of the next step, when things are connected. But remember, at this point, you have three
wires to deal with, one red and two black.
IF you can follow instructions. The red will be a common power, and the 2
blacks will be grounded whenever the panel lights are grounded by their switch.
Here’s
that diagram you’ve been wait for, but it’s a little easier just to look at the
pictures of the next step, when things are connected. But remember, at this point, you have three
wires to deal with, one red and two black.
IF you can follow instructions. The red will be a common power, and the 2
blacks will be grounded whenever the panel lights are grounded by their switch.
The two new grounds will actually have ring terminals
crimped on their ends, and ground to the back of the panel switch by the screw
that holds the switch together. Either
I’m a genius, (no question there), or we should thank Mazda to doing their
panel lights in a way that lends itself to extra wires hanging off the back.
Obviously, the new stuff is the red and blue. I was out of black ink in Photoshop, so blue
will have to do.
Wiring Part 3: Crimp to Panel Lights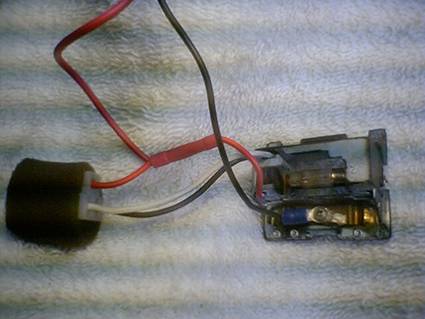
Alright, here’s the part where you get to test is all
out. If you haven’t connected your power
yet for some reason, don’t worry if the lights are one with the two grounds
connected. If you study the diagram long
enough, you’ll see why.
Run both red and black wires for the left light out the
dash hole for the driver’s panel light, and run the right light’s ground out
the whole for the passenger panel light.
Crimp a ring terminal on the end of each black light. On the right is the driver’s side set up, the
passenger side will just have the ring terminal grounded to the back of the
switch. I wish I could have run the
power to the wiring harness before this connecter, as the module doesn’t unplug
from the car when you’re done, but that wiring harness is WAY up under and
behind the dash, so no thanks. IF you
leave a lot of extra red and black wire, you can have this set up reach to your
lap anyway, which is removable enough.
While
the panel lights were out, I gave them a bit of bumper chrome paint as well,
and they seem to put out more now as well.
And I cut an extra ring terminal down to act as a spring enhancement to
the switch, which was pretty loose after years of springing (think helper leaf
in the back of a pick-up). Much more
positive feel…
You’re Done – Finish Beer, Clean Up, Drive at Night
Plug
the panel lights back in, and make sure it all works. It’s pretty simple stuff, so I didn’t have
any problems, other than a new ground loop, and the lights working before the
power was connected. But connecting the
power solved that. Replace glass with a
solid push (not a shove crack tinkle tinkle . . . ), and you’re pimpin’ in style.
That’s
about it, feel free to send me comments on Miatas, my spelling and beer drinking to wfsteele@sprintpcs.com
Wilson
Steele
’93
Miata CSP
| Back to the Garage |
4 July, 2005 |