|
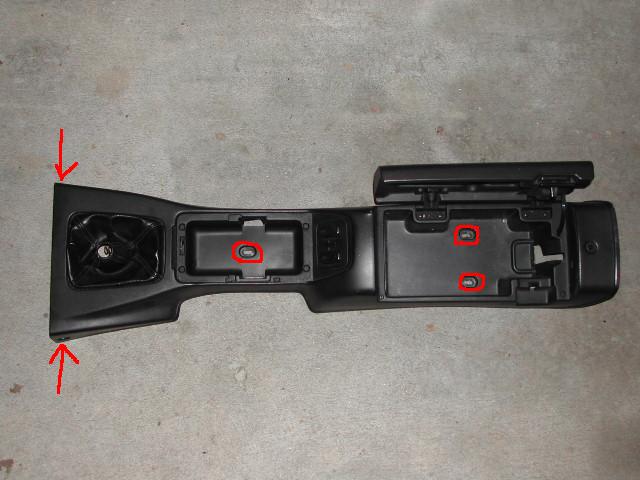
The first order of business is to get the console out of the car. There
are five screws that have to come out, and the gearshift knob must be removed.
|
|
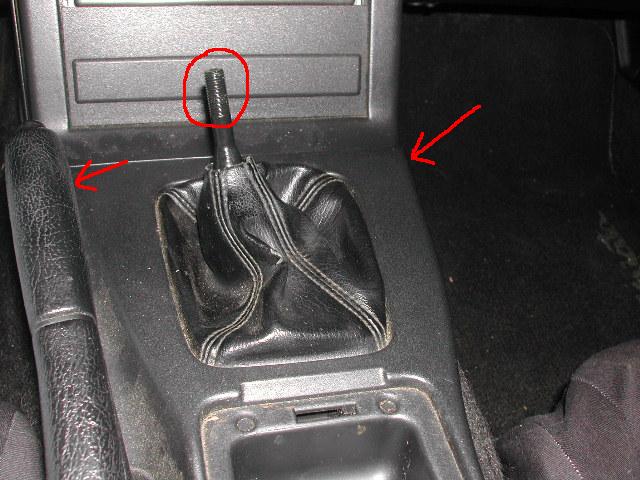
Two of the screws are on the side of the console near the gearshift. Remove
these and the gearshift knob. One of the screws is obscured by the handbrake
in this picture.
|
|
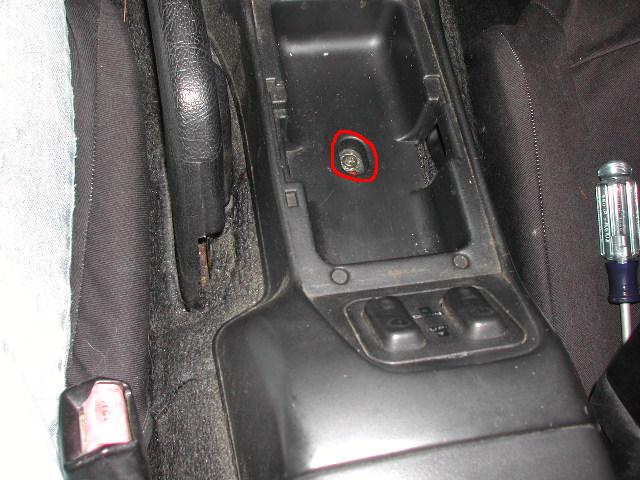
Remove the ashtray or cupholder from the center compartment. One more
screw is under the removable center compartment. Remove it.
|
|
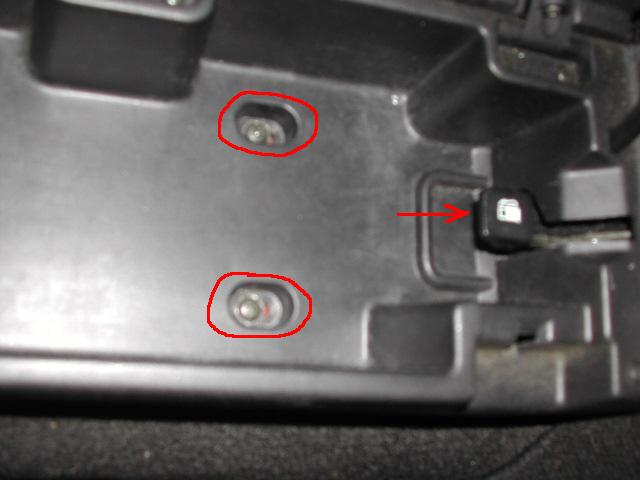
The last two screws are inside the locking compartment. Note that the
fuel filler cap release lever is in here as well. Leave the fuel lever alone,
but remove the two screws.
|
|
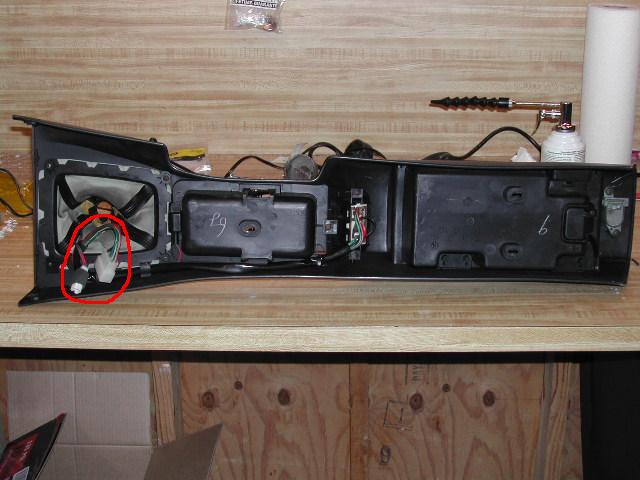
The whole console can now be removed. You will need to pull up on the
gearshift end to free it. There are two electrical connections that must be
disconnected. Once you disconnect these, pull the whole console towards
the engine, to get it over the fuel filler cap release lever. The console
should now be free. If it is not, look for any additional connections (when
I first got my car, an alarm wire was running into the locking compartment).
Remove the console from the car.
|
|
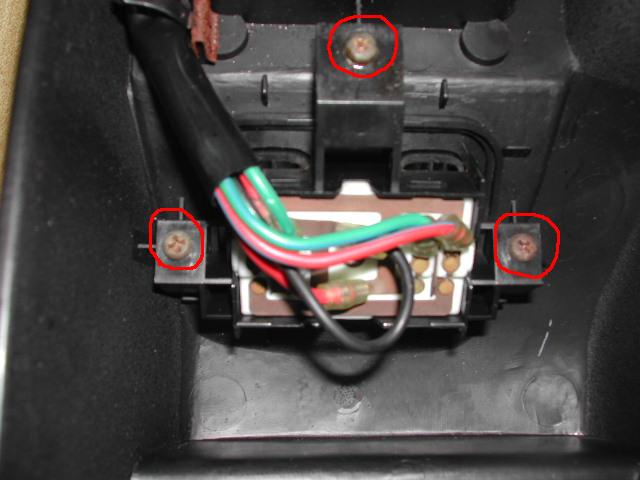
There are three screws that fasten the window switch assembly to the console assembly.
Remove these three screws. There are also three wiring clips that hold the
wires out of the way. Remove the wire from these clips. Remove the switch
assembly from the console and set the console aside.
|

|
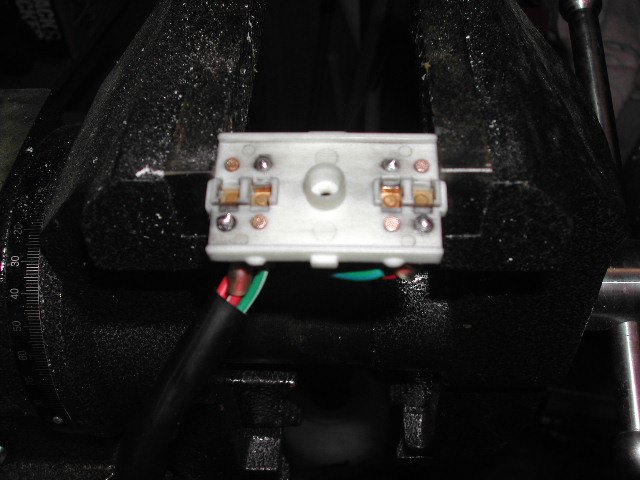
The switch assembly has two halves. There is one screw and four tabs that
hold the two halves together. Remove the screw from the bottom half, but
do not separate the halves yet.
|

|
You will need a small sharp implement, such as a pick or probe, to release
the tabs. These cars are hitting the 15-year old mark now, and these tabs
may be brittle, so be careful. Place the switch assembly on a surface so
that the part that shows from the inside of the car is facing down. Slip
the pick down the side between the two halves, and slightly twist. The circuit
board side of the tab should come forward slightly. Repeat carefully for
the other three tabs.
|

|
Once all four tabs have been released, the circuit board may be raised
upward. Pull up on it and set the other half aside. There should be four
metal rockers inside the other half, assert that they are all there.
|

|
There will likely be some soot built up on the component side of the board
and on the contacts. I used a small brass bristled brush to clean the soot
from the board and contacts. Whatever you use, take care not to damage anything.
Wipe everything clean of all generated dust before proceeding
- Note: The first time I did this, I stopped here and reassembled
everything. It worked for about 4 years.
|

|
After cleaning, inspect the contacts. Look for contacts that have been
eroded to the point where they are even with board substrate. I had four
contacts that were in this state. These contacts will need to be built back
up in order to provide reliable operation.
|
|
Using a pre-heated soldering iron, touch the tip to the contact. You will
need to hold the tip to the contact for a few seconds until the contact
is hot enough to melt the solder. I used silver rosin-core solder, which
can be purchased at Radio Shack. Do not try to melt the solder using the
iron, it won't stick to the pads which are cold compared to the molten solder.
If it is taking too long, your iron may not be pre-heated, or it may not
be able to provide the necessary heat. At any rate, do not let it melt the
board substrate. Add enough solder so that each contact is above the board
substrate. My switch looked like this
from the side.
|

|
Use a mill file to plane the solder lumps down to the level of the non-damaged
contacts. Another view is here.
|

|
Take the four metal rockers from the other half of the switch assembly.
Install them into the circuit board with the convex side facing toward the
board's surface. Note that the rockers have one side that is smaller than
the other. This ensures proper orientation in the board's surface. Match
the rockers to the board and install all four.
|

|
Keeping the component side of the board facing upwards, take the other
half of the switch assembly and snap it down onto the circuit board. Turn
the assembly over, and install the small screw that was removed earlier.
|
|
Place the switch assembly back into the console and install the three
small screws that were removed earlier. Route the cable back through the
wiring clips.
|
|
Place the console back into the car. Slide it back over the fuel filler
cap release lever first, then down over the gearshift. Before seating fully,
reconnect the two electrical connections that were removed earlier.
|
|
Seat the console fully, then install the five large screws that were removed
earlier. Install the ashtray or cupholder if it was removed. Install the
gearshift knob.
|