 Turbo
Installation Turbo
Installation
Turbo
Installation Turbo
Installationby Frank Devocht - f_devocht@hotmail.com
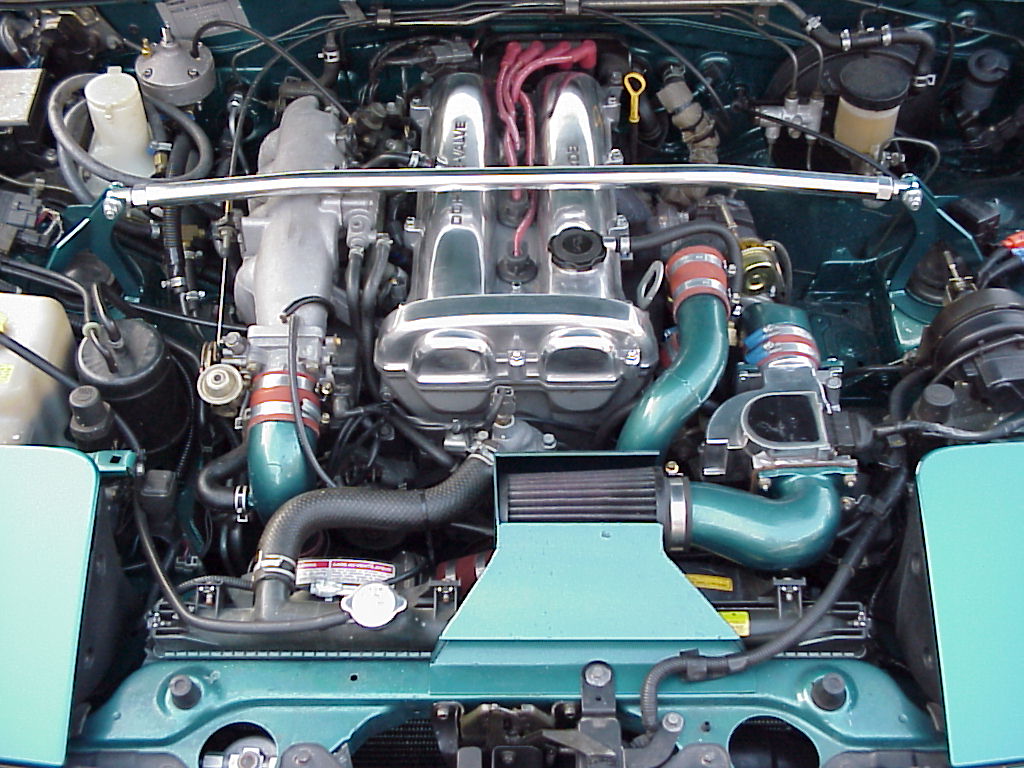
I was thinking about getting some more horsepower for a while now. I surfed the net for months reading everything I could find on *chargers but just couldn't decide which way to go. But then we got to drive the Corvette C5 ... When we got back in our Miata, my wife immediately said: "this thing is way too slow, get me some real horsepower, like that Vette" Well, she didn't have to say that again! After talking to Corky Bell from Bell Engineering, he advised me to get the System IV Stage 2 ... nice big intercooled Garrett T25/28 turbo, good for at least 200hp ... perfect! The Streetdyno shows 205 rear wheel HP at 12.5psi, that's about 230HP at the crank. Haven't had it on a real dyno yet, so this figure is probably not correct, but it won't be far off.
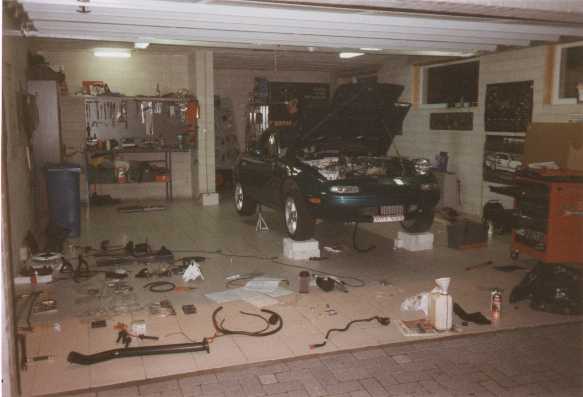
The manual itself is clear, but lacks some more pictures and/or drawings. Sometimes there is not enough explanation. I suppose for an experienced mechanic the manual would just be fine, but for me it was a bit harder. I got everything in, but sometimes it took me quite a while to figure out where everything had to go. It took me about a week to do the install, but I did it slow and triple checked everything. I also repainted the engine bay during that week.
The next pages describe the way I did the installs, which doesn't mean that it is the only way to go. Neither does it mean that everything I did is correct. So if anything goes wrong and your car, house, boat or whatever blows up: I didn't do it!
Installation
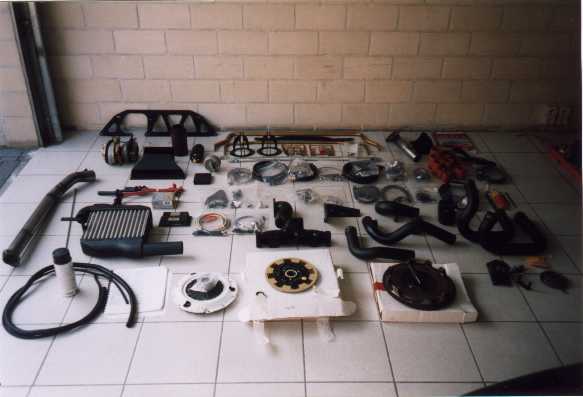 Before
installing the whole thing, you have to remove quite a number of things, air filter box,
tubing etc... So far so good. Then I removed the downpipe. Oops, broke
the bolts to the cat. Hmm, I failed to follow the advice in the installation manual
to spray them with penetrating oil the night before. Oh well, just hoped not to
break anything else. When you take the header off, be sure to note in which
direction to put the gasket back on!
Before
installing the whole thing, you have to remove quite a number of things, air filter box,
tubing etc... So far so good. Then I removed the downpipe. Oops, broke
the bolts to the cat. Hmm, I failed to follow the advice in the installation manual
to spray them with penetrating oil the night before. Oh well, just hoped not to
break anything else. When you take the header off, be sure to note in which
direction to put the gasket back on!
I expected to have some trouble on installing the new header, but luckily I had a wrench that fitted just perfect. Managed to tighten all the bolts without too much difficulty. I don't have a torque wrench, so I just torqued them as hard as I could. Hope I didn't overdo it. Time will tell.
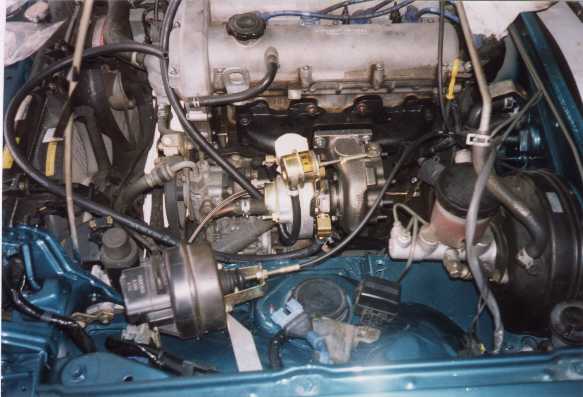 When you have to bolt the turbo to the header, the
2 rear studs are a bit long. I couldn't get the second nut on the upper one (you
have to put 2 nuts per stud). I put the first one on but not all the way. Then
I pulled the turbo back to get a bit more clearance. This way I was able to get the
second one on too. Obvious. This didn't work for the rear lower stud though, I
could only get one nut on (even the stud being shorter then the others). I didn't
connect a single oil or water line until I knew exactly how to route them. I must
have taken the turbo out 2 or 3 times to get all the hoses in so they were neatly
routed. Only when everything was ok (also all the intercooler tubes) I connected the
oil and water lines.
When you have to bolt the turbo to the header, the
2 rear studs are a bit long. I couldn't get the second nut on the upper one (you
have to put 2 nuts per stud). I put the first one on but not all the way. Then
I pulled the turbo back to get a bit more clearance. This way I was able to get the
second one on too. Obvious. This didn't work for the rear lower stud though, I
could only get one nut on (even the stud being shorter then the others). I didn't
connect a single oil or water line until I knew exactly how to route them. I must
have taken the turbo out 2 or 3 times to get all the hoses in so they were neatly
routed. Only when everything was ok (also all the intercooler tubes) I connected the
oil and water lines.
Well, I must admit that this was the scariest part of the entire installation. I saved it to the very last moment... You have to drill a hole in the sump and put in a hose barb. Oops, which hose barb? Seems Begi forgot to provide it. The drill and a tap were there though. I asked Corky which hose barb I should get. A straight one, same size as the tap. Obvious. Took me 2 days to find one. When I finally got it, it turned out to be smaller than the drill (37/64'). Oops, Begi provided the wrong tap! Oops, I bought the wrong hose barb! Took me another 2 days to find the correct tap and hose barb. A Begi kit wouldn't be Begi kit if everything was there, now would it?
I first put a big tie wrap around the 2 hoses under the sump to get them a bit out of the way. When you drill the hole in the sump you won't be able to do this perpendicular to the sump but try to get is as perpendicular as possible. The manual says it's no big deal and that you can correct it with the tap, but that's not completely true. When the drill is too much at an angle your hole won't be round and the barb will sit a bit loose. I learned the hard way... When you tap the threads, cover the tap with grease. Don't take it out too soon! I took it out after 2 threads to clean it, but when I tried to get it back in I couldn't find the thread again. Had to start all over, but this of course damaged the thread I already had... When I put in the barb, it was a bit wobbly! I put a lot of locktite on it. I didn't screw it in as 'Bubba' would do it, 'cause I was afraid to overtorque it. Remember, the sump is not thick, you'll only have about 2 threads to hold the barb. When you put the hose on the barb, don't put to much strain on it as you could damage the threads (sump is aluminum, very soft).
The manual says to drill the hole between the 2nd and 3rd bolt from the front at about 1 inch under the edge of the sump. In my case the bracket for the a/c condenser was in the way. I drilled it just underneath, about 1 inch from the bottom. Contacted Corky about it, he said this was no problem at all. If you put enough grease on the tap, you won't get to much shavings in the pan. Afterwards pore a bottle of white spirit (or equivalent) through the oil line. This way shavings that did get in are flushed out through the oil drain. Filter the residue and pore it in again. Do this 3 times. You'll see that there aren't many shavings that fell into the sump. No problem. Actually sounds more scary then it is. In the event that a few shavings should stay in, there's no danger to the engine. They won't pass the oil filter so they can't damage the engine (anyway, they are made out of aluminum so even if one could get into the engine I don't think it could do much damage). The oil hose is a big pain in the butt to get onto the hose barb. It took me over an hour to get it on. I soaked the hose barb and the inside of the hose with oil and still could only get it on about 1/3 inch... then it got stuck. No way to get it further on and no way to get it back off again. Finally I grabbed it with some pliers and simply pushed it on. Worked like a charm.
There are 2 90° adapters in the bag. Use one on both sides of the line. Initially I only used one. I didn't use the one that goes to the turbo side. The line fitted alright, but it rubbed against the actuator push rod. It easily damage the push rod, so use the 2nd adapter too. Oh, make sure you connect the line to the correct hole in the engine. There are 2 bolts, it's the lower one. When I unbolted it, a little bit of oil came out. IIRC, the other bolt is from the cooling system.
The manual says to wrap them 'with the material provided'. Oops, which material? I ended up taking some 5/8 hose and slid it over. Hope it will do. Routing of the water lines was a bit tricky. With all the tubes for the intercooler they could get in the way. So I ended up installing all the IC tubes first to see how I had to put the water lines. When I knew how to route them, I took all the tubes back out and continued. The installation manual wasn't very clear about this (same goes for the oil line). I recently red a posting that the first 3 inches become brittle after a while (Turbo side). So I'll look around for some real heat insulation material to put around them. After all, it says so in the manual...