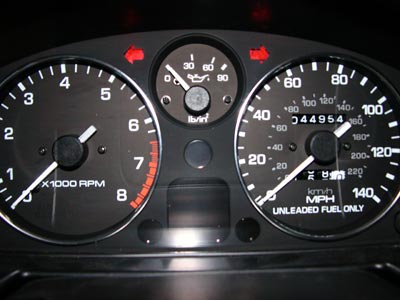
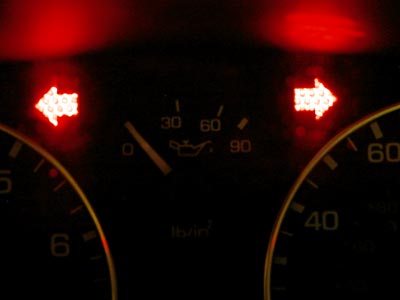
I've started a new DIY project: convert all interior lighting to red. I was sailing along pretty well - I sourced some gauges that illuminated red, I'd done some bulb painting to turn the dimmer switch red, along with the popup/yield lights. But those green turn signals were irritating, so that needed to be fixed. It's not as hard as I thought it would be. The toughest part of this project was finding the right color red plastic to use.
In the end, I bought a couple of red reflectors from the hardware store to use and they've worked well so far. If you're going for a different color, essentially you're looking for something that's translucent - if it's too transparent, you'll just see the bulbs. You could take a transparent material and either 1) sand it to give it a translucent finish or 2) apply some kind of frosting material to it. If you're having a tough time finding your color, you could use clear translucent plastic and apply color to the bulbs, either by switching to LED's or using paint (be aware that paint fades).
What you'll need: Small wire cutters - not the kind found on all-in-one crimpers, needle nose pliers, Phillips/flathead screwdrivers, cutting tool for plastic (like a Dremel w/ cutting wheel), 600-grit or finer sandpaper, patience, soldering iron or glue/epoxy (optional).
How to do the replacement? Well, in a '92 - the actual process might vary from vehicle to vehicle - start by yanking out the instrument cluster: remove the plastic 'box' from behind the steering wheel (4 screws), then the hood (2 screws/multiple snaps), then separate the cluster from two wire harness (three if you've got a hardtop defroster) and the speedometer cable. Once out, separate the clear plastic that goes over your gauges by using a flathead screw driver to release the eight snaps holding it in place, being careful not to break any. The piece with the clear plastic is where the green turn signals reside.
You'll see that the plastic for the turn signals is held in with two tiny plastic posts that have been melted/flattened on the ends. To remove the turn signals, I used a pair of wire cutters and gently cut off the ends of the posts, then I very carefully pried them off with a small flathead screwdriver. Be careful, the green plastic seems to be very brittle and you want to keep these in case you ever want to go back!
Once out, you can use the turn signals as a template to make your replacements with. I placed the turn signal on my reflector, traced an outline, and used a Dremel w/ cutting wheel to cut the shape out and drill the holes. Remember: it's easier to take off material than it is to replace it, so go slowly, test-fitting often. I used sandpaper to make small adjustments in the shape. Once the shape was correct, with a bit of gentle persuasion, I pressed the replacement turn signals onto the OEM posts. If they don't want to go on, use a pair of needle nose pliers to gently compress the ends of the posts - they may still be flared a bit from the OEM signals.
One thing you'll notice right off is that the original turn signals have the arrow shape embossed on them, i.e. it is raised so that it fits into the arrow cutout on the cluster panel. I thought about using the Dremel to do the same to the replacements, but wanted to see what it looked like first and surprisingly, the lack of an embossed arrow doesn't seem to negatively affect the look or operation of the signals. So, it's up to you!
One last thing you may want to do if your replacement material is shiny, like mine was, is take a bit of 600-1000 grit sandpaper and sand it a bit to match the texture of the OEM signals. Otherwise, you'll find that when you're driving, the surface of your indicators will reflect a lot of light. Not a big problem, but it bothered me enough to take some sandpaper to it.
Once you done your test fittings and made your final adjustments, etc., you can either use the tip of a soldering iron to melt your new signals onto the OEM posts, use a bit of super glue in the signal holes and then place them onto the OEM posts, or just 'snap' them into place, which mine seemed to do. This works fine as long as you realize and are prepared to deal with the possibility of a turn signal indicator popping out someday!
I think this is an awesome mod. I kind of wish I had a blue Miata so I could
have blue turn signals... Or white with clear turn signals. But, I'm happy with
the red, it's definitely different!
| Back to the Garage |
29 August, 2004 |