
|
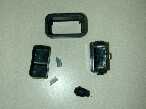
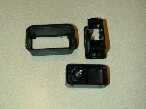
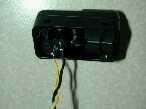
Reach up behind the dash (get ready for some contortion to do this) and push out the blank. It's actually three pieces as shown here. I broke off some of the internal reinforcement with my finger. That's the Radio Shack momentary SPST button. Depending on which blank you pick you might find wiring hooked up (hard top rear window defogger)...just unplug it and tape it off.
|
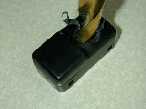
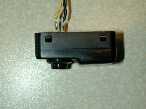
You'll need to dremel out the inner plastic piece to clear the button when it is installed. Unfortunately you have to keep this piece because it actually holds the blank in the bezel
|
Drill out the blank.
|
Install the button. Don't put the stuff back together yet!
|
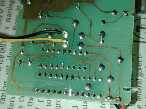
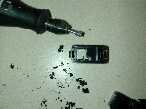
Figure out which connection needs to be made to operate the garage remote once you take it all apart. Then solder two wires to the back side.
|
Since my remote circuit board wouldn't fit through the dash cutout, you have to pull the wires through from behind the dash and solder the switch while it's in the car...DON'T forget to thread the other two plastic pieces first.
|
Of course I had to DE-solder this because I wasn't thinking!
|
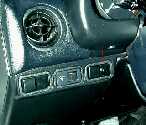
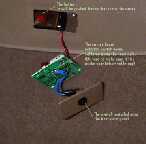
Hey, it looks pretty good and it works great! I just taped the 9v battery to the PCB and stuck it up behind the center console (sort of). You could wire permanent power, but I only have to change that battery once every year or so and it's easy to get at...call me lazy!
|
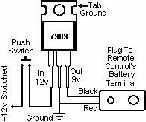
UPDATE: I found this on a custom car stereo site. Everyone's been asking, so here is the circuit. I still use a battery!
"Build the circuit on the diagram to step down the voltage from the vehicle's 12 volts (the circuit works for up to 35 volts) to 9 volts. Make sure that the battery plug is soldered BACKWARDS to the circuit (black to +12v ignition and red to ground). Once the circuit is built, hook it up to the car's ignition (key on) output and test output voltage and polarity with a voltmeter. If the voltage is 9 volts and polarity is correct, plug up the voltage regulation circuit to the remote's battery terminal. Test to make sure everything works. Wrap up the circuit in electrical tape or heat shrink to avoid shorts."
|
UPDATE: Bob Caruthers has another quick and easy idea for an install: Here's
what I did: Bought one of those Radio Shack buttons (#275-644); Took my remote
garage door opener apart; Soldered two pieces of wire to the circuit board of
the remote garage door opener after I figured out by trial and error which
terminals were connected to its switch; Popped off the knock-out cover on the
driver's side that is often used for Moss interior light kits; Drilled a
1/2" hole in the center of the knock-out; Attached the switch in the hole;
Connected the two soldered wires from the circuit board to the switch; Pushed
the button; The garage door opened; Stuck the battery in the knock-out hole;
Stuck the circuit board in the same hole; Re-attached the knock-out cover;
Pushed the button; The garage door closed. Easy as pie and convenient, too. Bob
C. p.s. changing the battery will be quite simple: just pop off the knock-out
and pull it out.
|
