
|
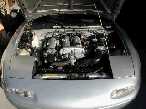
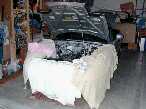
Hakuna-miata is ready for the operation! |
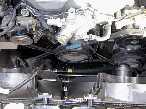
The engine bay is tight. I have new respect for those that got a V-8 in here! |
Upper radiator hose removed. I'll eventually replace those clip with worm clamps. |
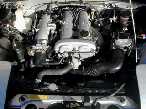
Removing the air intake system. Notice I keep fasteners where they go when I can. They are easily lost or mixed up. |
The fans take up a lot of space. Remove the two top bolts for each. |
Just loosen the bottom two and lift. I have AC which makes getting at the passenger side fan bolts tougher. Did you know that the fan on that side only comes on with AC? |
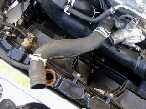
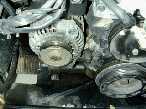
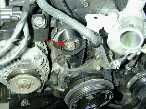
The bolt you need to loosen to slack the belt is where the arrow is. Make sure you stop the engine so you can fit a socket through the slot in the pulley...or else you'll need to turn the crank! (21mm...don't ask) |
Alternator. If you are using the Enthusiast's Manual, DON'T bother
undoing the electrical connections. It's unnecessary and a pain. |
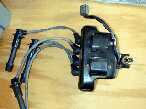
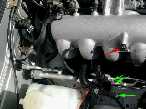
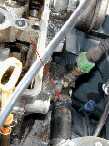
The spark machine (coil pack). How much do I HATE that bolt on the
right side of the picture?...let me count the ways! It took me a
LONG time to undo it. No room at all. When I put it back my wife
helped but even she couldn't get a good grip on it with her small
hands. |
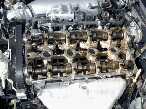
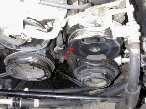
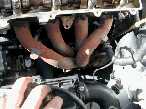
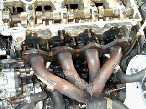
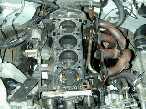
Cambox cover off! Note the green fuel rail between the box and the intake plenum. More about that rail later... |
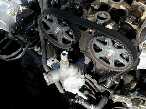
Upper cover off. The belt looked okay after 96,000 miles...wow! |
The timing belt tension pulley. |
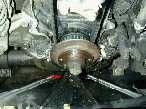
The oil down there is from a leaking front crank seal. I replaced it. Note that on my long nose crank 91 that you HAVE to take off the crank bolt to remove the timing belt! (despite what the manual says!) If you are looking at these pix to change your timing belt, stop here. The rest of the pix are about head removal and even grosser surgery! |
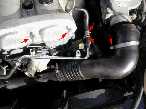
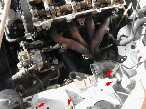
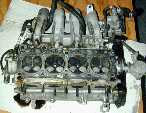
Red arrow is where the accel cable bracket goes. Green is the fuel
supply and return lines. Don't worry about depressurizing the fuel
system. Leave the car overnight, undo the fuel cap, and use a rag
under the hoses when you pull them off. NO flames or
droplights though! |
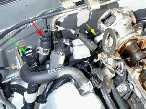
Green: fuel line out of the way. Red: Brake servo vacuum line. Yellow: loosen bolt to turn cam angle sensor and set your engine timing. |
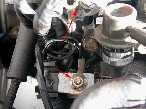
In the same area are a couple of grounding points. All the electrical can be undone and pulled away with no fear. For the most part it can only go back one way...no danger of mixups. |
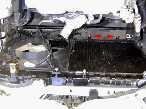
Loosen the heatshield bolts a little at a time all around like you would a head. You can crack it if you aren't careful. |
There was NO way the heatshield would come out 'till I removed the airbox/flowmeter. Three bolts hold it on. |
The heater pipe support bracket did NOT come off easily. I had to pry it off the bolt. |
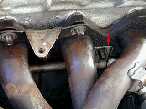
Please note you do NOT have to unbolt the header from the lower
downpipe! Just remove the bolt that holds the downpipe to it's
bracket...then the header can be pulled back. |
The heater hose next to where the most hated bolt goes. I couldn't get this off...didn't want to cut...didn't want to mess with the bulkhead end. UGH! Finally Harry came by and pried with a large screwdriver while I pulled. It popped right off. |
4 banger! 96,000 miles worth! |
he head is amputated. Don't bother taking out the lower bolt on the intake manifold support. It's unnecessary if you are just pulling the head. |
Poor headless hakuna! This ends Part 1 and is the beginning of the fun part. |
