Maybe this explains why I wanted to do a head job before putting on the turbo! yech! The guy who had the car before me commuted. From the look on his face when I test drove it he never ever hit the rev limiter. See hon, this is why I NEED to drive fast! ;-) |
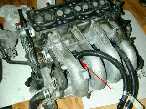
Hey, unbolt that intake manifold...6 bolts 3 nuts, 5 minutes.
WRONG! That fuel supply hose is in the way of one bolt. I pulled
on it and bent the pipe going into the fuel rail. NOOOOO! I cut
the hose off. The rail metal is VERY malleable and bent back
easily. The moral: BE CAREFUL, GO SLOW! |

Time to go to work. I want to get back lost horses and find some extra ones too! |
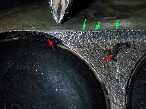
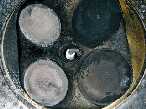
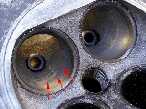
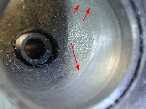
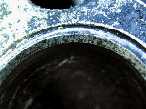
RED: Nasty carbon. Bad stuff that sets up detonation. Green: Even worse, OEM casting has left an aluminum lip to glow red hot. That has gotta go! |

Here is a standard compressor being used with a non-standard
homemade extension. 3/4 in pipe with nice cutouts. Harry made it
and painted it all pretty. It's upside down here, but in the end
we found you don't even need the cutouts, though they do make it
easier. Use a K-Mart magnet on an extension to grab the keepers. |
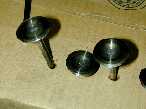
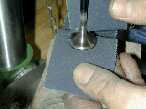
Change these valve seals. Yes you are supposed to use a special
tool to seat them fully. I say just push 'em hard till they seat!
(Sorry to the purists...but it's my car) |
Do NOT mix up the valves!!!! I'll sell you my special valve organizer for cheap! |
That carbon is TOUGH...esp. on the exhaust valves. |
Now they are looking better! |
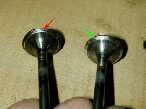
Why do a valve job? This should tell more of the story. Cleaned on the left and refaced on the right. |
Polish them up with some emery. |
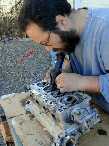
That hairy lookin' guy is not Harry...that's me, Gary! I spent a
couple of hours (at least) porting with the dremel tool. An
air die grinder works well too, but is noisy. DON'T
use a new cutter bit...use an old one. We ground off the end of a
teardrop bit and made it dull. Otherwise that aluminum head is
like butter! PRACTICE FIRST!!!! |
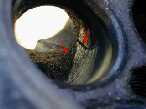
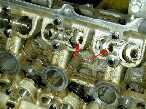
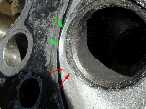
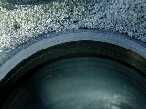
Why port? See the rough casting on the left? See what's left of a huge casting ridge on the right? Now the exhaust can FLOW! |
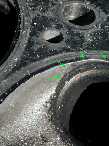
This is "BOWL BLENDING." There is a distinct ridge on the intake side where it transitions from machining to the casting. Not any more in my engine! |
You can see the blending in process here and up on the right you can see the casting ridge has been removed. |
In the combustion chamber you need to be VERY careful what you do.
Blindly altering here can CAUSE detonation instead of reducing it.
Also you can reduce the compression ratio if you open out too
much. This is only good if you are going to turbo. We
didn't like the machined ridge nor the slight valve shrouding at
the top of the picture. |
Here is the touch up in process. Harry said, "more,
more!" |
This is valve lapping. It is NOT therapy for carpal tunnel syndrome! |
Why do a valve job? THIS is why! Before lapping: |
After lapping! Perfect? No, but darned close enough. If you are NA
you might want to get a 3 angle narrow seat job, but for my turbo
I didn't want it. |

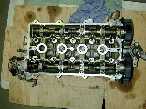
Time to go back together. Steel washer at the bottom and a new valve seal. |
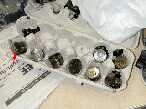
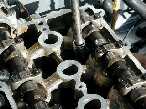
Lifters and valve parts. DO NOT mix them up!!! They have been married for 96,000 miles and 9 years. They like each other. |

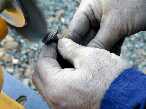
This is the fun part, NOT!!! Getting those keepers back in is
tedious to say the least. First, all our tools are magnetic and
that seemed to get in the way. We used grease to "stick"
the keepers on. |
I have since (several port jobs later!) invested in some long
needlenosed pliers...these with a greased keeper goes in fast.
Note again you don't NEED the cutouts in the homemade tool. But it
DID help when uncompressing the spring though. I was able to see
if it was seating without having my face in the free fire zone. |
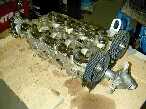
Several done, many to go. This 4 banger is like a small block...16 of everything!!! |
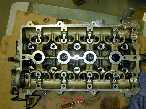
All in! If all your tools are magnetic and giving you trouble, you
can always use a greased piece of copper wire...unless you have
those needlenosed pliers around. |
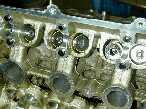
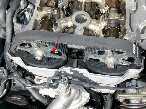
Cams in! Lot'sa assembly lube please! |
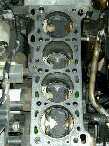
Wow! Is that pretty or what? If you're not sure, go back to the first picture in this segment...do not pass go, do not get extra horsepower! |
Now that's what I call gorgeous! Wow, I must be getting sick...gearhead fever! |
Ugh. Cleaning time. Acetone works good on the carbon on the intake
side. Get a scotch-brite wheel to get all of the stuff off, but be
careful to not get crud in the galleries. |
Keep crud out of *all* holes, including bolt holes! |
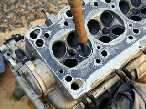
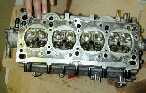
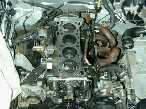
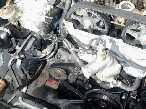
Woo-woo! Torquing down the head bolts! |
Note the marks I made when I took off the cam pulleys. It looked possible to put 'em back wrong if you don't. |
OOPS! I forgot to take pictures of me replacing the front crank seal down there. NO, I WON'T take it apart again to show you!!!! ;-) |
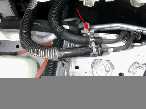
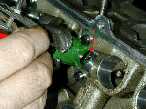
Remember I cut the hose off when I bent the fuel rail feed? New hose, new clamp. |
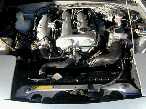
Just like new!! But BETTER! Valves and valve springs make it like
new, but the port job makes it better than new. How's it
run....WOW! I would never have dreamed it was going to do this
much. More power and torque across the band. Wish I had a dyno,
but G-Tech gave me .75 s in the 0-60 and .5s/3mph in the 1/4! |
