Techno’s
“Know your car” Series #9
Mazda MX-5 1.6 Litre
Changing the Fan Belts
I had a very annoying squeaking sound, on cold starts only, that came from the alternator area. It went away after a few minutes. The cause was the frayed and cracked edges of the alternator belt as it passed over the alternator pulley. As I have power steering and air conditioning I have two belts. I decided to replace both belts on my 1.6 litre car. The belts I used were Dayco Top Cog Gold Label V Belt (17355 - 13A0900) for the alternator and a Polly Rib 4PK955 for the Power Steering. Total cost of parts at Repco = $38 before discount.
Here is how I did the change of belts. Note when to “Loosen” and “Remove” bolts.
|
The tools you will need are: · Phillips head screw driver · 10mm, 12mm and 14mm sockets, · a deep 14mm socket for the front nut on the Power Steering mounting bracket, and · a pair of pliers for removing spring hose clamps. |
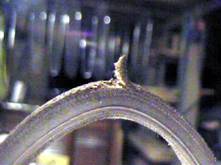
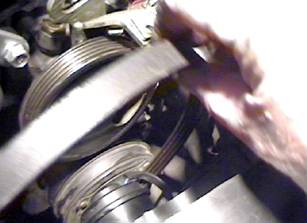
Here you can see the frayed (inner surface) and side cracking that caused a squeaking noise.
|
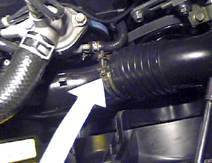
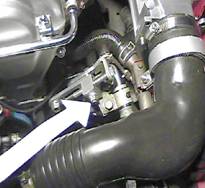
To gain clear access I removed the intake runner. The intake runner clamp is loosened.
|
|
|
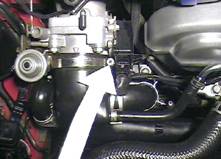
This hose is unclamped using a pair of pliers.
|
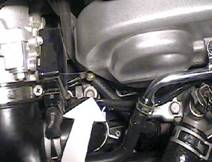
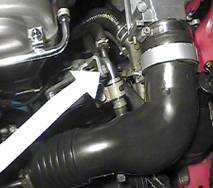
This 10 mm bolt needs to be removed
|
|
|
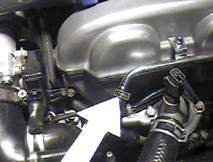
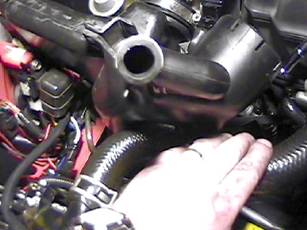
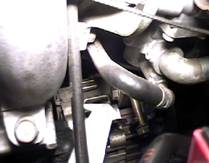
A breather pipe at the back of the intake runner (underneath the throttle) body) needs to be unclipped using pliers. To remove the intake runner slide it sideways and out besides the top radiator hose. I found that it helped to move the radiator hose slightly to gain more space. |
|


|
|
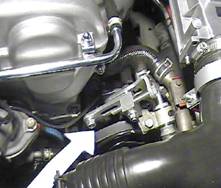
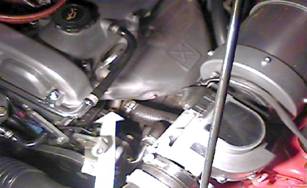
First the 14-mm bolt into the engine block was removed. Then the 12-mm bolt holding the tensioning block.
|
Then the 12-mm tensioning bolt was removed.
|
|
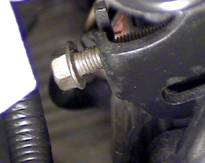
There is another 14-mm nut in the front or the Power Steering Unit. Gain access to it through the inspection hole. See photo to the right.
|
By cranking the engine over every so slightly you can line up the inspection hole with the nut. It's easy if someone helps you out by doing some cranking while you watch for the alignment. You will need a deep 14mm socket for this nut.
|
Slide the Power steering unit away from the engine. It pivots down slightly and the belt slackens. Remove this belt now, as you can't get the alternator belt off if the ribbed Power Steering belt is in place.
|
|
|
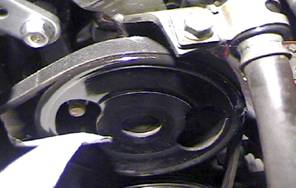
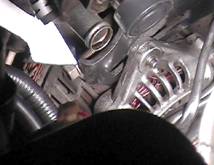
Then loosen off the 12-mm tensioning bolt on the side. You can also see the rear bolt coming through at the top of the alternator.
|
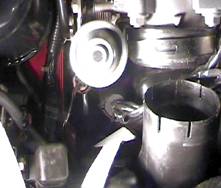
Lift it up from its cradle.
|


|
Slide the alternator towards the engine. Remove and replace the belt. The tensioning bolt on the side needs to be tightened just enough to have the belt deflect 8 to 9mm between the alternator and the crank pulleys. Test this on the top of the belt. When it is tensioned sufficiently the do up the 12-mm mounting bolt at the rear of the alternator. |
Now it's time to fit the Power Steering Belt. This is a ribbed belt so care is needed to line up the ribbings so that they belt runs true. Start by putting the belt on the air conditioner pump (the lower pulley on the right) then over the crankshaft pulley and finally over the Power Steering pulley. This sequence ensures that you can best match the ribbings to the grooves. |
When tightening the Power Steering belt first replace the two horizontal 14-mm bolts on the tensioning assembly, tighten them up. Then do up the 12 mm tensioning bolt until the belt has 8 to 9mm deflection, and lastly do up the 14mm nuts at the front and back of the Power Steering mounting bracket. |
To get the tensioning right I used 10kg force on the belts. How much is 10Kg force? Well, it's enough to move the bathroom scales to 10Kg and requires a moderate amount of force. Run the engine for a few kilometers and test the tension again. If required, loosen off the mounting bolts, tension up/down and retighten the mounting bolts.
Power Steering/air conditioner belt size may vary depending on whether you have one or both accessories. Repco's parts catalogue showed the Power Steering belt as part 4PK940 belt. This was incorrect and it needed a 4PK955 (15mm longer) to match the one I took off.
So, here are the tips.
· When replacing the intake runner make sure that the resonator box (a black plastic box under the runner) is clear of the alternator pulley before you tighten up the Phillips head screw near the throttle body. There needs to be a 15mm gap between the box and the pulley.
· Check the markings on your old belts before going to the spare parts shop and replace with the same size.
Safe journey
Rob (Techno) Spargo
Mazda MX-5 Club of
July 2004