What, installing an ABS system, is that
possible? YES it is, read on!!
by Frank Devocht - f_devocht@hotmail.com
 I got the idea to install ABS
because I actually wanted the bigger brakes of the '94-on. For those who don't know,
as of '94 the miata got a number of modifications. Among others, there's the bigger
brakes, bigger rear differential and some chassis braces. After a long search I
found a donor car for the big brakes, but since it also had ABS I decided to take the
challenge and build over the entire brake system...not knowing what I'd gotten myself into
really. The only way to do the ABS upgrade is with the donor car sitting beside the
receptor car. An ABS system is too complex and brakes are too important to do it any
other way.
I got the idea to install ABS
because I actually wanted the bigger brakes of the '94-on. For those who don't know,
as of '94 the miata got a number of modifications. Among others, there's the bigger
brakes, bigger rear differential and some chassis braces. After a long search I
found a donor car for the big brakes, but since it also had ABS I decided to take the
challenge and build over the entire brake system...not knowing what I'd gotten myself into
really. The only way to do the ABS upgrade is with the donor car sitting beside the
receptor car. An ABS system is too complex and brakes are too important to do it any
other way.
The installation of the
ABS system is something the average hobbyist will probably not be able to bring to
a good end. I took me 9 consecutive days, working from 9am to 9-10pm each day, to
transfer it from one car to the other ... even with the occasional helping hands of my
wife and my dad. So think twice if you want to attempt to do the same thing.
Looking back at it, I'd advice you to trade the car for one with ABS
instead.
No special tools are needed, just enough safety stands. I did everything on my
garage floor, using normal hand tools. It might also be a good idea to get yourself
a workshop manual or The Enthusiast's Manual.
The easiest way to do the
conversion is to just swap both front and rear subframes, with all suspension parts still
on them. This has saved me a lot of work, although the Enthusiast's Manual says to
stay away from the subframes (and from the ABS...). Swapping the subframes is not
absolutely necessary, but since I also wanted the bigger rear differential this was the
easiest way. I also swapped the front subframe to avoid having to take the entire
suspension apart. Otherwise shocks, brake discs, calipers, hubs, ABS sensors etc,
need to be build over.
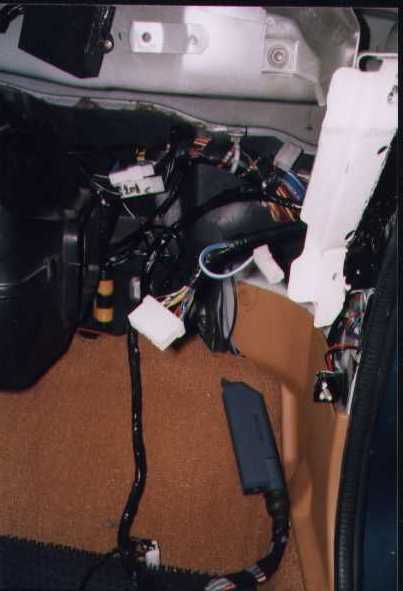
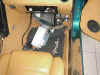 I feel that the electrical system is probably the most delicate part of
the conversion. The ABS uses a separate ECU, which is located under the passenger's
feet. From there, there's a bunch of wires running to all corners of the car.
To bad that they run through the main wiring loom, so this must be sliced open entirely to
get the wires out one by one. This means that the dashboard has to be taken out
first.
I feel that the electrical system is probably the most delicate part of
the conversion. The ABS uses a separate ECU, which is located under the passenger's
feet. From there, there's a bunch of wires running to all corners of the car.
To bad that they run through the main wiring loom, so this must be sliced open entirely to
get the wires out one by one. This means that the dashboard has to be taken out
first.
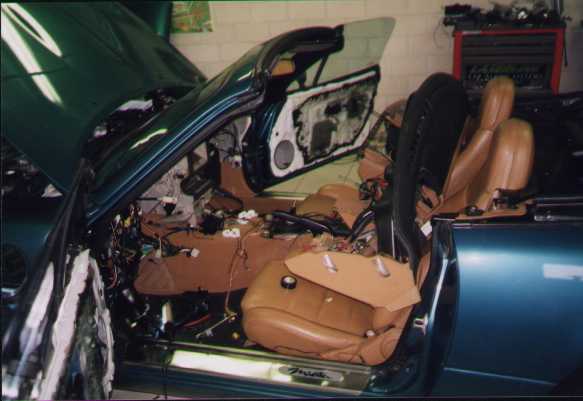
Removing the dashboard
At first sight this seems
a difficult task, but the dash can be removed fairly easy. First the rear console,
center dash panel and steering column assembly have to be removed, with steering wheel and
combination switch still on it. Start by disconnecting all connectors around
it. Although they all look alike, they really are different, so you can't miss when
putting them back together afterwards. Then take out the 12mm bolt and the 2 12mm
nuts at the bottom of the steering column, under the plastic cover. Finally remove
the 2 12mm bolts at the top of the steering column. It should now be completely
loose and can be taken out of the car.
The dash itself is held
in place by only 9 bolts. On either side of the dash there's 2 bolts under little
plastic plates. There's 2 similar plates on either side of the center console.
The last bolt is located under a square plastic, at the top center of the dash. It's
very close to the window so it's not easy to get to. Remove all these bolts.
Then disconnect the cables of the heating system. You might want to mark them with
some white out first. They are just kept in place with some metal clips and can be
easily pulled out. Don't forget to undo the hood release knob.
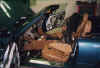 Finally
there's a few connectors to disconnect on the passenger side, near the blower. The
dash should be completely loose now and can be carefully lifted out of the car. It's
more easy with the top down. Be gentle, 'cause it's always possible that you forgot
to disconnect something, especially when you have some aftermarket items installed.
At this point it's also a good idea to remove the heater (3 nuts).
Finally
there's a few connectors to disconnect on the passenger side, near the blower. The
dash should be completely loose now and can be carefully lifted out of the car. It's
more easy with the top down. Be gentle, 'cause it's always possible that you forgot
to disconnect something, especially when you have some aftermarket items installed.
At this point it's also a good idea to remove the heater (3 nuts).
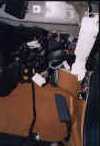
Removing the wiring
Once the dash is out, the
entire wiring loom needs to be sliced open. At certain places this is very difficult
as it's very well taped in and sometimes hard to get to. But it's doable.
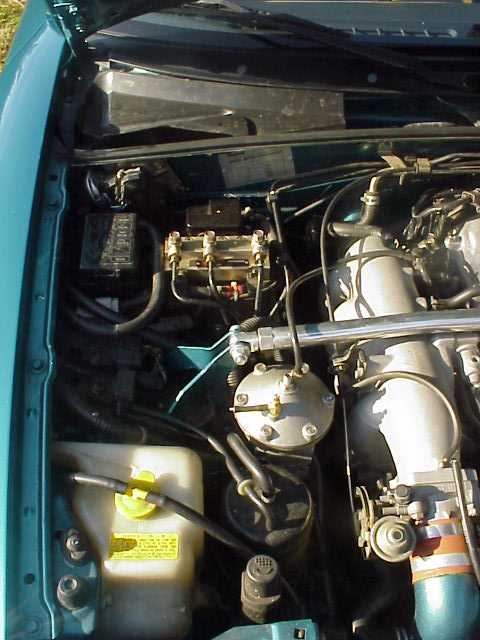
Most of the wiring goes to the engine compartment. I tried to get it out without
having to cut it, but that's just not possible, I finally just cut the wiring loom.
Then I just pulled the ends out from the side of the engine bay. To get the signal
cables for the wheel sensors out, the best way is to just cut the connectors off.  They can be
simply soldered back on afterwards. Then the signal cable can be pulled back from
the inside of the car. To facilitate access, it's best to remove the wiper motor,
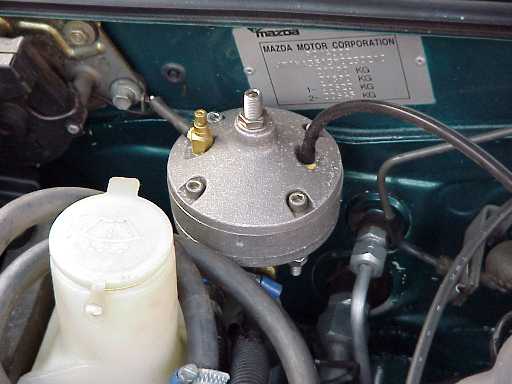
washer fluid reservoir, fuse box and it's support. Most of the cut wires go straight
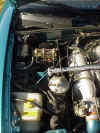
to 2 connectors on the ABS block. With these disconnected, it can be lifted out of
the car (undo all bolts and hydraulic lines). Finally, there's 2 wires which go to
the fuse box. The first goes to a 60A fuse. This wire can be carefully removed
from it's connector. The second goes to a 30A fuse. Because on my car this
fuse served the air-conditioning I just cut the wire. (on my car the 60A position
was unused, but I had to look for a solution for the 30A wire).
They can be
simply soldered back on afterwards. Then the signal cable can be pulled back from
the inside of the car. To facilitate access, it's best to remove the wiper motor,
washer fluid reservoir, fuse box and it's support. Most of the cut wires go straight
to 2 connectors on the ABS block. With these disconnected, it can be lifted out of
the car (undo all bolts and hydraulic lines). Finally, there's 2 wires which go to
the fuse box. The first goes to a 60A fuse. This wire can be carefully removed
from it's connector. The second goes to a 30A fuse. Because on my car this
fuse served the air-conditioning I just cut the wire. (on my car the 60A position
was unused, but I had to look for a solution for the 30A wire).
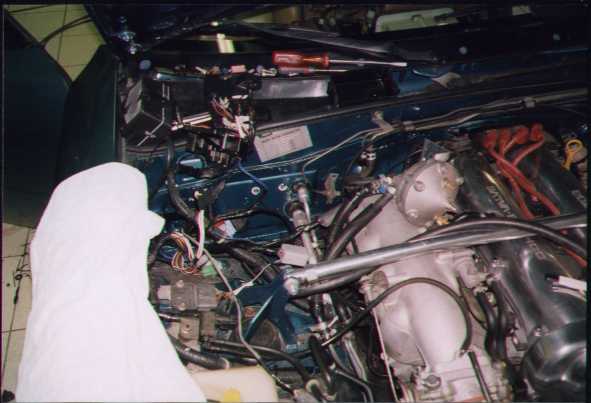
From the ECU there's also
2 wires which go all the way to the other side of the dash. One goes to the brake
lights and the other goes to the fuse of the wipers (duh). Finally there's also a
signal cable to the front left wheel. This also runs to the left side of the dash,
were it goes to the engine compartment. Again I just cut the connector and pulled
the wire back from the inside of the car. Afterwards I just soldered the connector
back on.
The signal cables for the
rear wheels run through the right door sill. The right one goes straight to the
tunnel next to the gas tank and can be easily taken out. The other one runs in front
of the gas tank, under the metal cover. So it will have to be removed, as do the 2
plastic panels on the side.
Finally there's 1 last
wire which runs through the dash itself. Its function is to make the light on the
instrument panel go on. The wire starts on a connector on the back of the instrument
cluster and runs through the dash where it ends in a big white connector. In my car
this wire was already there, but I only noticed it when I had already taken it out of the
other car... duh. Make sure you need it before you take it out, it could save you a
lot of time.
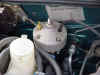
 ABS equipped cars have their washer fluid bottle in the front
bumper. My car had it next to the fuse box, so that also had to be taken out.
Because it's on the other side of the car, the wiring and water lines need to be removed
also. Even the water lines on the underside of the hood are different!
ABS equipped cars have their washer fluid bottle in the front
bumper. My car had it next to the fuse box, so that also had to be taken out.
Because it's on the other side of the car, the wiring and water lines need to be removed
also. Even the water lines on the underside of the hood are different!

 I got the idea to install ABS
because I actually wanted the bigger brakes of the '94-on. For those who don't know,
as of '94 the miata got a number of modifications. Among others, there's the bigger
brakes, bigger rear differential and some chassis braces. After a long search I
found a donor car for the big brakes, but since it also had ABS I decided to take the
challenge and build over the entire brake system...not knowing what I'd gotten myself into
really. The only way to do the ABS upgrade is with the donor car sitting beside the
receptor car. An ABS system is too complex and brakes are too important to do it any
other way.
I got the idea to install ABS
because I actually wanted the bigger brakes of the '94-on. For those who don't know,
as of '94 the miata got a number of modifications. Among others, there's the bigger
brakes, bigger rear differential and some chassis braces. After a long search I
found a donor car for the big brakes, but since it also had ABS I decided to take the
challenge and build over the entire brake system...not knowing what I'd gotten myself into
really. The only way to do the ABS upgrade is with the donor car sitting beside the
receptor car. An ABS system is too complex and brakes are too important to do it any
other way.