
4 Wheel Alignment on a Mazda MX-5 Miata
by Andrew Willliams
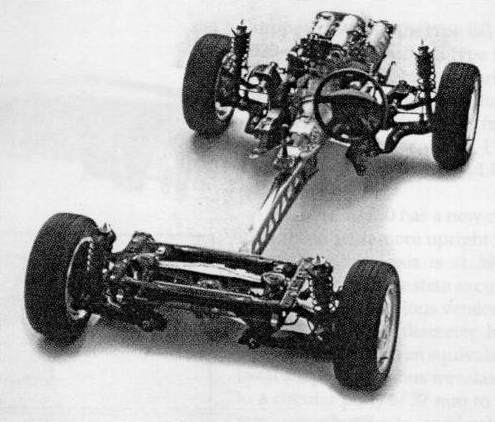
Can you measure and check 4 wheel alignment on a "5" using string, straight edge, plumb bob, spirit level and extending rule etc. Those nay sayers should note that motorbike frame re-aligners use a jig, and tape measure ;-). Any Freemasons among us will know little more was used to build Europe's great cathedrals, or to navigate the world! So why do people think the idea totally foreign when it comes to a simple car geometry. The MX-5 is not a hand crafted car like say the Jensen Interceptor, they are computer designed, the monocoque and suspension components are jigged, assembled and spot welded by robots, to within fractions of a millimetre! Manufacturers can not afford for things not to line up!
Read any US site dedicated to auto-cross and "5" motor sport, and they will talk about all sorts of trick settings. They will tell you that the rear wheel "toe" and camber is where you start (as they affect the handling most). Front wheel "toe", and camber come next, finally the caster angle is checked, and is sometimes compromised slightly due to the other (more radical) settings. The caster angle is mainly a function of the original design, it adds "damping" and "self centring" to steering. 5 degrees or slightly less is the desirable caster angle. If less, it makes the steering lighter - for those without PAS! Doing a search of the US "5" web sites. fora, and also Wikipedia will explain all this in far greater detail (see here, and the other external links on this page).
If any modifications are made to the "5" suspension, (see below!) such as replacement springs, dampers, bushes, track rod ends etc., alignment can be checked (and can if necessary be adjusted) using simple tools. Mazda tolerances are pretty wide, so getting within spec. is not difficult. Playing with rear "toe" and camber settings can be great fun! Obviously this web page is only my opinion, but I think all the links give great (independent) understanding in the subject Enjoy!
A few suggested pre-requisites:
1) Check tyre inflation.
2) Make sure the suspension is settled... Go for a drive (a week
is plenty of time to allow new components to settle)
3) While driving, find the centre position of the steering wheel,
this is useful to know (for resetting steering
wheel position).
4) Find out whether the car drifts to the left or right - can
help with adjustments (and for resetting steering
wheel position).
5) Find the most level (even) ground you can, to carry out the
checks. (garage or reasonable drive-way will do!)
FM recommended these settings as a good set up, who am I to argue!
Front wheels:
Caster: 5.0 degrees
Camber: 1.0 degree negative (about 5 mm out at the bottom, per
side)
Toe in: 1.6 mm (0.8 mm per side)
Rear wheels:
Camber: 1.5 degrees negative (about 8 mm out at the bottom, per
side)
Toe in: 1.6 mm (0.8 mm per side)

First thing to do.is to note
the front and rear track in the table and diagram above.
The front "axle line" is 20 mm (10 mm either side) narrower
than the rear. Run a string as shown, carefully measuring from
the wheel (centre) hub at the front and back wheels, allowing
for the extra 10mm at the front. See pictures below,
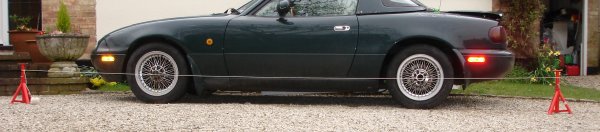

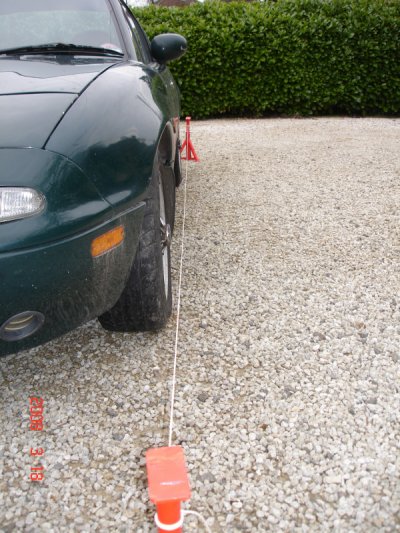
A second string should be run on the opposite side in a similar fashion, - note the string being used here is thick for photographic purposes (ideally a lighter thread or fishing line, should be used) The strings must extend past the front and rear of the car, so the two strings can be checked to see if they are parallel (with one another). This assures that the set up is as accurate as possible. Measurements can also be taken to specific parts of the car body too (each side being compared).
These strings should be a pretty accurate datum to work (measure) from...
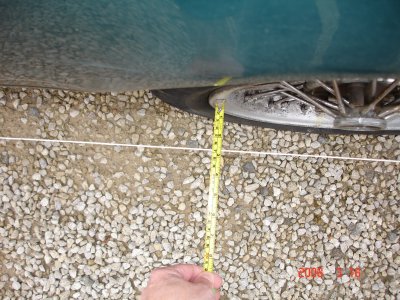
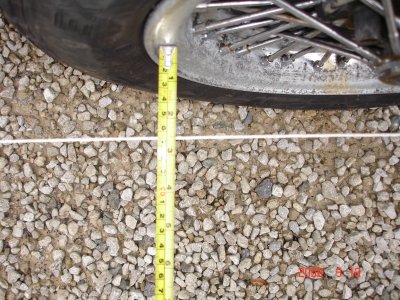
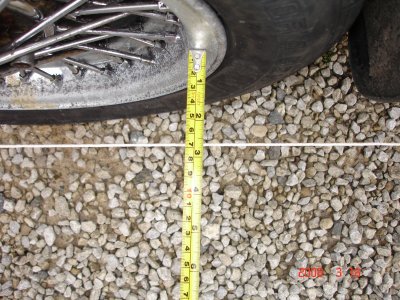
Rear Wheels
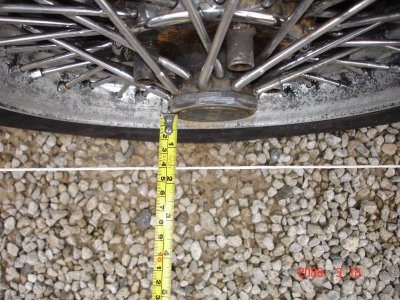
So, all you need to do
is measure between the string and the front of the wheel,
and between the string, and the back of the wheel - as
shown below. The difference should be: "toe in"
up to about 1 mm. The picture shows the "near side"
rear wheel being measured for "toe"! (In fact "toe"
measurement - in milli-metres - is specified at at the
fat point of the tyre, measuring at the wheel is possibly more
accurate!) This is the reason the specification is normally given
in degrees.
If the wheel is running exactly parallel (front and rear) it is still within Mazda spec., but ideally, both sides should have the same measurement (toe), and be within Mazda spec.

Do exactly the same on the car's "off side" (opposite side).
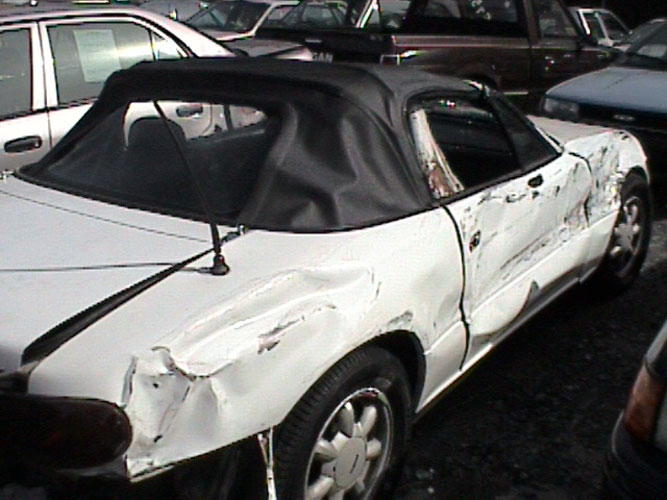
On the car shown, polyurethane bushes were fitted all around, the 8 adjuster bolts were set to the centre position, unsurprisingly the car wheel alignment was pretty accurate from the start. As stated in the opening paragraph, this should be the case, unless the car has been in a serious prang, or the bushes worn. Everything should be pretty straight!
Front Wheels
For the front, the steering
is first wound lock to lock, to be sure the steering
wheel is centring in the middle of the rack. This proves the (new)
track rod ends are fitted in the correct position. Tracking is
checked in exactly the same way as rear wheel alignment, again,
shown in the pictures below. Note front adjustment for toe is
generally done with the track rod ends, and not the wishbone adjustment.
Front wishbone adjustment is for camber
and caster
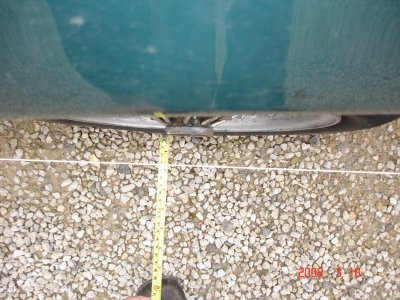
Rear Wheels re-check
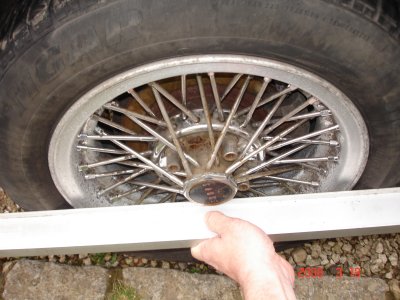
Now it is time to hold
a straight edge against each rear wheel (in turn) to recheck the
stringing measurement, holding the straight edge firmly against
the tyre wall. at the sill line, as shown. This technique is used
in many applications, such as checking motorcycle wheel alignment,
and in industry for checking drive belt/pulley alignment. Use
it to double check the string method.

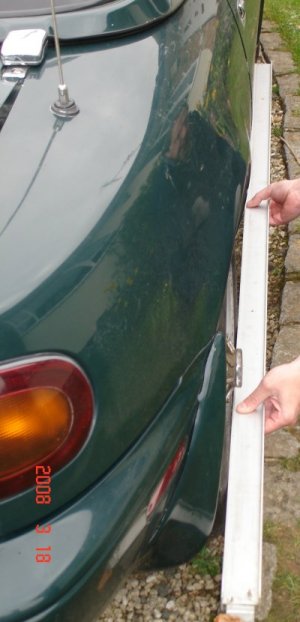
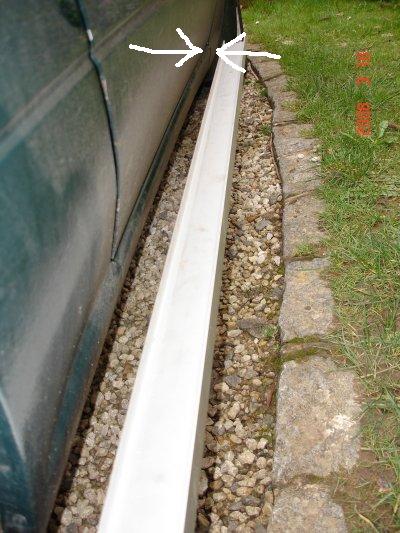
If the job has been done correctly, both sides should match. Note in the picture below, the distance marked at the arrows, is at the seam where the front wing meets the sill (directly below the door hinge). On a Mk 1 (fitted with standard off-set wheels) the gap should be about 35 mm - importantly it should be exactly the same on each side! There should be no significant tyre "run-out" (or bubbles etc.) so this measurement should be a reasonably accurate "quick check" (if it is wrong, go back to stringing or possibly a professional job). As you will see, with a 2 metre straight edge, if the wheel being measured is out by say 1 degree; at 2 metres, this would equate to approximately 30 mm (difference) where the arrows are! Clearly, rear wheel alignment can be checked to within a few minutes of arc, (the same on each side) using this final (rougher) check method!
Not only does this double check to a fair degree of accuracy, it also shows that all is well with the monocoque (no serious accident damage!) It is also a very quick check (30 seconds) to prove nothing has shifted, since last time the job was done. This is useful if you travel heavily pot-holed back road (as I do).
With a little more time "stringing" the car using a 4 sided box (across the front and the rear of the car), the hub centre measurement from the front and rear strings can also be used to ensure the toe angle of the front and rear wheels are even. This double checks for "thrust angle" (a term used when a car is deliberately set up "skewed" for running on oval circuits and the like) This is also confirmed with the "straight edge" compared against the (side) sills.
Camber can be checked, added or adjusted, using spirit level, plumb bob or extending rule. Obviously the car need to be on reasonably level ground (fudge factor can be worked out reasonably easily - I'll leave this to the enthusiast). Instead, it can also be done, if you know the measurement (on the same axle) between the two wheel hub centres (using the distance between the two strings and a few simple subtractions). You can easily figure out negative camber, with the extending rule, measuring under the car's (front or rear) "axle line", underside, "inside wheel" to "inside wheel". The notches on the adjuster bolts can be used, as a guide (see the Mazda chart below).
Caster angle is pretty much a function of the original suspension design, if the rest is right, caster should be within tolerance. Most motor sport people consider Caster has the least effect on handling. This Youtube video, gives a few ideas with that. Sealey do a DIY caster and camber measuring tool for £35 (see image below), which could be easily adapted. Do a search on Google for "Sealey +Caster" if you are really keen. If you do not feel confident with this, then just leave the front alone! Ultimately there is nothing stopping you paying for a professional job, in the certain knowledge that you now understand what is going on underneath, (and that all the bolts are moving freely). Below are details on how to adjust the bolts.

Epilogue
The vast
majority of "5's" will never see a full alignment
in their lives (outside
the original factory one) This task is often ignored even
by dealerships during the initial new car "pre-delivery inspection"
(it is supposed to be done, but few have the equipment). Very
occasionally, a "5" might have the tracking
adjusted, when an owner finds a "scrubbed out" front
tyre, that is the closest most get to an alignment.
Is a full (£100+) alignment mandatory, some enthusiasts, pedants, and anal retentive's think so, and on a regular basis too! But on a sunny afternoon, is it fun doing the above (if only checking), it would also help with the decision whether a £100 - £150 alignment is worth the effort and cost.
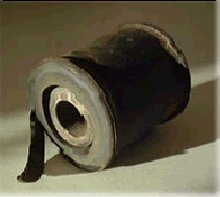
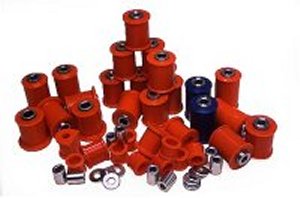
Wishbone bushing
Flexing in standard rubber wishbone
bushes is far greater than with modern polyurethane bushes (this
is why the MX-5 challenge
don't allow them in their regs.!)
Having old, tired, torn and split bushes in a complex multi-link
suspension, makes a £100 alignment somewhat moot, especially
if your car is only worth £1500. On newer cars, where serious
capital has been invested, the added cost of an alignment is probably
not that significant, on the original outlay, though
MK 3's probably need the lowering kit first!
Organic rubber bushes on a 10 or 15 year old MX-5, which has covered 60,000 miles (or whatever) will have started to perish (as mine had). This is not easy to see, with the bushes in situe. In Norman Garrett's book he suggests that new bushes are one of the best value handling upgrades "bang for the buck". If you are considering replacement wishbone and anti-roll bar bushes, fitting polyurethane bushes will improve handling, without affecting ride comfort to any great extent. It should be noted that there are different hardness polyurethane bushes. They are expensive, requiring considerable capital outlay, also they are difficult to fit as a DIY job. Anyone considering replacement polyurethane bushes, would be well advised going for the split ones, as they are much easier to fit. (I bought complete bushes, which really required a proper bench press to push them home.)
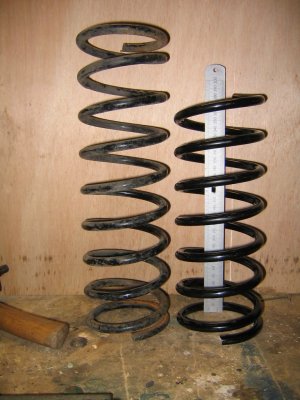
Lowering springs
Lowering the MX-5 can be done quite cheaply using "trim springs" These a quite literally standard springs that have had about 75 - 100mm cut off their "free" length(using an angle grinder). There are also aftermarket lowering springs designed to fit on the standard shock absorbers. Avoid both these options, they are awful, they reduce "sprung travel". When the car goes light (over a hump), during landing, the suspension has lots of almost unsprung travel, it then tends to quickly bottom out on the "bump stops" which causes very unstable conditions and feel. Low springs on the track, are fine, but for everyday road use they are a very poor option.
"Coil-Over" struts
Replacement struts - often referred to as "coil-overs", though the standard ones are "coil-over" (damper) too! "Road springs", and shock absorbers (more accurately "dampers") need to be be matched, for a successful outcome. Purchasing those known as "ride height kits" are undoubtedly the ones to go for. Specifically ones with adjustable damping, AND screw adjustable spring perches, as shown below.
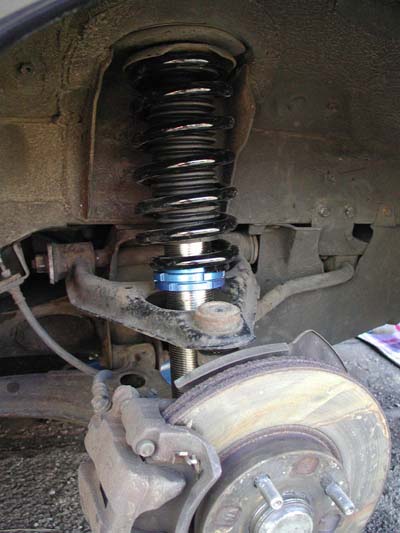
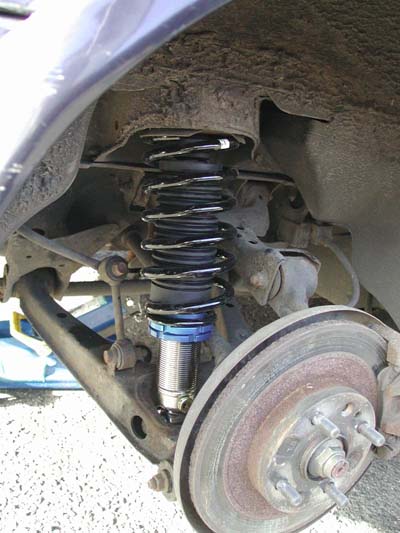
Struts with fixed perches, or those with multi position perches are useless, as it is highly unlikely that the EXACT ride height will ever be achieved. Having to remove the strut, and compress the spring, to change the height is a futile pointless task. The slight extra cost of the screw perch type, is well worth the extra money. With screw perches, the ride can be set to the ideal height, for the roads travelled. From a 4 x 4 look alike, to a track hugging low rider! A car that is too low, is a misery, too high, and the handling and looks compromised!
Some other useful recourses
http://www.fizzindi.demon.co.uk/wheelalign.htm
http://www.miata.net/garage/align.html
http://www.hummingbirds.net/alignment.html
http://www.fizzindi.demon.co.uk/mk2align.doc
http://www.quadesl.com/miata_alignment.html
http://en.wikipedia.org/wiki/Suspension_(vehicle)
http://www.tampabaymiatas.net/Misc_Pages/Miata Suspension.htm
http://en.wikipedia.org/wiki/Caster_angle
http://en.wikipedia.org/wiki/Camber_angle
http://en.wikipedia.org/wiki/Toe_(automotive)
http://en.wikipedia.org/wiki/Ackermann_steering_geometry
http://www.youtube.com/watch?v=9HbkslChoBY
http://www.youtube.com/watch?v=TrWkqJzYfQ4
http://www.familycar.com/Alignment.htm Thrust Angle
http://autorepair.about.com/od/glossary/a/glossary_new.htm
http://www.miata.net/sport/Physics/
http://en.wikipedia.org/wiki/Multi-link_suspension
http://en.wikipedia.org/wiki/Understeer
http://en.wikipedia.org/wiki/Oversteer
| [Home] - [FAQ] - [Search] - [Sponsors] - [Forums] |
| [Garage] - [Clubs] - [Contact Us] - [Disclosures] - [More...] |
Copyright
©1994-2024, Eunos Communications LLC
|