|
Miata Rear Shelf Extension Doug
Thomson Our dog likes to sit on the rear shelf of our Miata. When the top is up, no problem, but when the top is down, there's not much space - Syd is a full figured girl and needs a little extra leg room. This little shelf is simple to make, proves that it is possible to bend Plexiglas or Lexan, looks good, and is easily removable in that it uses Velcro and an existing carpet button to hold it in place. I have patterned this on a 99 Miata. You may have to make adjustments for earlier models. One day, I'll add a thingie showing how we made provision for a dog seatbelt harness. Here's
What You Will Get When Finished |
 |
|
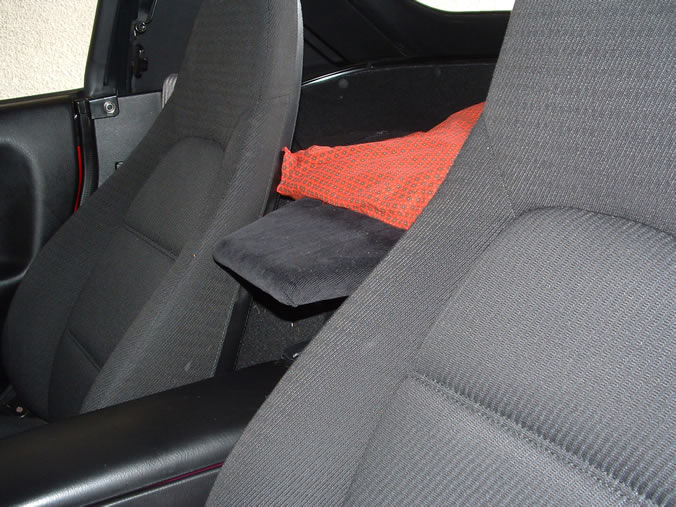
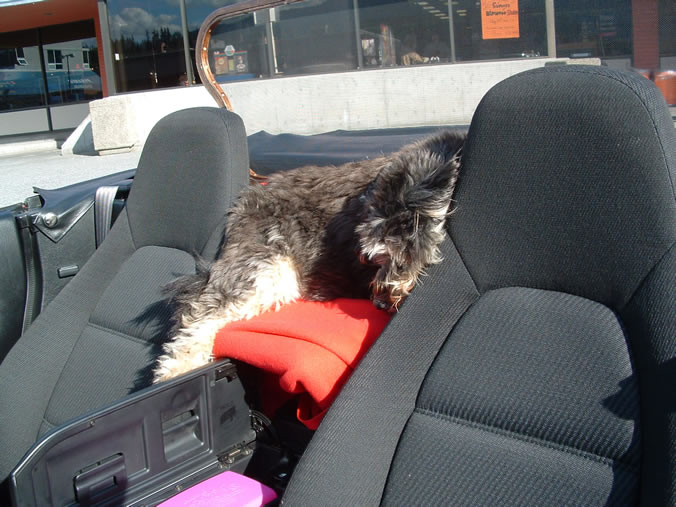
| Sydney's red pillow sitting on top of shelf extension. |
Here's Syd using extension - note
that she won't ride without the red blanket. Windblocker
is the other design on this site.
|
| Materials: |
|
|
Tools |
|
| Method (note: large images have textual explications) | ||||
|
Images
1 & 2
Here's the pattern for your shelf extension and a shot of the bending form with the 1/4" Plexiglas already bent. Because this shelf extension will be covered, you don't have to worry about the sharp edges of the form creating blemishes on the Plexiglas. Ergo, I didn't bother to round the edges of the form or to cover the form with cloth. You will, however, want to round all of the corners on the plexi. It will help you when attaching the foam padding. |
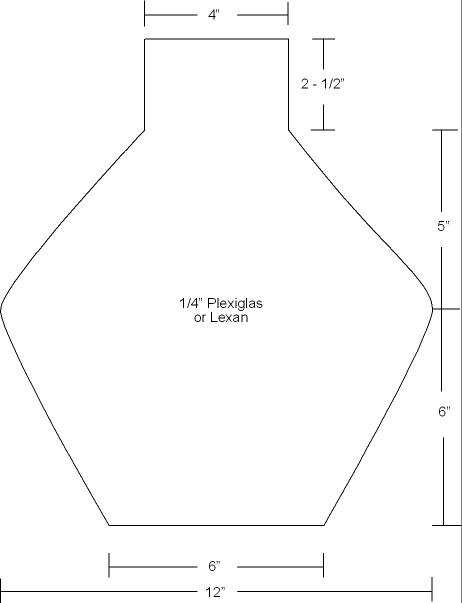 Image 1 |
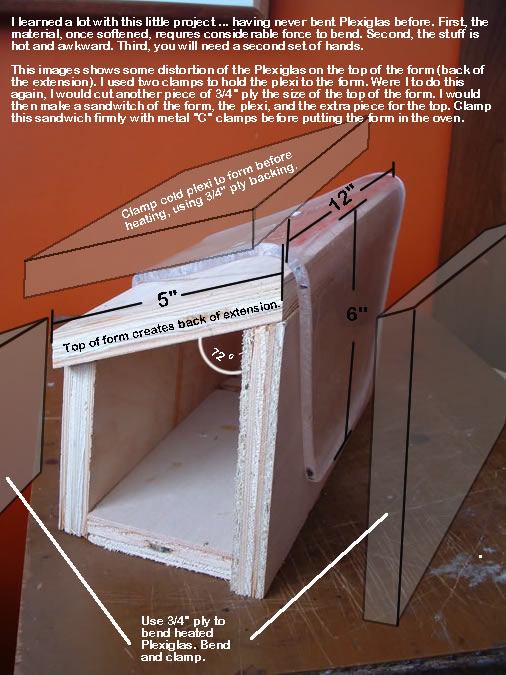 Image 2 |
||
| Look at Image 2 (large version) for additional notes. Make sure that the form is built very solidly, as it will have to withstand considerable clamping force. I suggest clamping the Plexi to the form using the sandwich method. The 2 - 1/2" base and 6" platform will overhang the form when you put it in the oven. As they heat in the oven they will begin to sag over the form (you will finish the rest of the bending). | ||||
| Heat your oven to about 300 degrees F. Clamp the plexi to the form - make sure it is very firmly clamped. Put the form in the oven. Keep very careful watch of the Plexiglas in the oven. As the form heats, the base and platform sections of the Plexiglas that are overhanging the form will begin to sag slightly. Prod the Plexiglas slightly with your oven mitt, it should feel rubbery. If you hear a crackling sound get your form out of the oven quickly as the Plexiglas is beginning to break down ... bubbles of gas will be forming in it and will weaken it considerably. | ||||
|
Here's where you will need two sets of hands. You must move quickly as the Plexiglas will cool quickly ...
Congratulations, you've done the hard part. |
||||
|
Images
3 & 4
Carefully remove the button that holds down the shelf carpet that sits directly behind the shelf extension. Using a permanent marker, mark the location of the carpet button, and storage compartment lock on the Plexiglas. Drill holes as shown in Image 4. Sand and finish the edges of the Plexiglas. |
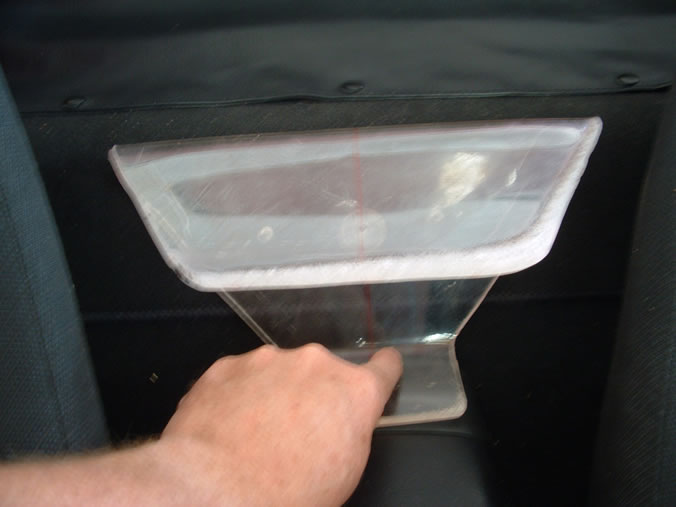 Image 3 |
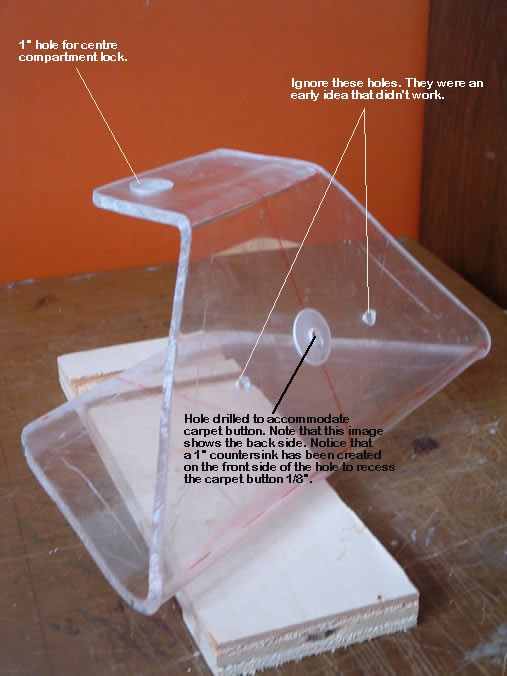 Image 4 |
||
|
I
forgot to take a picture of the padding on the top ... sorry. Anyhow,
you will use contact cement to attach the foam to the top platform.
Lay the foam on top of the extension (platform) and try bending it around
the platform to form a nicely rounded edge on the shelf. This high density
foam is quite stiff and you will need to wrap around about 2" to
have a large enough glue line to hold the foam. You will need to cut
the foam about 2 - 1/2" larger than the top platform on 3 sides
(passenger, driver and front). Cut the back side flush but with a taper
to ease the fabric you will apply later. Glue the foam to the top, roll
and glue the front edge, trim excess material, and role and glue the
sides.
|
|
|||
|
Images 5 &
6
|
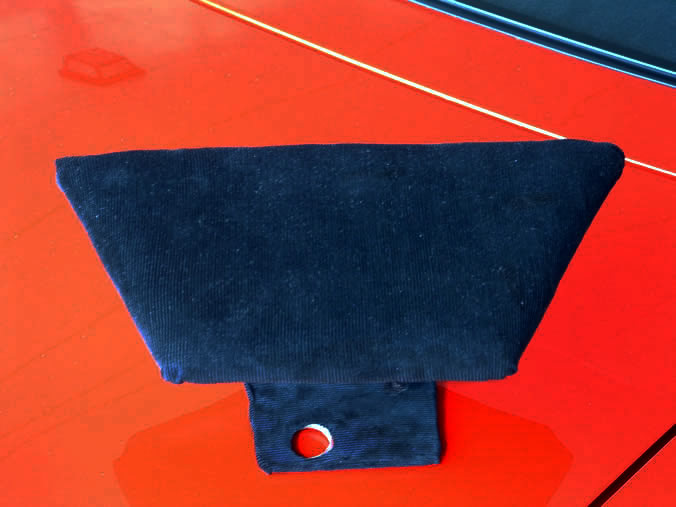 Image 5 (this is really black, honest) |
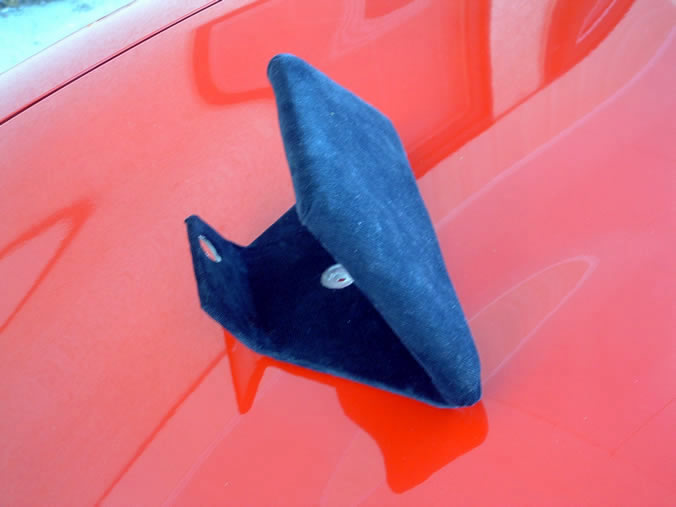 Image 6 |
||
|
On the very back of the console (next to the carpet) attach a 4" strip of Velcro loops. Make sure you thoroughly wipe that area of console with alcohol before attaching. Stick a 4" strip of Velcro hooks to the bottom of the Plexiglas (so it hooks to the strip you put on the console ... duh!). Now cover the back of the Plexiglas with Velcro hooks ... they will stick to your Miata's carpet. |
||||
|
Now
position your finished shelf extension, press the Velcro in place, and
insert the carpet button through the Plexiglas and into its original
hole. Your shelf extension is now firmly in place.
|
|
|||
| More Pictures | ||||
|
Driver's side view. I'm 6' and extension doesn't interfere with shifting. |
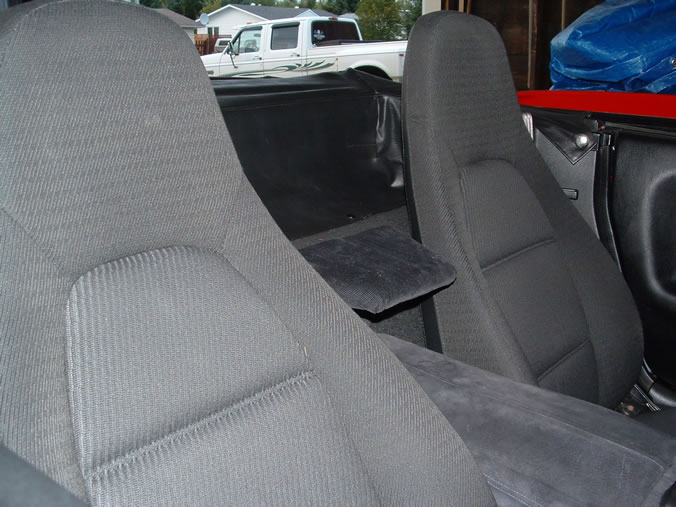 Passenger side view. Poor angle doesn't really tilt downhill. |
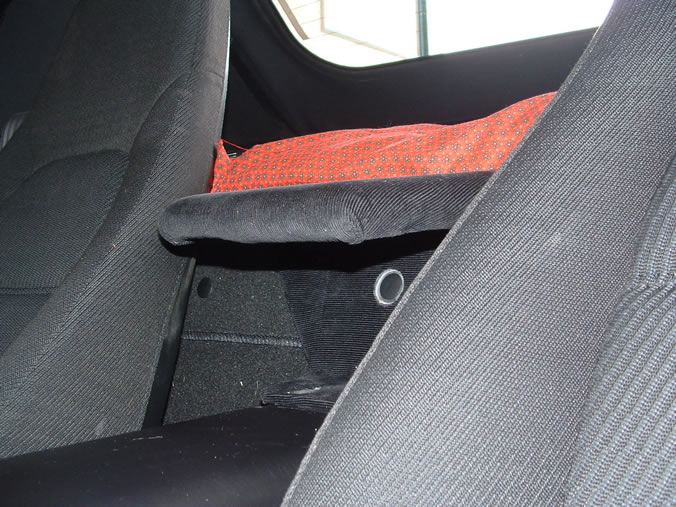 This image shows the carpet button recessed in the Plexiglas. |
 Note how the console storage opens under the platform. |
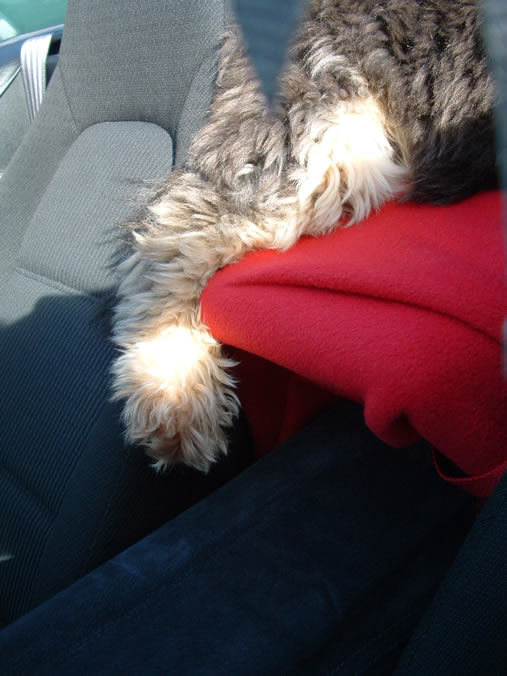 Syd's casual hanging foot. |
| Back to the Garage |
8 April, 2006 |