
by Joanne Heckmann
Mudflaps are a worthwhile addition to your Miata. They minimize the amount of dirt and stones thrown up against the bottom of the car. Best of all, the Mazda factory parts look good and are easy to install.
 |
 |
So easy, in fact, that some would say a how-to article is overkill. On the other hand - this is often the first mod that a new owner will attempt, and knowing what's involved ahead of time will inspire confidence, improve the experience and make for a better result.
So, here we go...
What's In the Box
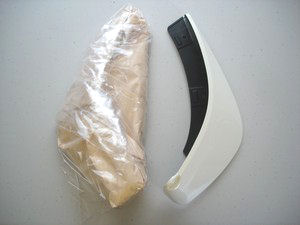
Mazda packs the flaps as if they were delicate, expensive china: each one comes well protected in soft-sided paper wrapping, inside a plastic bag, inside the box. Be sure to protect the finish as you work with them - keeping them inside the plastic bag is a good idea.
 |
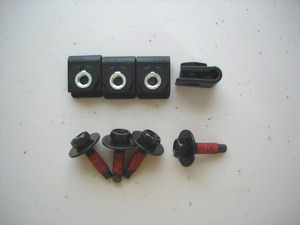 |
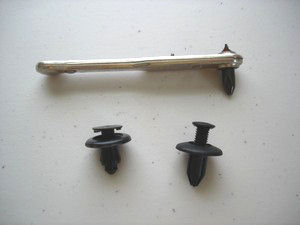
A small bag of fasteners and printed instructions are included. The instructions provided here are a bit easier than the printed ones - no need to remove any wheels or panels.
Tools
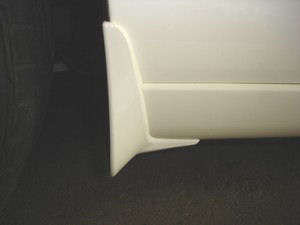
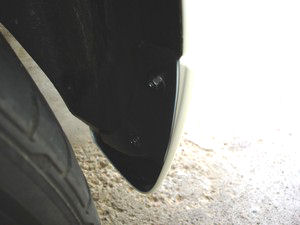
Rear Flaps
We'll install the rear mudflaps first. If you decide to stop midway through the install, you won't look too silly going down the road with just the rear flaps installed.
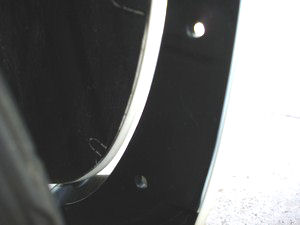
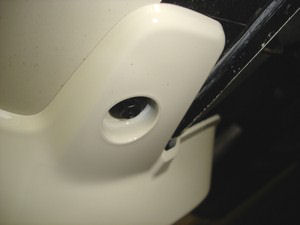
Holding a rear flap up to the car, you will see tabs molded into the inner fender liner that correspond to the position of the two upper holes in the flap. These tabs must be cut to reveal holes in the metal panel behind them.
 |
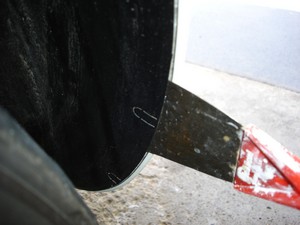 |
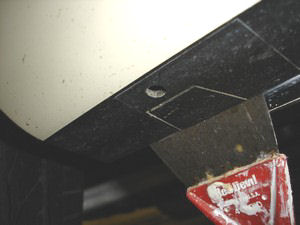
An easy way to protect the metal panel is to slip a putty knife under the plastic. Use a box cutter to press against the putty knife and cut the plastic.
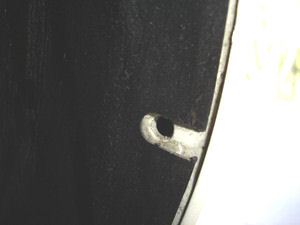
The holes are easily accessible from under the back of the car. Just reach up and place the u-clips over the holes, with the nut facing the rear of the car. Wiggle the clip a little until it settles into position over the hole.
 |
 |
Next, remove the bottom bolt. If you don't have an 8mm socket, a 5/16 may do the trick.
Clean the area where the mudflap will contact the car. Try not to cry over chips that may already have appeared in the paint.
Put one of the new bolts through the top hole in the flap, put the flap in position (doesn't it fit nice?), and gently turn the bolt until you feel it engaging the nut. Put the second bolt in. If necessary, use a nail or awl to align the holes. Put the bottom bolt in - this is the same one you removed earlier. Leave each bolt slightly loose.
 |
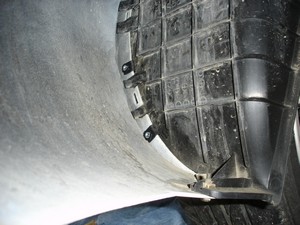
Now, hold the flap tightly against the car and work from the top down to tighten the bolts. Remember, the nuts are held only in plastic clips. Be gentle! Use the flashlight and make sure the plastic inner fender liner isn't deforming as you tighten.
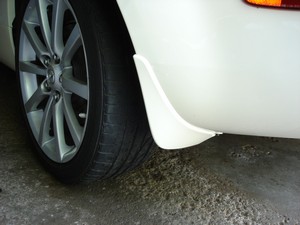
Front Flaps
The front flaps are a little different. This time the bottom is cut away and gets a u-clip. The inner fender liner already has two fasteners in place, one of these will be reused.
Although your car may be different - on mine, the existing inner fender liner fasteners were plastic quarter-turn Phillips head expansion fasteners that simply popped, then pulled out. Be gentle - no need to press hard or strip the Phillips head. Set the fasteners aside.
 |
 |
On the bottom, use your flashlight to locate the squarish tab that needs to be cut away. The putty knife trick works here, too. Insert the u-clip, nut side on top.
Insert one of the old expansion fasteners in the top hole of the flap. Put the flap into position and gently push the fastener into the hole, then use your screwdriver with gentle pressure to turn the Phillips head a quarter turn until it pops in.
The new expansion fastener goes into the second hole. This one is a screw type, so use your screwdriver to snug it up. Remember, the backside is not a nut, it's just plastic that's expanding - be gentle and don't strip the Phillips head.
 |
 |
Insert a bolt into the bottom hole, engage the nut and tighten while holding the flap against the car.
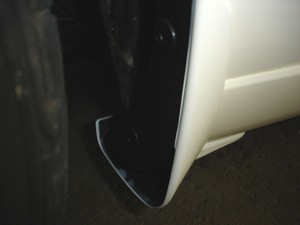
Congratulations! You're done! Go for a ride and test them out! ;-)
| Back to the Garage | 28 May, 2012 |
| [Home] - [FAQ] - [Search] - [Sponsors] - [Forums] |
| [Garage] - [Clubs] - [Contact Us] - [Disclosures] - [More...] |
Copyright
©1994-2024, Eunos Communications LLC
|