I replaced a top on a '95 M1 this weekend. When I removed the old top, the rain rail was attached to the top fabric with pop rivets. The thin plastic liner had some minor cracking around most of the rivet holes. The rivets seem to do no more than hold the rain rail and the fabric in place. Of course once a pop rivet is compressed there is not much chance to make any minor adjustments as the plastic liner would surely crack. The new top that was provided did not have the rain rail installed, so I had to remove the original one and attach it to the new top. I purchased NYLON screws (10 - 24 by 1 inch) and nylon nuts to attach the liner to the fabric. After I had punched out the rivet and mounting holes in the new top, I attached the old rain rail to the new fabric, made adjustments to line up the mounting holes and then tightened down the nylon screws and cut off any remaining threads at the nut. The nylon screw heads are no larger than the pop rivets and the backing is much neater. I used stainless washers in any holes that were cracked. The only draw back was the higher cost for the nylon parts compared to the pop rivets. but that was minor.
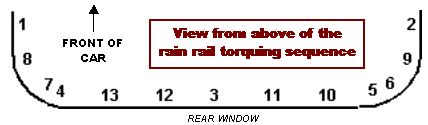
When tightening the bolts on the rain rail, correct sequencing is essential to avoiding leaks.
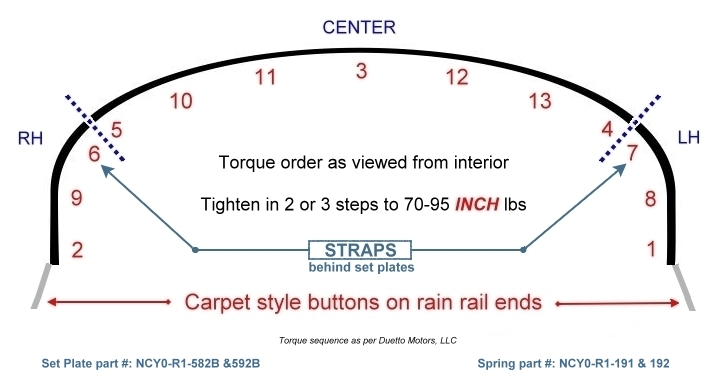
When tightening the bolts on the rain rail, correct sequencing is essential to avoiding leaks.
| Back to the Miata.net Garage |
6 November, 2005 |