Mazda Factory Wood Dash Kit
Deciding I wanted a wood dash in my 2001 LS Miata I looked into the options available. I didn't want a kit that was stuck on using double-sided tape, so that left me with the factory kit. When it arrived I was a bit disappointed to only find two pieces included. Not to worry, after installation I was amazed at the difference of the look of the interior.
This was a fairly simple project that most mechanically inclined people could do in less than an hour.
Now that that's out of the way here is the installation procedure.
First ** Disconnect your battery! **
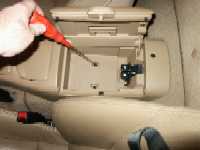
Remove the screws from inside the storage compartment (you'll
find two of them) that hold your center console in place. I'm pointing
at one of them with the screwdriver, the second is directly below.
Remove the screws hidden under the molding colored caps from the
side of the console (the caps are attached to the screws, so do not try to pull
them off!)

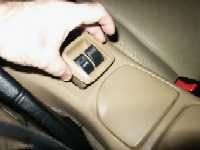
Remove the power window switches. I used a folded piece
of paper under my pry bar to prevent damage. Note if you don't have power
windows this will be a plain cover, the removal instructions remain the same.
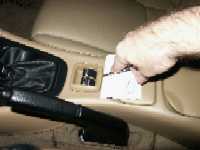
After getting the cover or switches out of the way, you'll find
a single screw that need to be removed. Note the white power connector
for the windows switches.
Lift on the front of the console to loosen it (can take some force
to do this) and then pull it forward until you clear the trunk and gas release
levers. This will allow you to remove it from the car.

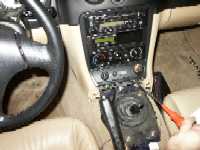
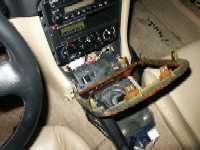
My screwdriver is pointing a one of the two screws holding the
radio surround in place, the other is left opposite. Remove both of these.
It takes a surprising amount of force to remove the trim piece,
I found it helpful to force a screwdriver into the gap near the clips as I pulled
it free. Use your new trim piece as a guide to figure out where these
clips are located.
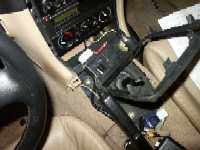
Once it's pulled free you'll have access to the lighter and passenger airbag electrical connectors. Both of these are keyed so they'll only go back one way, so you won't need to mark them. IMPORTANT! Make sure you have disconnected your battery before disconnecting the airbag!
Remove the airbag switch from the radio surround by pressing down
the wedge connectors. The lighter socket is also held by wedge connectors,
these are a bit harder to get to since they're inside the lighter barrel.
Use a fine bladed screwdriver to press one of these down while firmly pressing
the socket toward the front of the surround. Once the metal part is removed
you can remove the yellow plastic surround by pressing down on the wedge connector
and pulling.
Reinstall both the airbag switch and lighter socket by reversing
the directions above.
Reconnect the airbag and lighter electrical connectors.
Snap the radio surround back into place. Note that the surround
along the top of the radio doesn't sit flush with the radio. It sticks
out about 1/8". Reinstall the two lower radio surround screws.
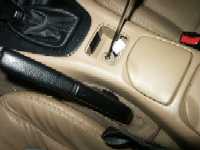
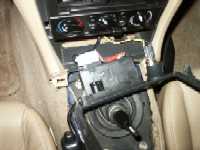
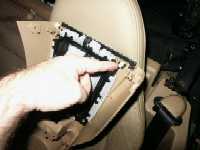
Remove the shifter surround from the center console by squeezing
the clip I'm pointing to and pressing, there one just like it left opposite
of the one I'm pointing to. This piece will pivot toward the small end.
See the next picture to get an idea of what I'm talking about.
Feed the smaller end into the console. Firmly pressing the
wide end of this piece will snap the surround in place. Make sure the
shift boot is pulled up out of the way.
Reinstall the center console by reversing the console removal steps above.
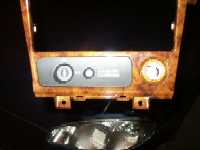
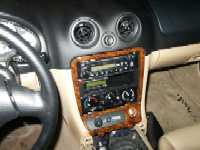
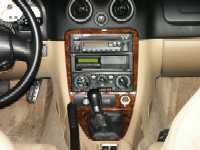
Here is the finished product.
Questions? Send me an E-mail and I'll try to answer them.
| Back to the Garage |
24 February, 2007 |