Converting a 1990 Mazda Miata interior with LED’s
by Michael Bednar
Remember, LED’s are polarity specific. If you install an LED and it fails to light, turn it 180 degrees and try again.
All LED’s were purchased from http://www.superbrightleds.com/
|
1990 Mazda Miata |
|
|
|
|
|
|
|
|
LED CONVERSION |
|
|
|
|
|
|
|
|
Interior
Lighting |
|
Qty |
Mazda
Part Number |
Light
bulb Part Number |
LED
Part Number |
Mazda
Cost |
SuperBriteLED
Cost |
|
|
|
|
|
|
|
|
|
|
|
Map Lights (Stock) |
2 |
000011302 |
Festoon 3022 |
3022-WWHP4 |
$2.29 |
$6.95 |
|
|
Floor Lights (Modified) |
2 |
|
Festoon 3910 |
3910-WW6 |
|
$3.70 |
|
|
Heater/AC controls control lighting |
2 |
NA01-61-C95 |
74 |
74-WWHP3 |
$4.28 |
$3.49 |
|
|
Heater/AC controls A/C indicator |
1 |
NA03-61-C95 |
74 dim |
74-BHP |
$4.28 |
$2.49 |
|
|
Heater/AC controls A/C control
lighting |
1 |
NA02-61-C95 |
|
NEO3-W Instrument Cluster |
$4.07 |
$1.29 |
|
|
Ashtray Light |
1 |
362575139 |
74 |
74-GHP3 |
$3.69 |
$3.49 |
|
|
Automatic PRNDL |
1 |
|
194 |
WLED-WHP5 194 Wedge |
|
$5.95 |
|
|
High Beam Indicator |
1 |
|
194 |
WLED-BHP |
|
$4.95 |
|
|
Hazard Switch |
1 |
NA01-66-462 |
|
NEO3-R Instrument Cluster |
$4.85 |
$1.29 |
|
|
Barn Doors Switch |
1 |
NA01-66-462 |
|
NEO3-W Instrument Cluster |
$4.85 |
$1.29 |
|
|
Dimmer |
1 |
BR7055431 |
|
NEO4-W Instrument Cluster |
$4.97 |
$1.29 |
|
|
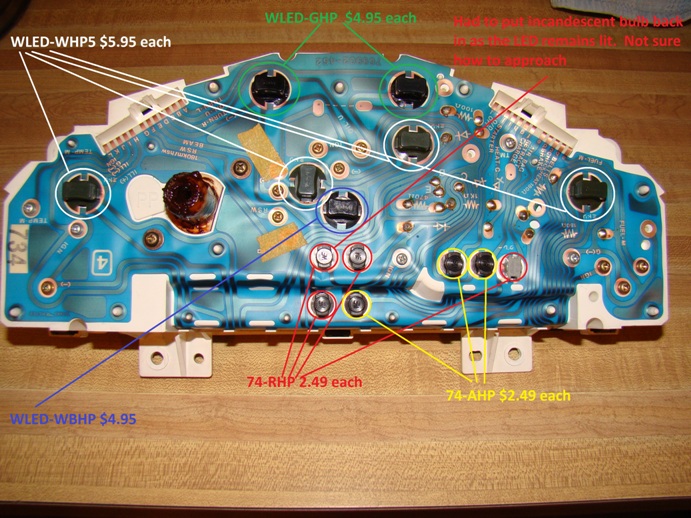
Gauges |
4 |
362575139 |
194 w/Green Sleeves |
WLED-WHP5 194 Wedge |
$3.69 |
$5.95 |
|
|
Gauges |
4 |
R49155431 |
74 |
74-RHP |
$4.28 |
$2.49 |
|
|
Gauges |
3 |
R49155431 |
74 |
74-AHP |
$4.28 |
$2.49 |
|
|
Turn Signals |
2 |
R49155431 |
74 |
WLED-GHP |
$4.28 |
$4.95 |
I just finished the LED
conversion in my 1990 Miata and thought I’d share the information that I’ve
garnisehd over these past few weeks in hopes of saving time and money on their
own project.
I started with the HVAC
controls as they are easy to get to for the LED replacement. I did read that you could use Finger
Nail polish remover to remove the green from the Instrument gauges and I
immediately thought that would work for all of the control panels in the
car. Wrong! The HVAC has the colors layered on a
clear sheet. Black, white and
green. Removing the green with
fingernail polish remover WILL remove the green, white and black. I had to buy a replacement
which is a different story alltogether.
Not all parts are created equal through the NA’s
To remove all the bulbs in
the HVAC control unit you will need to remove the full assembly from the center
console. Two are hidden beneath
the fan dial, which happens to be glued in place. Do not remove the fan graphic. Removing it may result in the ink being removed from it’s
clear acetate surface.
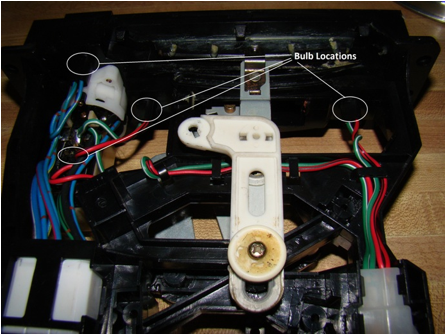
This is the underside of the
HVAC unit. The two far left
locations require removal of this unit in order to replace.
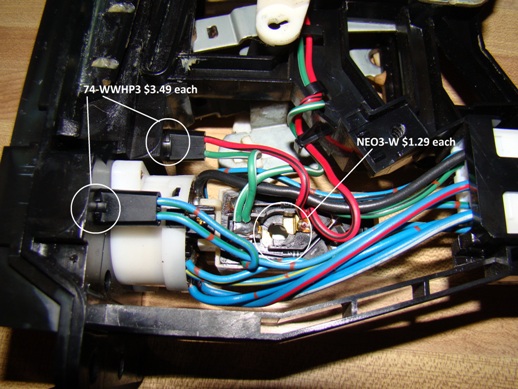
The left side of the HVAC
unit requires two size 74 bulb and one mounted on it’s own fitting. This shows the LED equivilant that I
used.
WW=Warm White W=White (although the switch has a
green colored gel built in)
Revision: I replaced the lower left LED with the following part number 74-BHP (Brighter Blue on the A/C indicator
light)
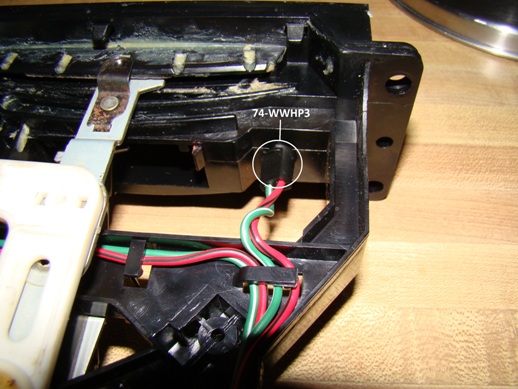
The right side of the HVAC
requires one 74-WWHP
The hazard and Headlight
(Barn Door) retractor switch requires two LED’s. Both had the green sleeve around the bulb which gave the
green glow. I use a red LED for
the flasher and a white LED for the Headlight Switch. Both are subtle when lit and provide adequate lighting in
the dark.
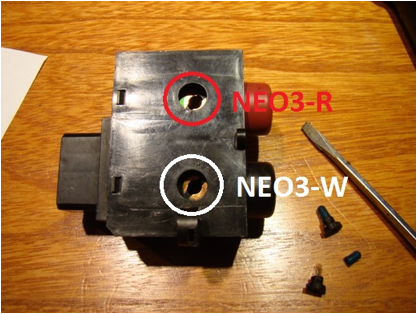
NEO3-R and NEO3-W
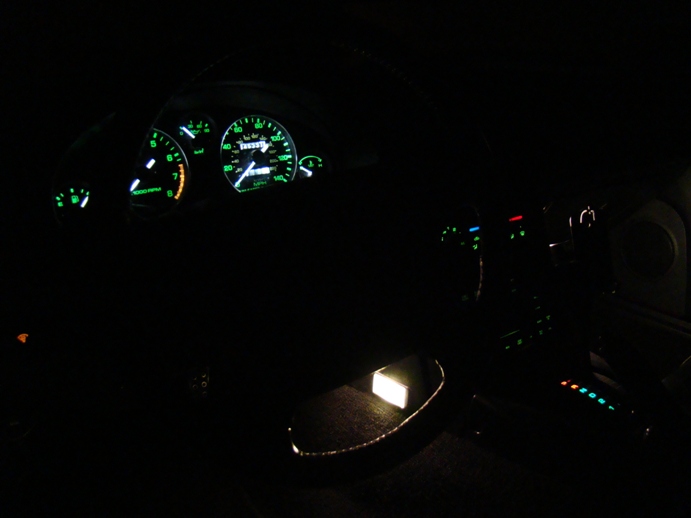
The center console as I have
done mine.
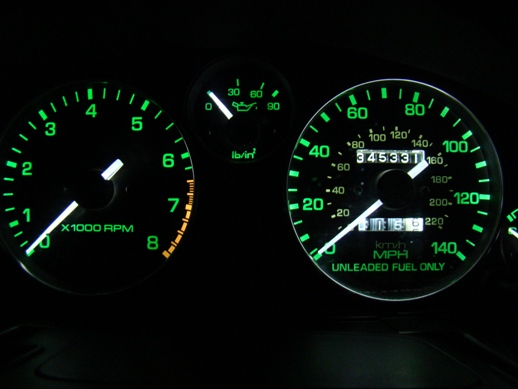
Yes, the mileage is correct.