
A dirty power window switch can cause your Miata's windows to hesitate, or refuse, to go up. A new switch costs well over a hundred dollars and is worth it if the alternative is to leave the windows down. But if the money you would spend on a new switch can be used for something better, then try cleaning the old switch before you purchase a new one. You have to take the vehicle apart one way or the other, so why not? First call the dealer to see if they have a switch on hand and check the price. (This is a common, profitable, problem, so they usually do.) If they do, try fixing the one you take out before you spend that money. It's an easy process.
The first thing you will need to do is take out the center console. This will require you to remove the shift knob (loosen the keeper pin on the bottom of the knob) first. There are a few screws you must then remove and the whole center console will pull up. Be careful with the attached wires and take note of how they are fed and fastened through the system.
The power window switch can be unplugged from the harness quite easily. There are then three screws that fasten it to the console. Remove those screws and the switch is free.
Holding the power window switch face down in your palm, you will see a Phillips head screw in the center of all the wires. Remove that screw and the switch will come apart with a little persuasion. Do this over a table or other work surface because there are little parts that can fall out. Set the loose parts to the side.
Turn the switch over and you will see the dirty contact points. Take a small wire brush to them and clean the contact points on the plastic backing. After you complete that, take the four (4) rocker switches and, while holding with a pair of pliers, clean with the wire brush. Don't go too crazy with the scrubbing brush, this is a delicate switch.
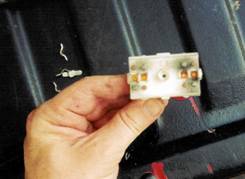 |
Here is how the switch should look after disassembly. Notice the dirty contact pads on the switch and the (4) dirty rocker switches on work surface. All of these need to be cleaned with the wire brush. |
When you have finished brushing the buildup from the contact points, reassemble
the switch. The rocker switches go in only one way, so you won't mix them up.
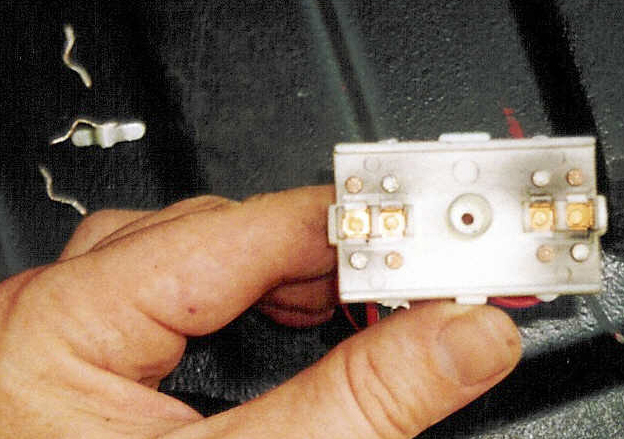 |
Notice the difference on the newly scrubbed switch. The contact pads are shiny and the rocker switches look shiny as well. Reassemble in reverse order. The switch is built intuitively and goes back together with little trouble. |
Once you have the switch reassembled, plug it back into the wiring harness and test it with the power turned on in your car. Do not reassemble to whole center console before you test it. It may not work for you, and you may have to run up to the dealer for a new switch.
If it works, put it all back together and enjoy the money you saved. If not, well, lets hope it was the switch in the first place!
I would like to point out that a good can of electronics cleaner such as Puretronics (I got mine at Fry's in Palo Alto, CA) will clean off the entire switch assembly, contacts and rocker elements without the need for abrasives. I just finished the procedure and can vouch for it, however, I can't say if the Puretronic would mar the plastic on the top of the center console though it didn't seem to affect the bottom of the console adversely.
I did the procedure with the switch dismounted and dissembled but some adventurous soul might try it in place. It does seem as if you'd have to do the spraying from the bottom since there doesn't seem to be a direct path to the switch from the front of the rocker buttons.
The four rocker contacts that fall out when you disassemble the switch should be replaced, bulge down, into the each of the notches on contact board. They're not concentric--if they don't fall easily into place, rotate them 180 degrees and they will.
Also, the contact board snaps easily into the upper portion of the switch when correctly oriented. If you feel undo resistance, rotate it 180 degrees--don't force it.
| Back to the Garage | 31 October, 2009 |
| [Home] - [FAQ] - [Search] - [Sponsors] - [Forums] |
| [Garage] - [Clubs] - [Contact Us] - [Disclosures] - [More...] |
Copyright
©1994-2024, Eunos Communications LLC
|