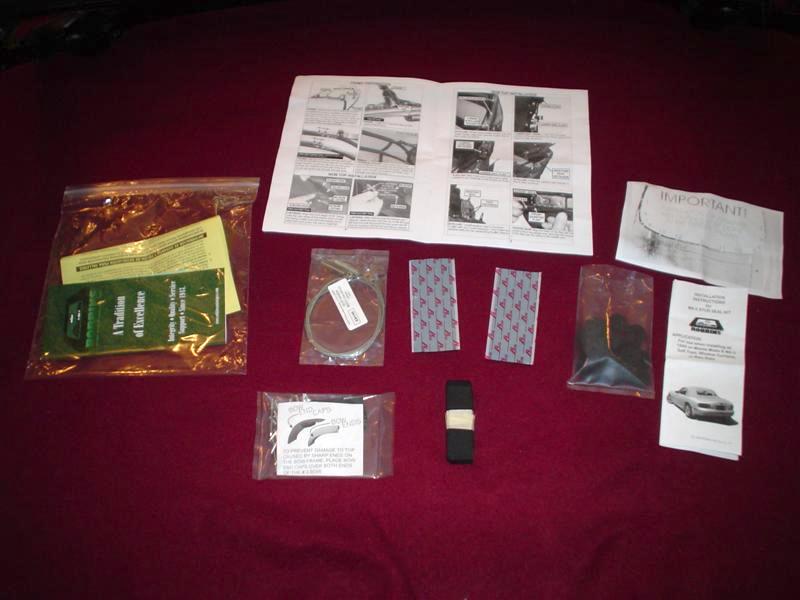
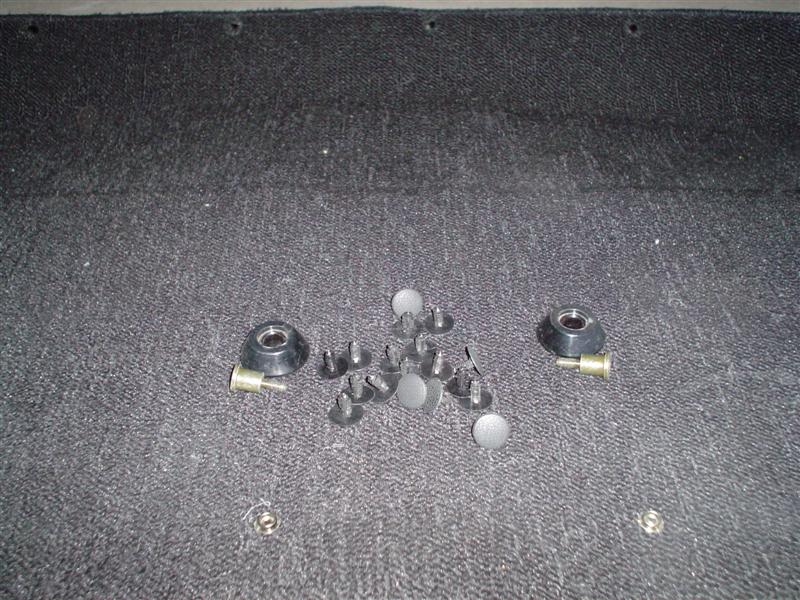
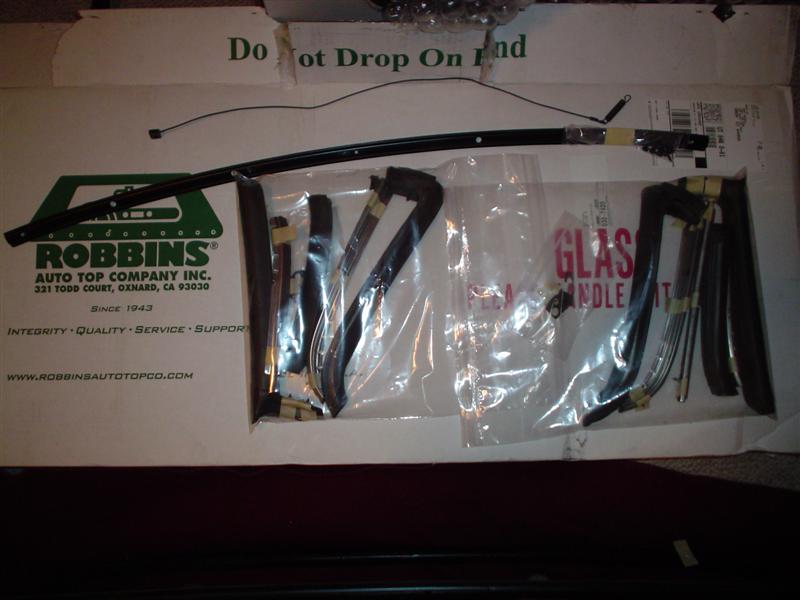
Here are the parts and instructions that came from Robbins with the replacement top as well as new tension wires. The new tension wires do not come with the top and must ordered separately. The 2 velcro strips (in the center of the picture) are not used on my 1991 Miata. Also the "bow end caps" (bottom left) are also not used on my model.
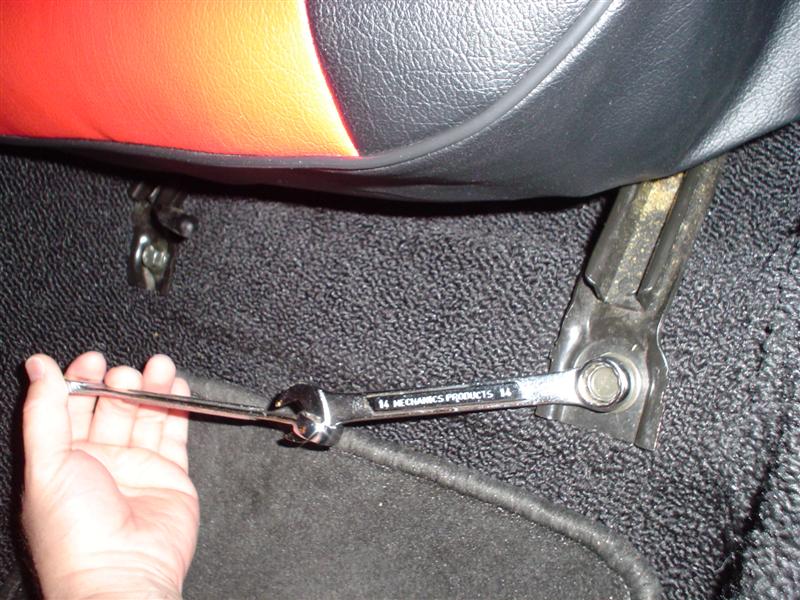
Remove the seats from the car. The bolts can be very tight and difficult to remove. I found it useful to use a box wrench and connect another box wrench to its end in order to get more leverage.
Go to the store (such as Harbor Freight) and buy a push-type fastener removal tool. Remove the push-type fasteners that hold the back ledge carpet in place. Be careful not to catch a carpet loop and cause a run in the carpet. There are also 2 blocks with a phillips head bolts that need to be removed. Remove the back ledge carpet from the car.

Remove the nuts from the 3 frames and remove the frames from the car.
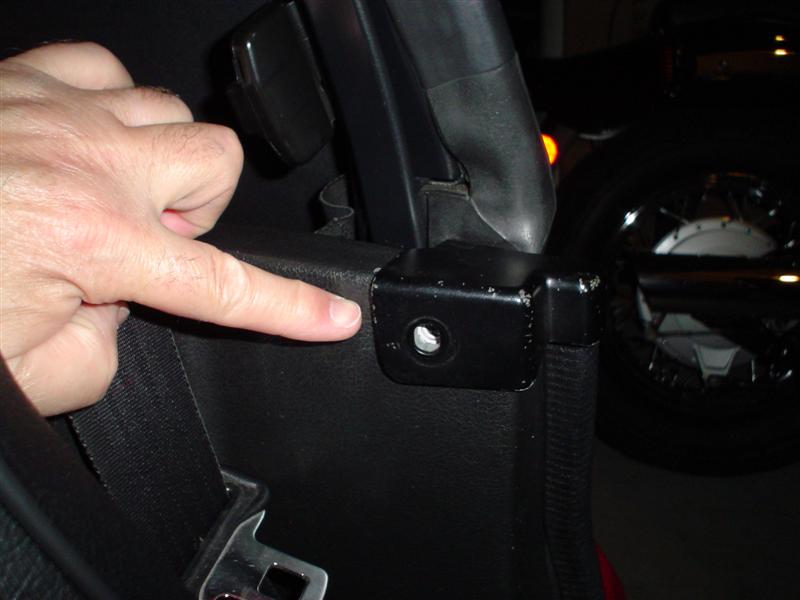
Remove the heavy metal 'belt line cover' behind the driver's and passenger's heads. There is a bolt on the inside (with a snap top) and a phillips head screw that screws right down from the top. Put them in a baggie with the screws, marking where they go and also which is left and which is right.
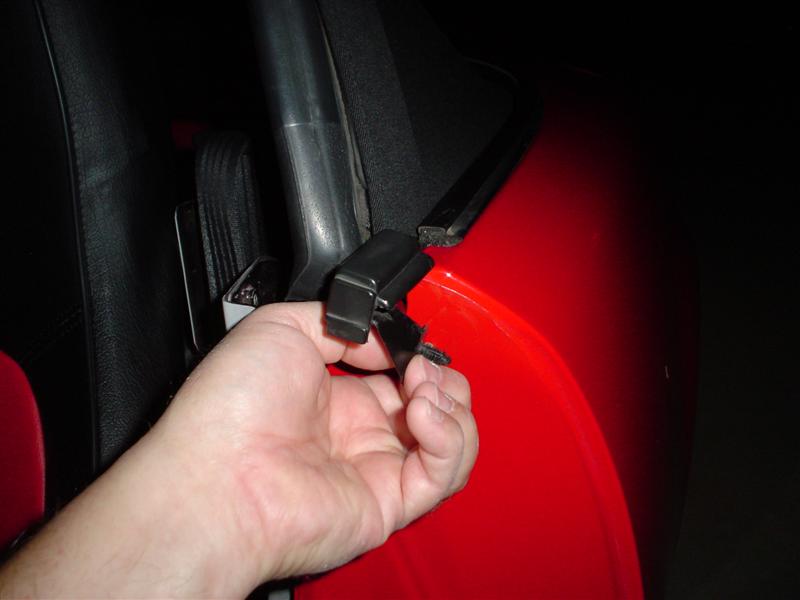
Remove a second metal 'belt line cover' that is right next to the previous step's piece. It is attached with a plastic push-type fastener. Put them in a baggie with the screws.
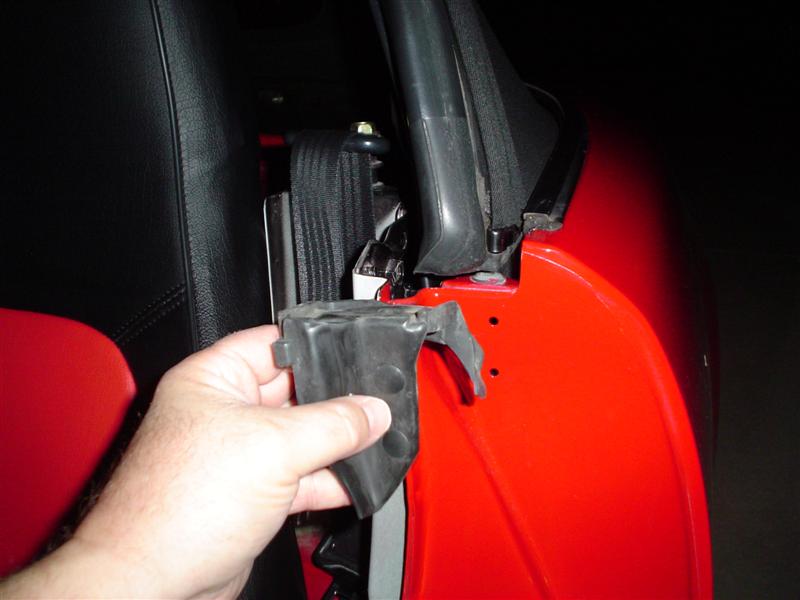
Remove the rubber cover from the same area.
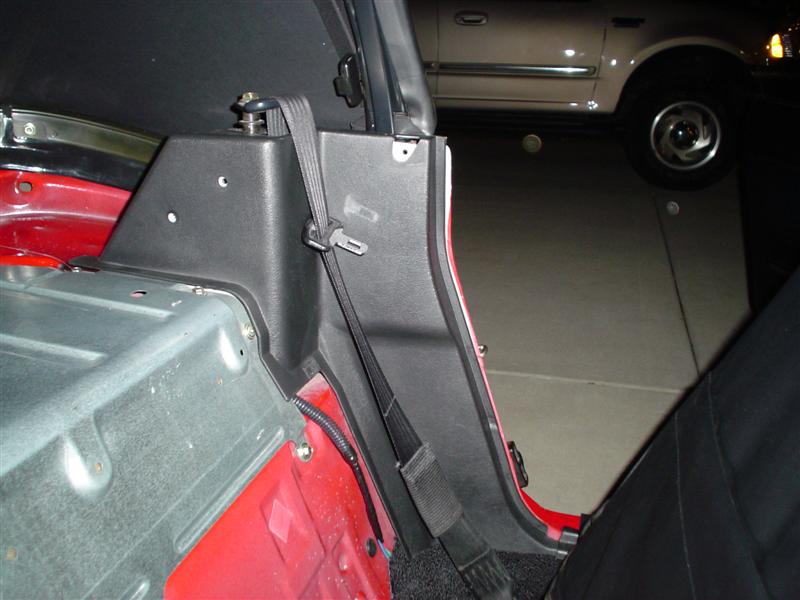
I then removed the seat belt tower covers by removing the weather stripping that runs along the back of the door and snapping off the large seat belt tower cover. There are a few small plastic pieces to remove as well.
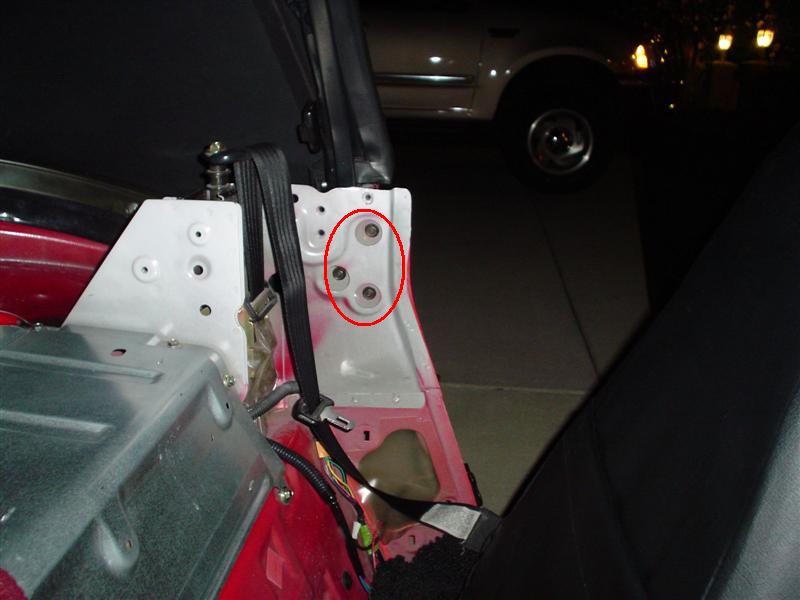
Here you can see the seat belt tower with the cover removed. The 3 bolts on each side that hold the convertible frame are visible as well.
Here is a picture of the seat belt towers from above.
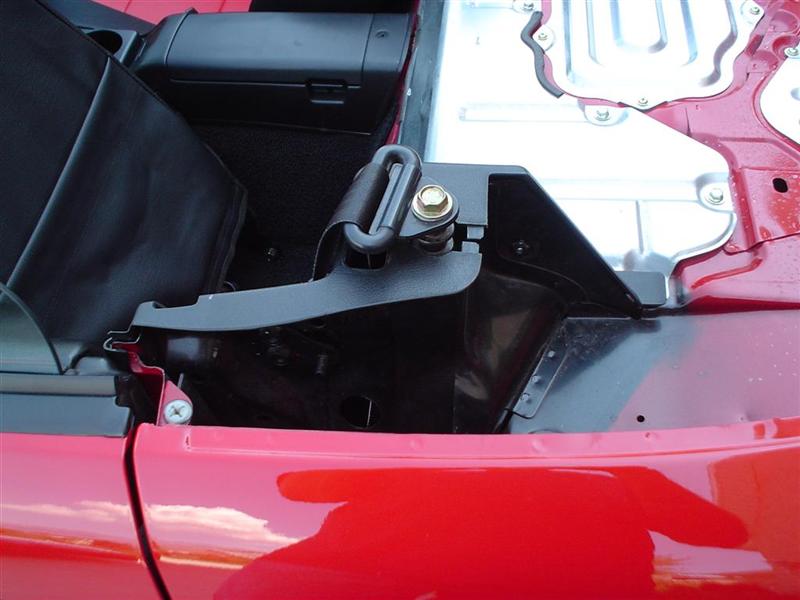
The convertible cloth is held in place in the front by a "set plate" and 7 screws. Remove the screws and remove the set plate. Bag the screws, tape the bag to the set plate, and set aside.
The front rubber is held into place by 2 screws. Remove the 2 screws. The rubber then gently pulls off.
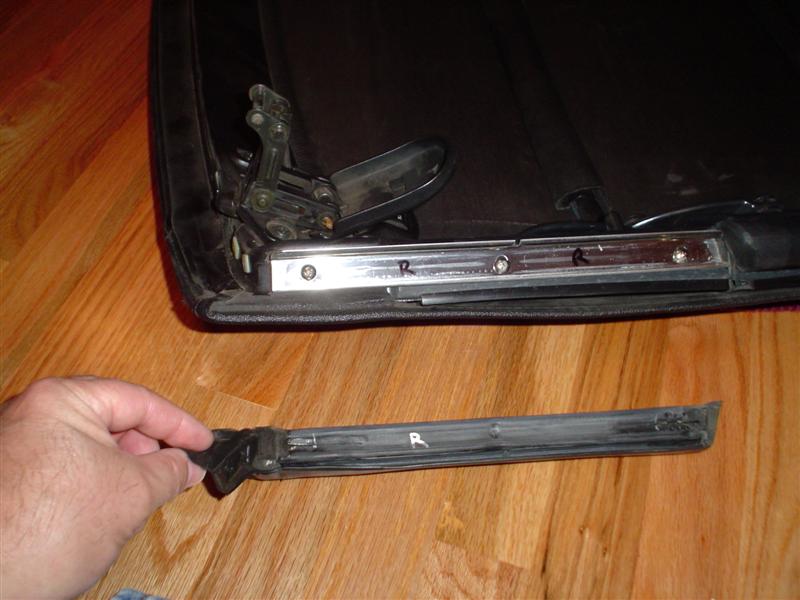
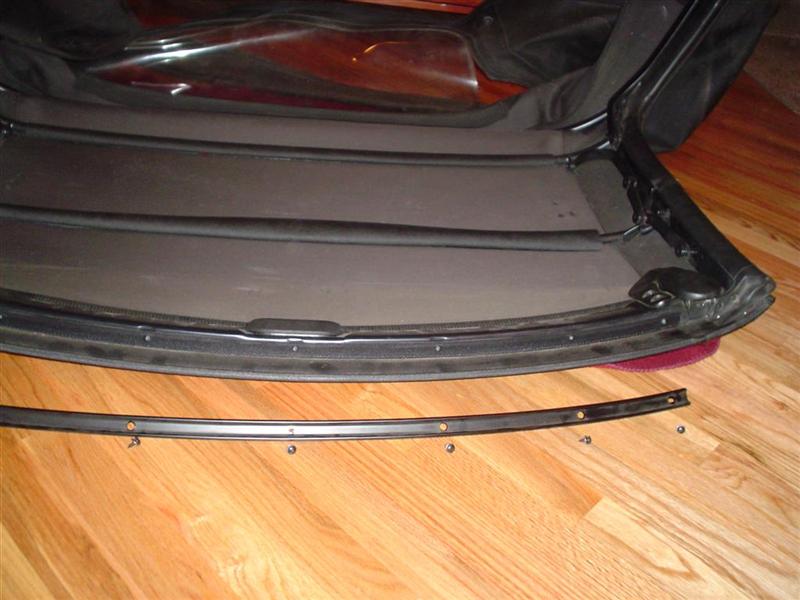
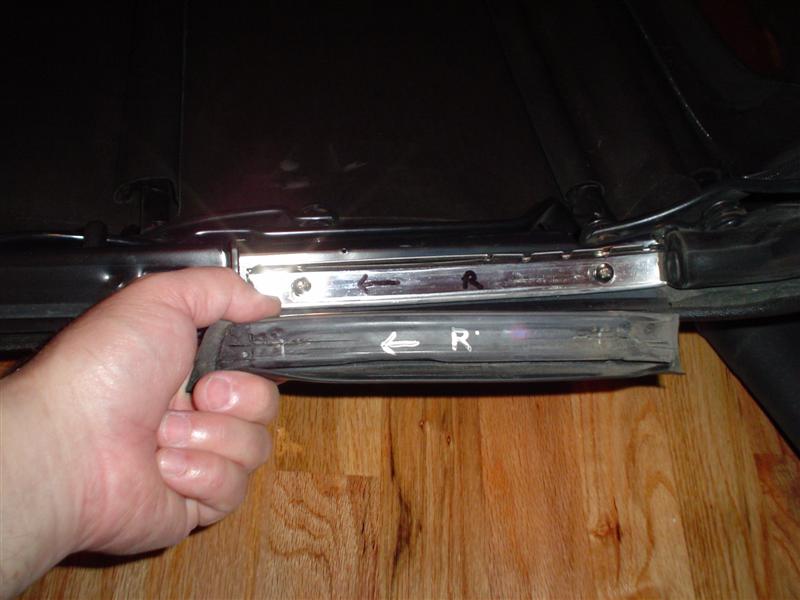
This is the front rubber off of the frame. Mark the rubber and the frame pieces. Unscrew the shiny frame piece too. These shiny frame pieces press the top to the frame and hold it in place. I placed the screws into the holes of the removed pieces and taped them in place. I put all 3 rubbers and all 3 frames from one side and placed them in a large ziplock bag.
The middle rubber piece just pulls off. Ease it off gently.
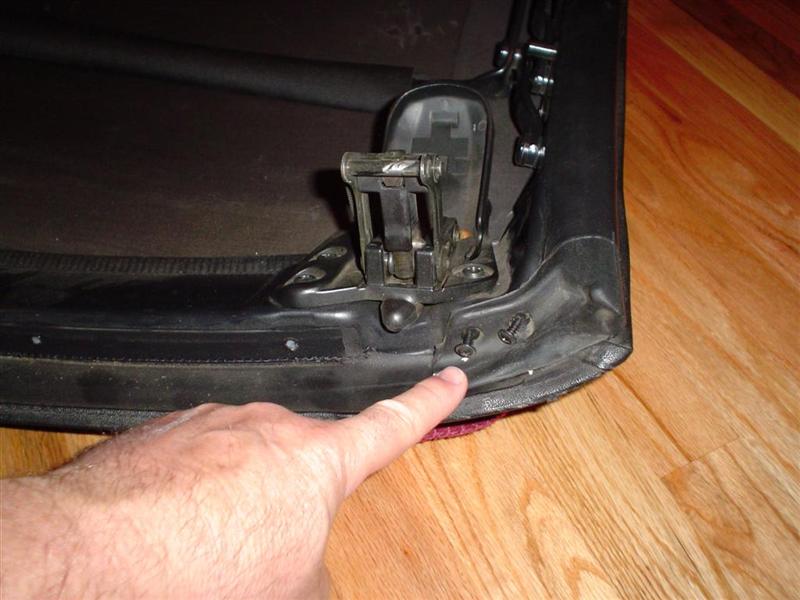
The third rubber has 2 push-type fasteners at one end.
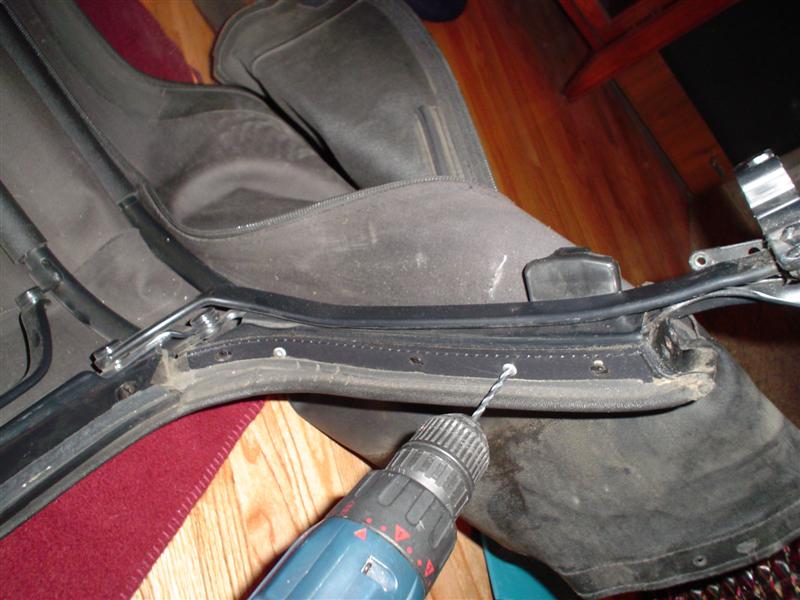
The easiest way to access the 2 push-type fasteners is to remove the 2 rivets holding the cloth behind it. Removing these 2 rivets will allow you to pull the cloth away from the area around the push-type fasteners. To drill out the rivets, pick a 1/4 inch drill and carefully drill away the top of the rivet. Drill out the rivets and pull the cloth away from the end of the third rubber where the push-type fasteners are. Use a push-type fastener pry tool. Really, just go buy one.
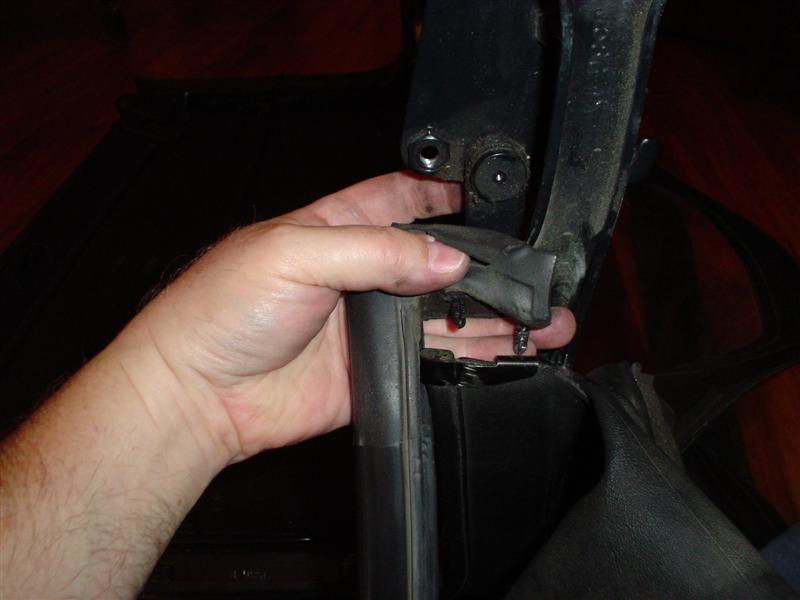
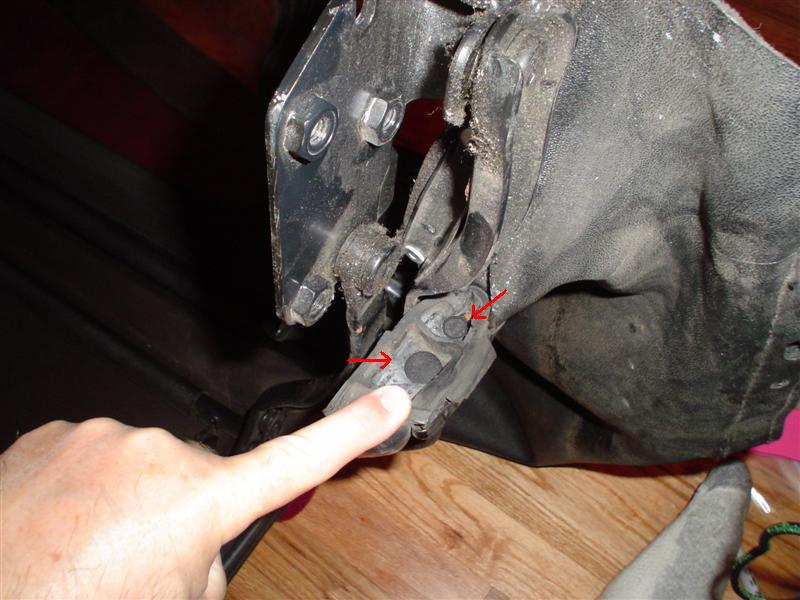
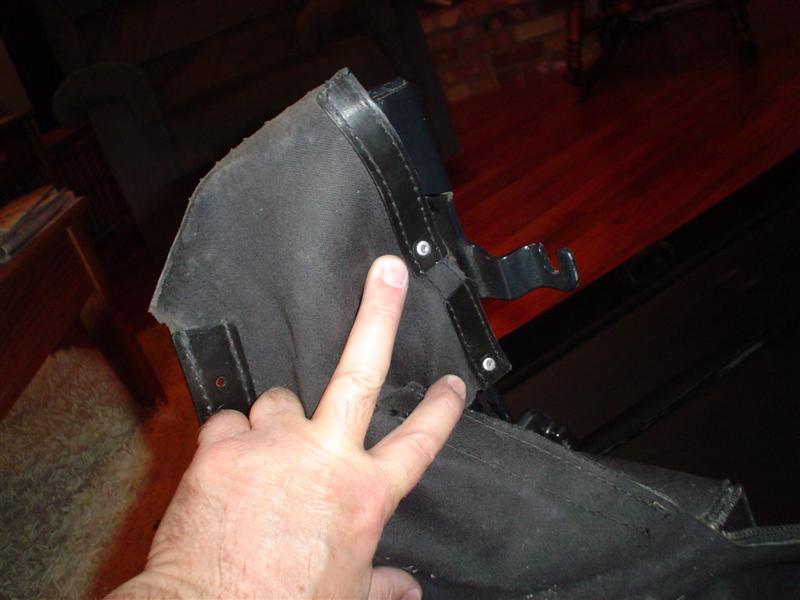
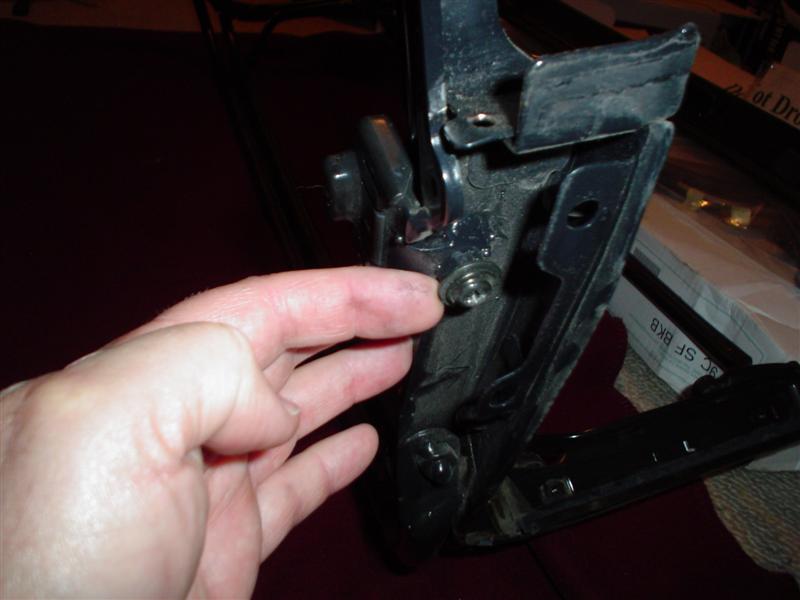
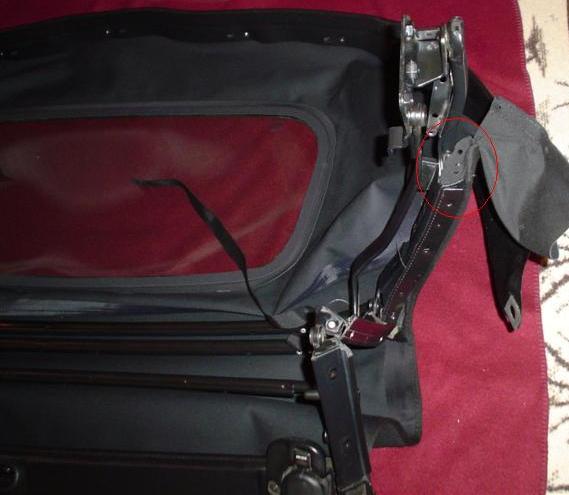
The third rubber is now removed and you can see the two push-type fasteners. Notice the cloth is pulled down just behind it. And just below the push-type fasteners is the infamous B-Pillar Retainer! Yeee Haaaw! Now remove the shiny frame under the 3rd rubber. Mark it so you can replace it on the correct side with the correct side facing out.

Wow, the wonderful B-Pillar Retainer. Now I finally know what it is, what it is for, and where it goes.
Remove the B-Pillar Retainer. It is held in place by a screw in the center hole. The outside 2 holes are where the push-type fasteners of the third rubber go thru. Mark it as left or right side, and place it in the appropriate left or right side bag o' parts.

A close-up of the B-Pillar Retainer. Cool!
We already removed 2 rivets behind the B-Pillar Retainer. Now drill out the 2 rivets under the 3rd rubber.
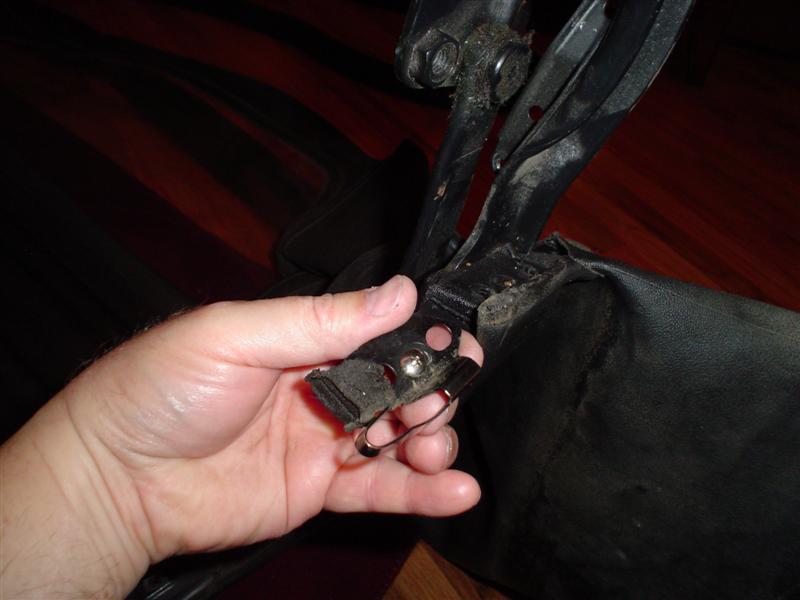
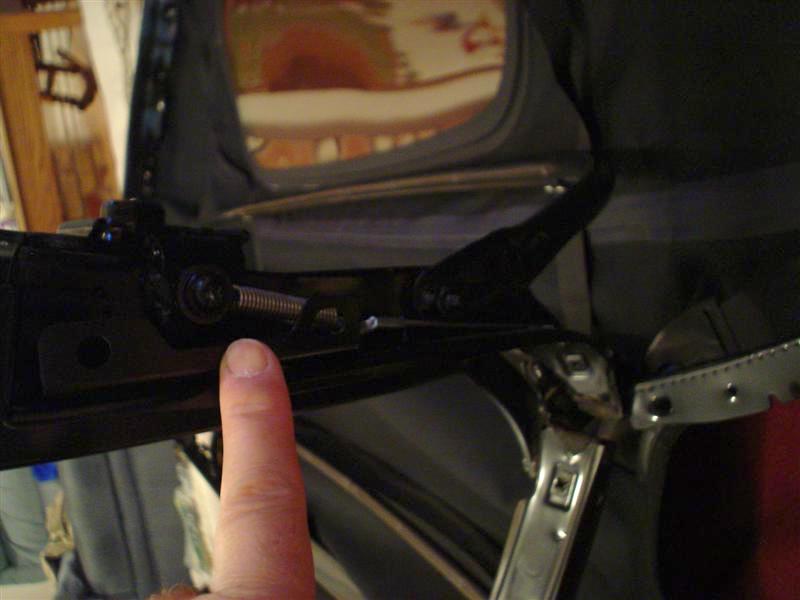
Fold the top so that the spring is not sprung tight. Unscrew this screw (located a little below the B-Pillar Retainer) and remove the spring. Replace the screw so that it will not be lost.
Remove the 3 rubbers, 3 frames, the B-Pillar Retainer, and the spring from the other side. Now you can remove the cloth from the frame
OK, here is where I disagree with every other set of instructions for installing a new top. All the other instructions say to carefully pry the "listing" slightly away from the bow so that the cloth can be removed. Instead, I separated the cloth strips from the main section of the convertible top and just slid them off of the end of the listings. I un-did the velcro and also tore that strip from the main section of cloth so that it could slide off too. Obviously if you were removing the top, repairing it, and replacing it again, you would not damage the top in this manner.
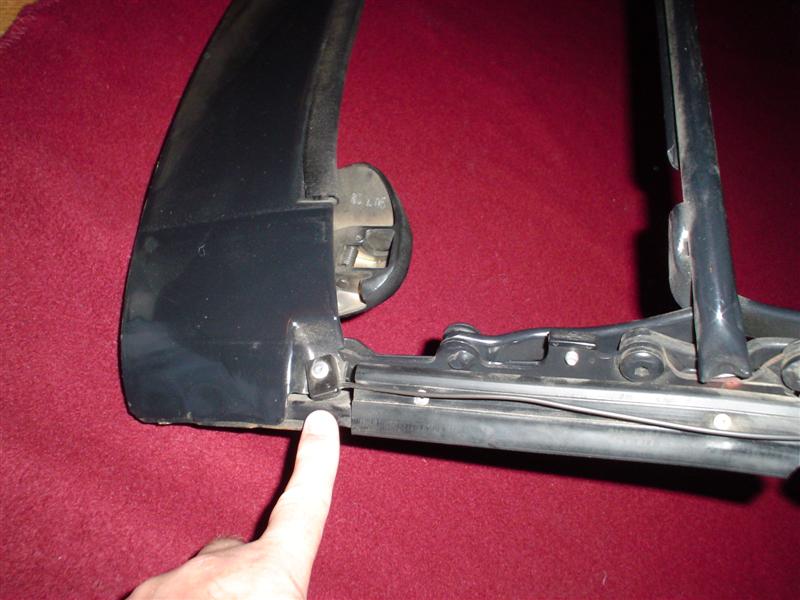
Here is the hole in the frame where the tension wire goes thru. The tension wire usually goes thru the cloth top too but here I am showing it without the top.
If you are replacing your tension wires, drill out this rivet to replace the tension wires. One side of mine was broken so it was a good thing I bought new ones.
Here are my bags o' parts. I really did place the parts in large ziplock bags, one for the left and one for the right. The B-Pillar Retainer is in there too. The front "set plate" and its bag o' screws which is taped to the "set plate" are also visible.
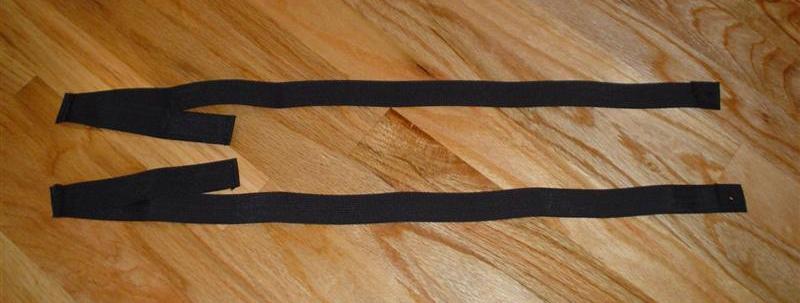
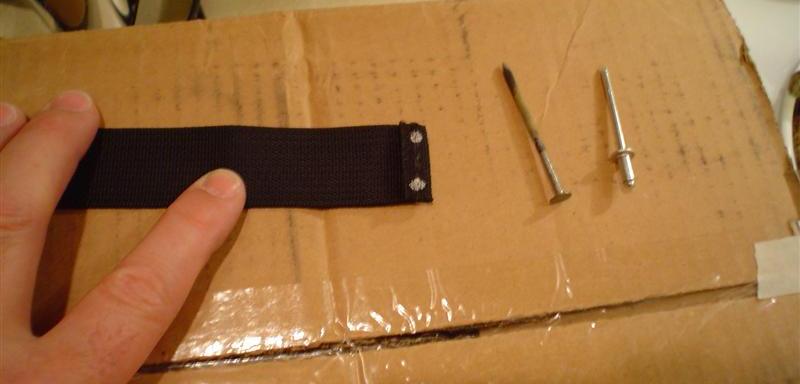
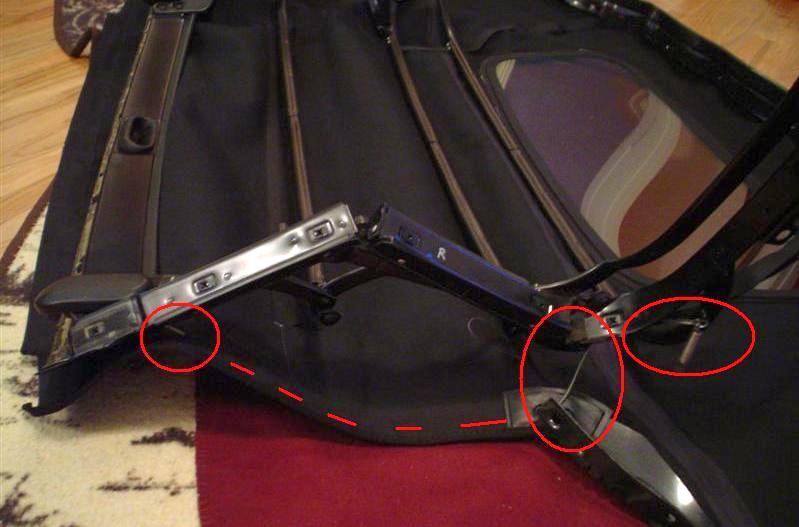
One of the more difficult things I had to do was to add a strap to each side of the frame. This is only necessary on the 1990-1997 Miatas. The later years already have this modification. The glass window is heavy and these straps make for a smoother top along the back corners to the left and right of the window. Also it allows for the 4th bow to move against the 3rd bow when collapsing the top and it pulls the 4th bow back into place when the top is up. Here are the straps. Although the installation instructions make no mention of it, there is a left strap and a right strap. The straps are a bit dark and difficult to see but I have laid them out so that the short straps rest on top of the longer straps. Notice that they are opposites of each other. One short strap angles left and the other right. To determine which is left and which is right, test install them. To test install each one, slide the strap ends into the listings pulling on the long end of the strap and holding it approximately where it will eventually be attached to the 4th stud from the end. If correctly installed the strap will lie flat and smooth. If incorrectly installed there will be a pucker where the strap leaves bow #4. This only takes a few seconds so try it both ways and see if becomes obvious which way is right.
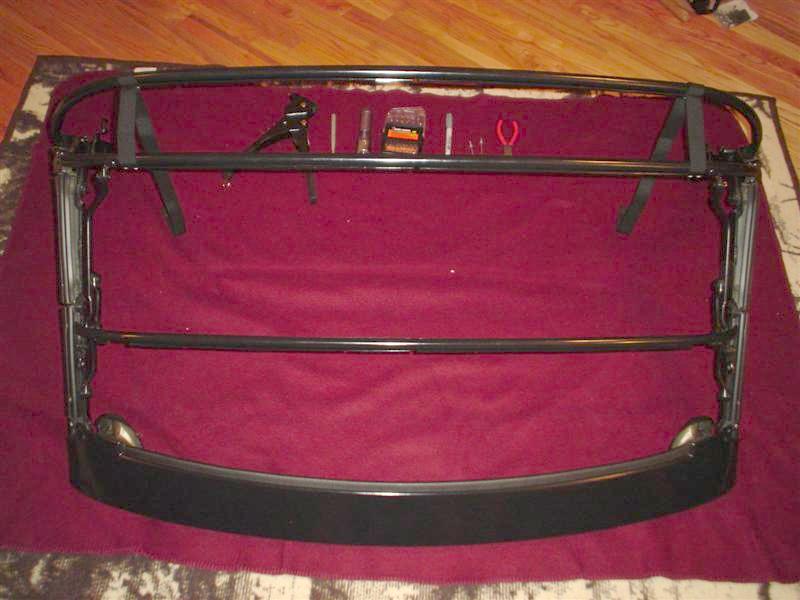
It might help to see the straps once they are installed on the frame. Next I will show the steps to install the straps on the frame. I also took a few minutes to wipe down the frame. It was pretty dirty and by cleaning it I keep my hands cleaner and therefore the top cleaner while I am working on it.
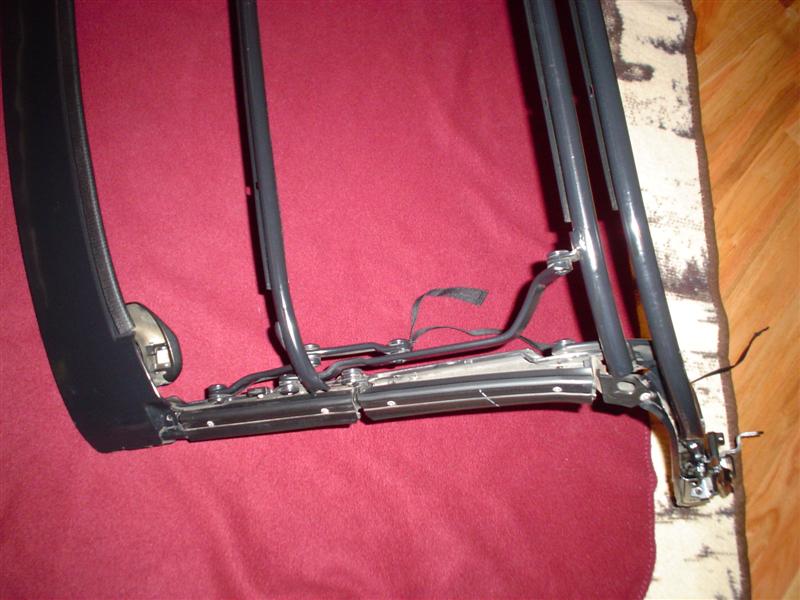
The bows are numbered 1 thru 4 with bow #1 being the thick front bow and bow #4 is the rearmost bow. Here is a picture of the frame with bow #4 lifted and resting near bow #3. Bow #4 hinges freely and seems to move very low, but once a top is installed it will stay only about 5 1/4 inches behind bow #3.
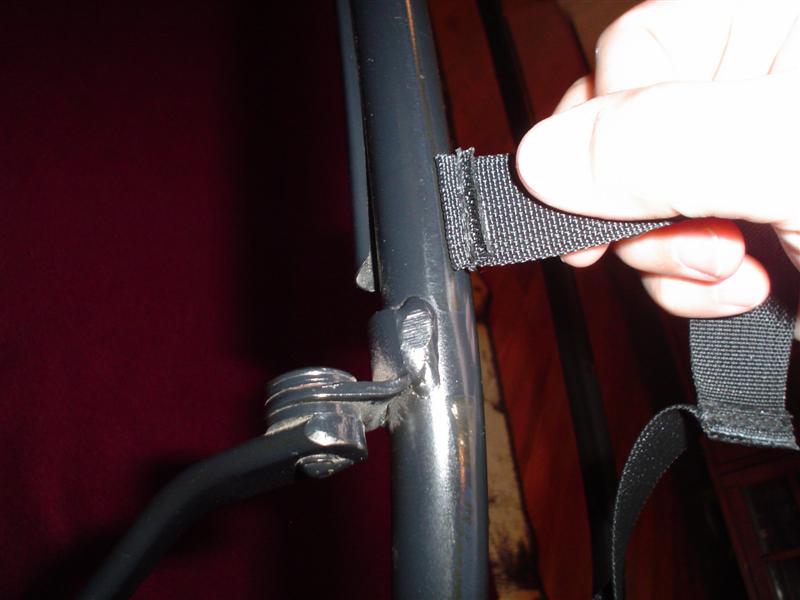
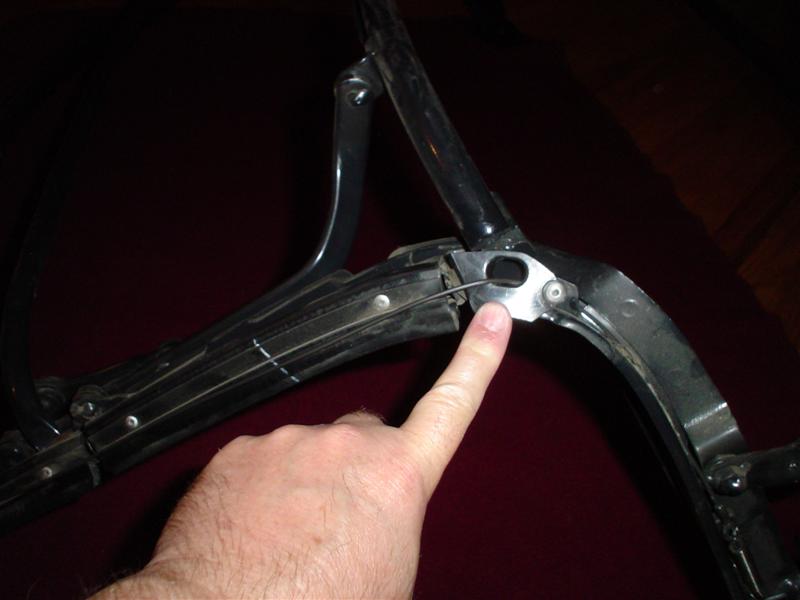
Here is a close-up of bow #3 and the end of one strap. The convertible top frame has bows and the bows have listings. Listings are the thin metal pieces attached to the bows. Each listing has a lip where its metal edge is folded over. The top material and the straps have edges that are folded over to make a lip. When the lip of the material is pushed between the bow and the listing, the lips interlock. In this picture you can see the lip on the listing and the lip on end of the strap.
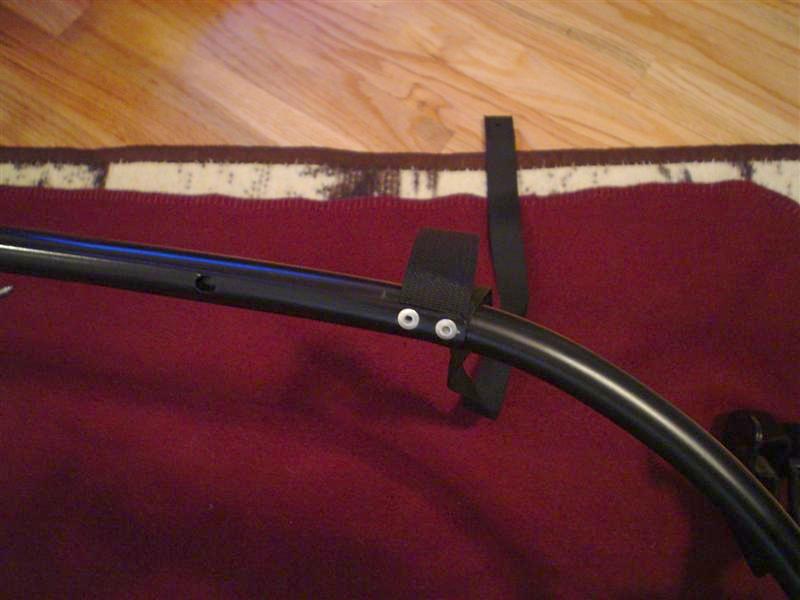
The straps need to be riveted to the bows. In order to install the straps, it is necessary to drill holes in the listings and bows. Before I go thru the steps to accomplish this task, perhaps it will help to show an example of what we are trying to do. This picture shows how it will look when one strap is riveted to one bow. Next I will go thru the steps to install the straps onto the frame.
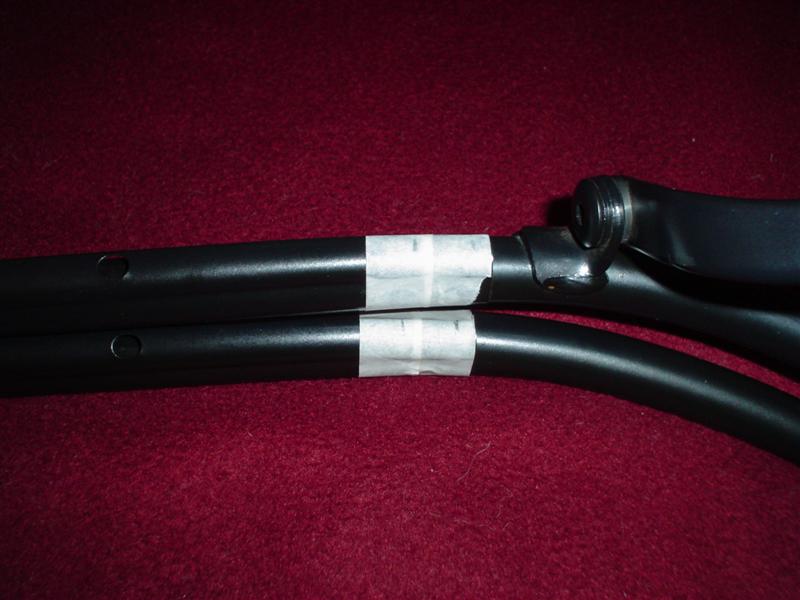
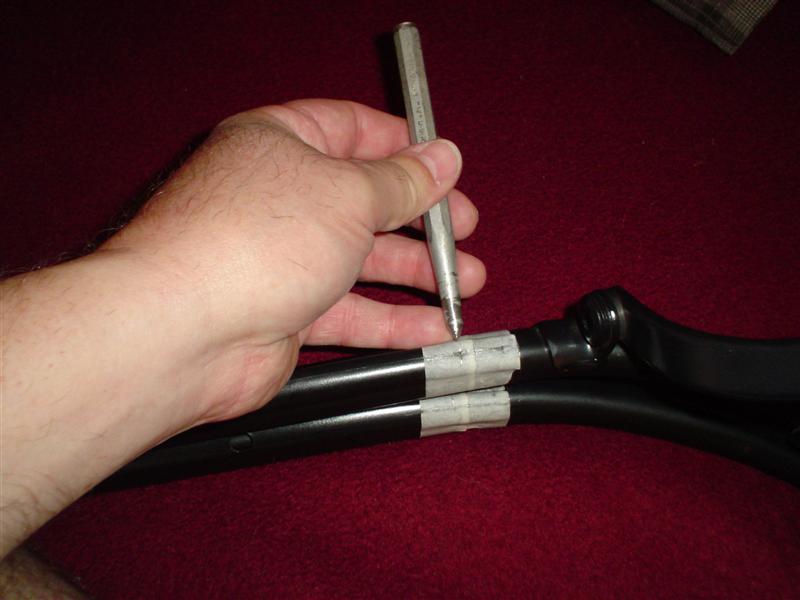
I had to drill holes for the rivets that will hold the straps to the bows and listings. The holes are drilled though the listing and thru one side of the bow. The strap fits between the bow and the listing and a rivet compresses all 3 together. The holes are 5/32" in diameter and are 3/16ths and 13/16ths of an inch from the end edge of each listing. This makes the holes 5/8 of an inch away from each other. Here I wrapped the bow and listing with tape so that I could make a pencil mark where I needed to drill. The tape is applied right at the end of the listing so that I could measure back 3/16ths and 13/16ths of an inch and mark it. Look below when the tape is removed to see how the listing really looks.
I used a center punch to start the placement of the holes. Be gentle, the metal is very soft. While I was using the center punch I placed a piece of metal between the listing and the bow so the listing would not pinch against the bow.
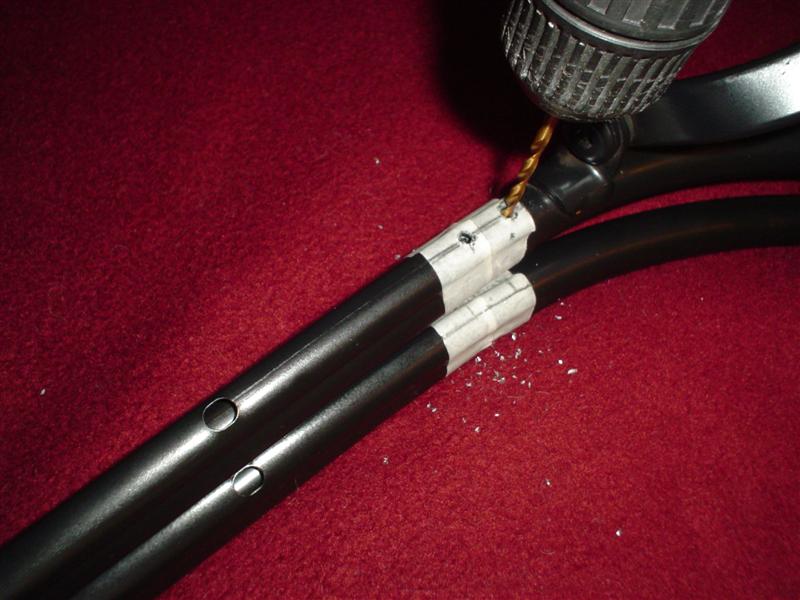
The metal is very soft and easy to drill. Remember, drill thru the listing and thru one side of the bow, aiming toward the center of the bow. I centered the holes in the listing, not side to side obviously since those measurements are given above, but in the height of the listing similar to the larger holes to the left of where I was working.
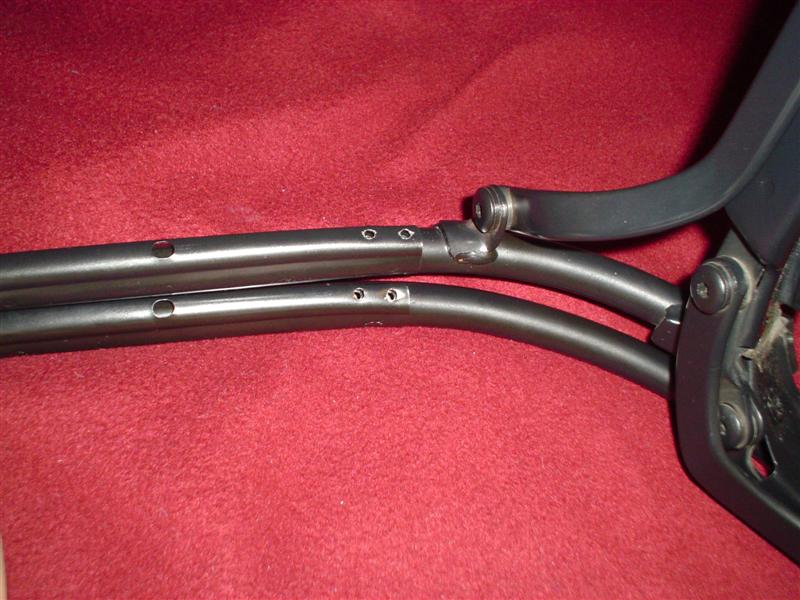
This picture shows the holes. You can even see the hole in the listing and the hole in the bow just behind it. Check the size of the hole by test fitting a rivet (DO NOT INSTALL THE RIVET YET). I had to enlarge the hole slightly but I did not use the next larger drill as that would have been too much. After drilling I cleaned up the metal shavings.
I next fit the strap into the listing and marked onto the strap where the holes were located. Here you can see the markings I made on the strap using a silver Sharpie. I then removed the strap and made a hole in the strap by heating a nail and melting the hole in the strap.
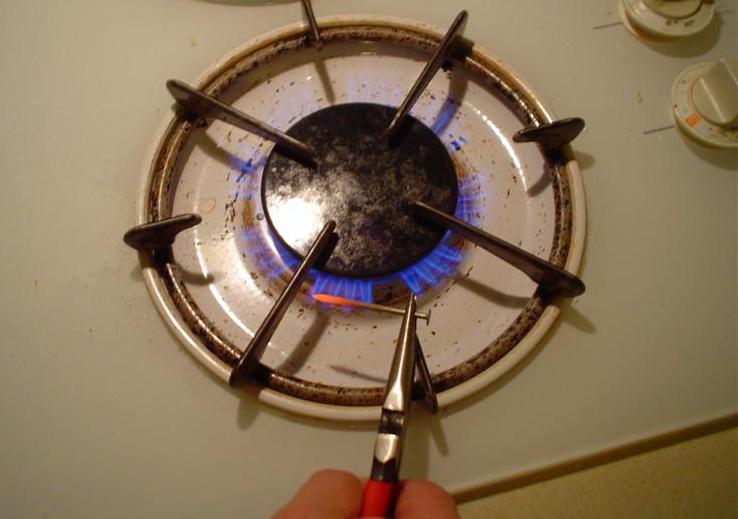
Here I am heating up a nail.
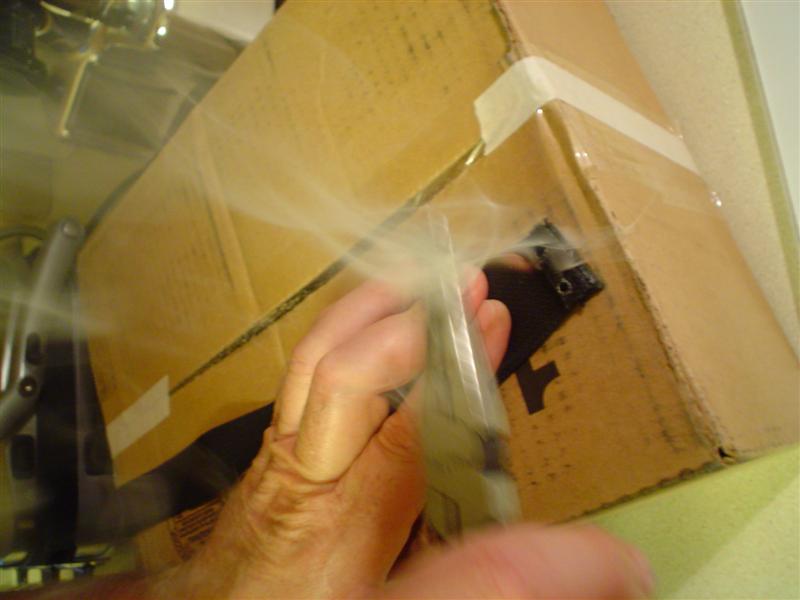
I used a box to press into so that I would not melt my countertops and get divorced. I am sure the fumes should not be inhaled. The hole was VERY EASY to melt into the strap. Be careful and go easy here. Use a rivet to make sure the holes are the correct size.
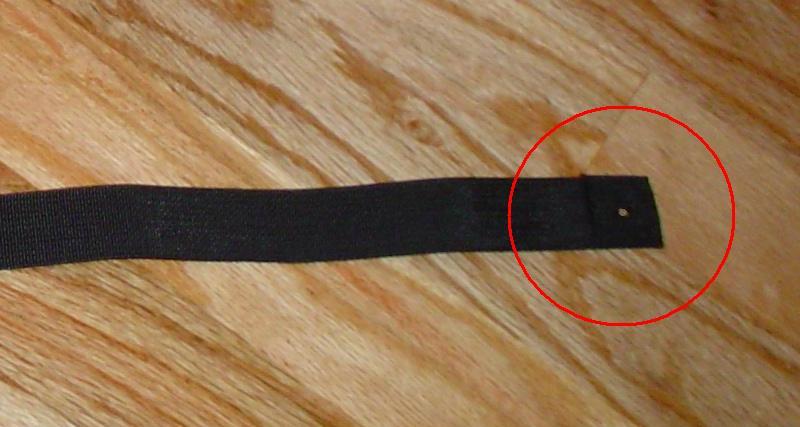
Also, there is already a single hole burned thru the end of the strap where the strap will press onto a stud. In order to check that it will fit, take the strap, walk outside to you car, and press the strap onto the stud where it will eventually be placed. In my case, the hole was not large enough. Determine if you need to enlarge the hole and if so, use the red hot nail trick to enlarge it now while it is easy to work with.
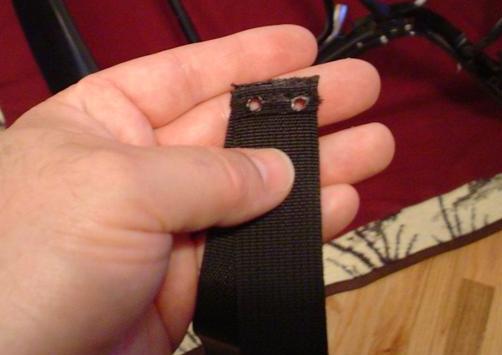
Here are a couple of the holes I made.

Install the straps into the listings and install rivets to clamp the straps between the bow and the listing. Make sure you drill all 8 holes and mark and melt all 8 holes in the straps before installing any rivets. Remember that the straps are not identical. There is a left strap and a right strap. IMPORTANT: Install all the rivets in bow #4 before installing any rivets in bow #3 since it will be easier to work on bow #4 with the strap free of bow #3.
Installing rivets. SWEEEEET!
Straps are installed. I hope this makes it easy to visualize how the bows, listings, straps, and rivets all fit together.
I previously drilled out the existing (and broken) tension wire. I had to drill the hole very slightly for the new rivet to fit. There are 2 large rivets in the package to use for installing this.
The tension wires are not identical as there is a left and a right. I placed the smooth side of the metal tab down so that the smooth sides would mate and would make a tight rivet connection.
To reinstall the fabric onto the frame I first spread the top out flat with the inside facing up.
I then placed the frame on top of the fabric.
Next I threaded the tension wire thru the channel in the top.
Thread the spring and wire thru the hole in the frame and attach the spring to the screw on the frame.
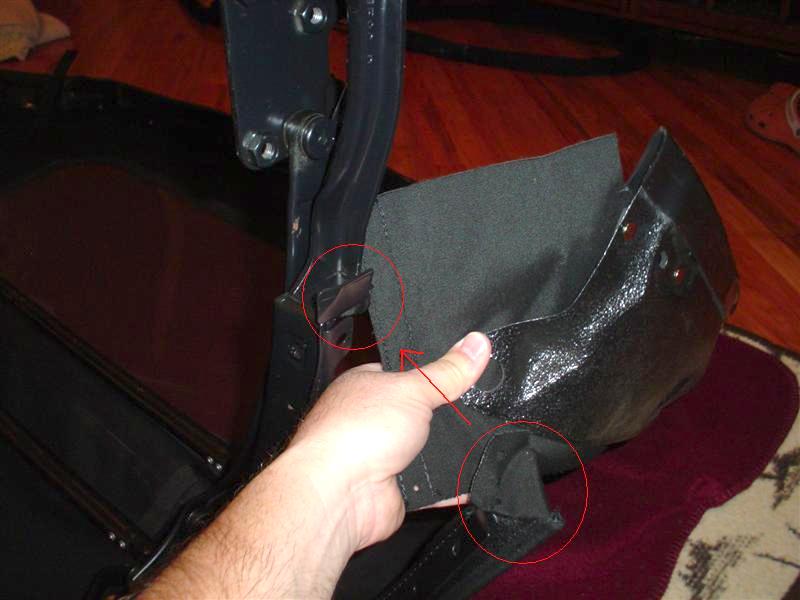
Now attach the fabric to the b-pillars. To make it easier, fold up the frame a bit and bring bow #4 next to bow #3. This is a little difficult since the fabric must be stretched pretty tight in order to get the fabric pockets to go over the metal tabs at the ends of the b-pillars.
Here you can see the fabric installed over the b-pillars. Next, you will want to install the b-pillar retainers.
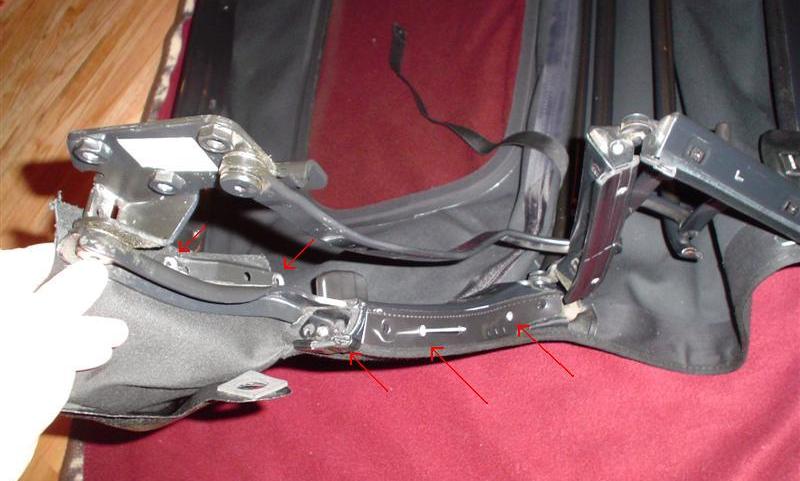
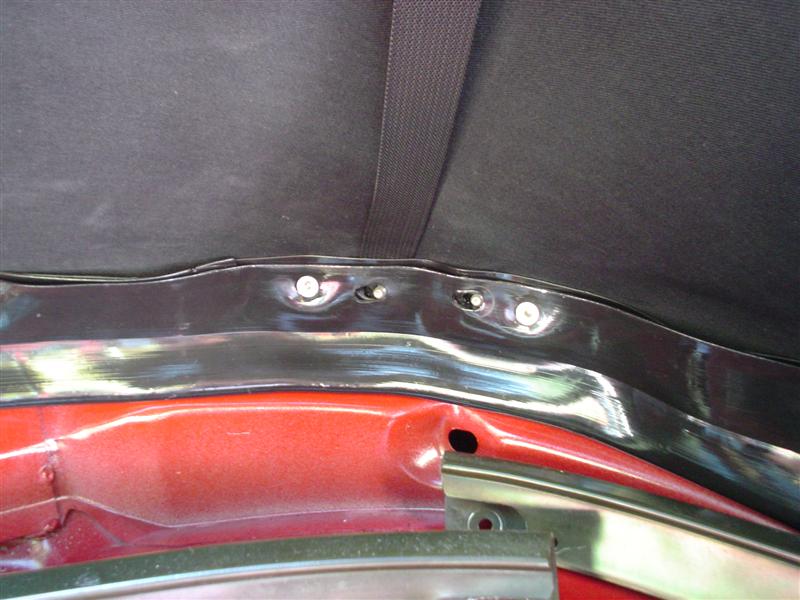
Then, you want to install 2 rivets in the plastic edge that will be under frame #3 and rubber #3. Also, install 2 rivets to attach the material just behind the bottom of the b-pillar. This picture is of the left side so it may look backward.

Install silver frames #2 and #3 and install the rubbers over those. There will be markings on the frame where the screws were aligned originally. Install all the screws loosely and adjust the frame so it is positioned as it was originally.
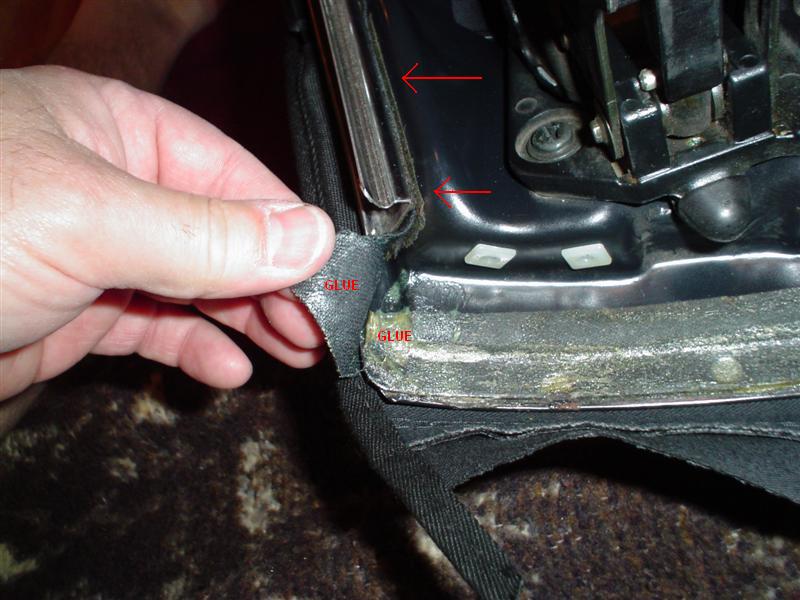
There is a flap of fabric that goes under the #1 silver frame and rubber. This strap has a hole for where the front screw goes into the #1 silver frame. Line up this flap and screw it down with the silver frame. Also, here I am gluing the corner. The instructions say to use some special glue. The stores around here don't carry that glue so I bought a small bottle of "Weldwood Contact Cement" for about $3.00. Here I am putting contact cement on the frame and on the back of the front half of the flap mentioned above. With contact cement the idea is to spread cement on the areas to be glued, in this case both the frame and the back of the flap of fabric. Then you let the glue dry for 10 minutes to 60 minutes and when you press them together they are stuck forever. This isn't very forgiving. The idea is to make sure you know exactly what you want to do and do it right the first time. Next I spread cement on the front corner and on the back of the fabric, waited 3 minutes (not as patient as I was a few sentences ago, huh?) and pressed down the front corner. I then installed the front rubber #1.
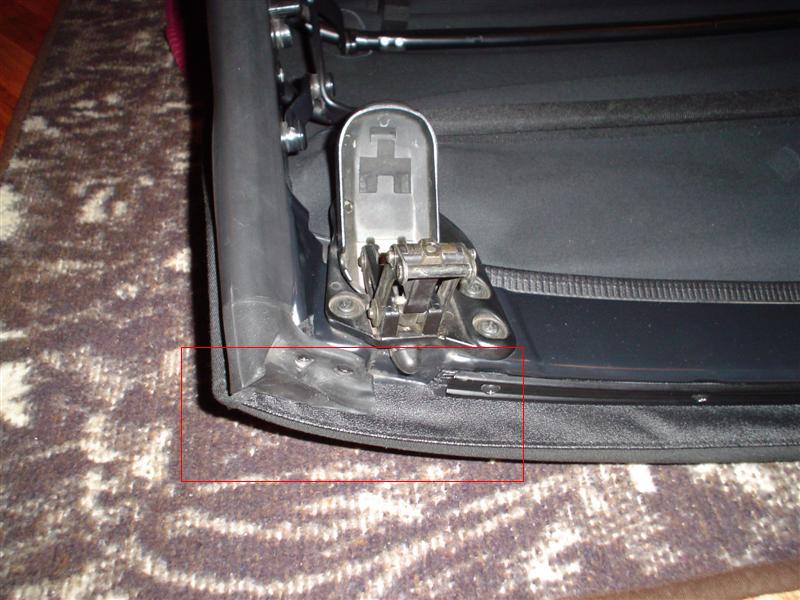
Next I used contact cement on the frame and on the corner of the fabric. I glued up to and maybe just a hair past the first screw on the front set plate. Again, be sure you know what you want to do and then glue it. It is a little difficult to know how much of the edge of the fabric to glue. Even if you install the set plate and straighten the folding top, the fabric will not be pulled tight. The resistance in closing the top comes from the tension wire and spring and is not because the fabric is being pulled tight. Anyway, I applied glue to the frame and the underside of the fabric, waited a few minutes, and pressed them together. Here is what it looks like after gluing down the corner and installing rubber #1. At this point I was done installing the fabric onto the frame.

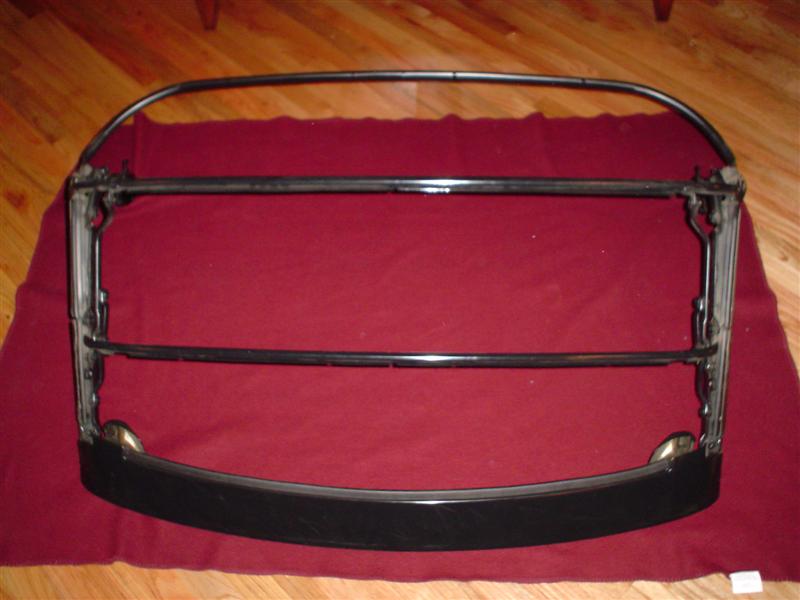
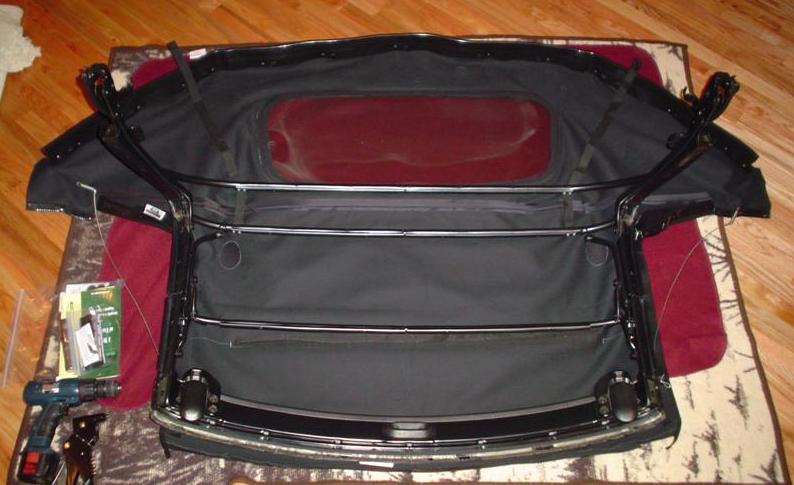
The finished top with fabric installed. My back hurts a bit too much from sitting on the floor and reaching over the top so I will attach it to the car tomorrow.
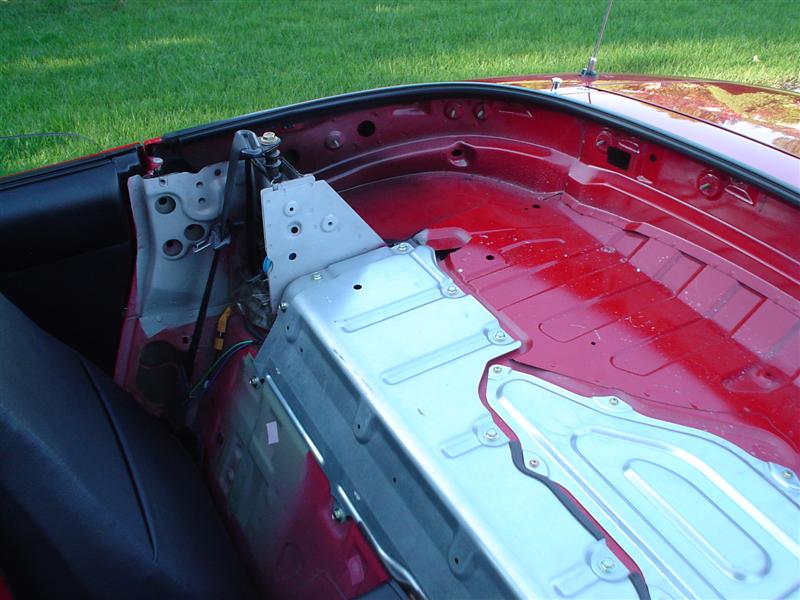
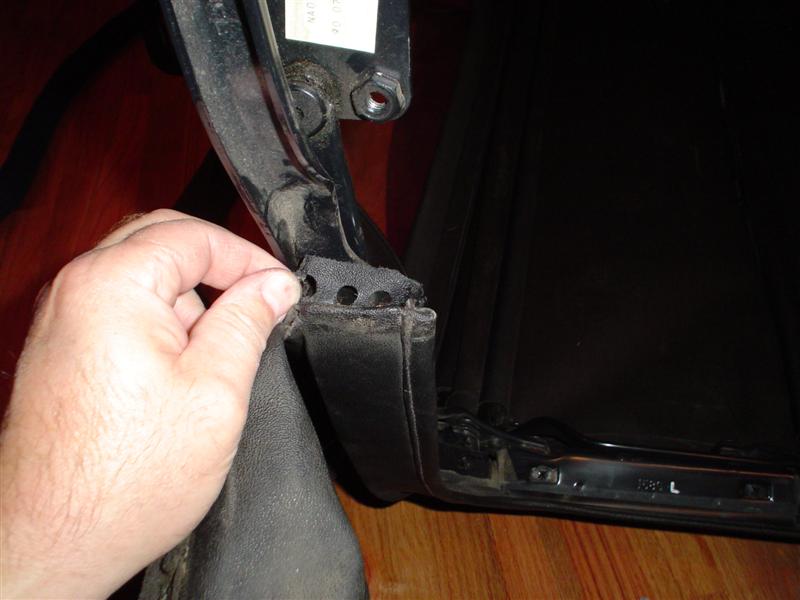
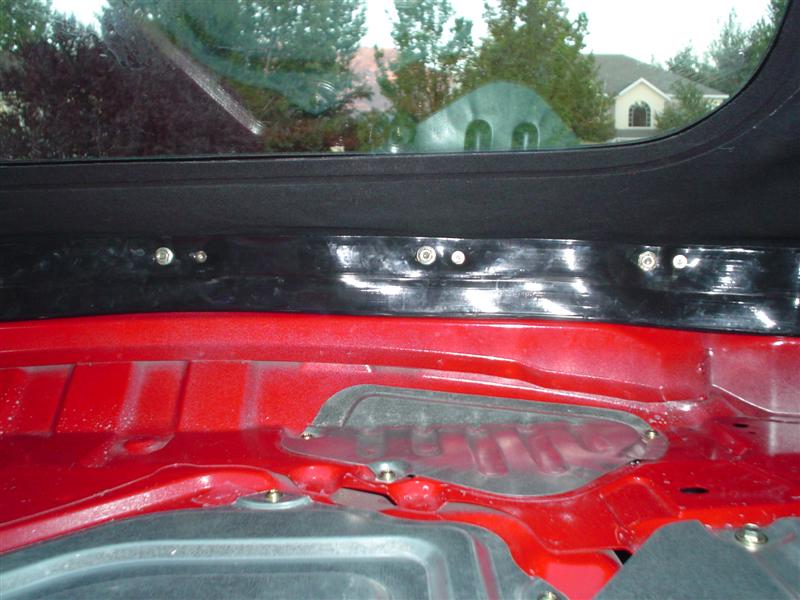
Here is the back ledge before the frame is reinserted into the car.
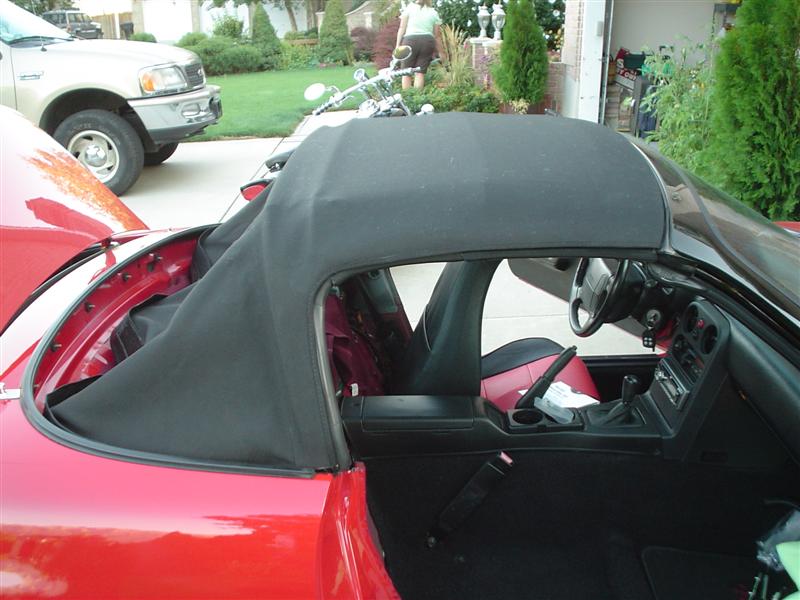
While off the car, extend and lock the top as if the top were in the "up" position. With a helper, place the top onto the car. There are 2 posts on each side of the car just behind the seats and on the outside of the seat belt towers. The convertible top frame has 2 indentations that fit over these posts. The posts are threaded and may not seem like posts. When the top rests on these posts, the 3 bolt holes will line up ready for the bolts to go in. Put in the 3 bolts on each side and tighten them up. The picture shows the top latched to the front. Make sure the top is unlatched before going on to the next step.

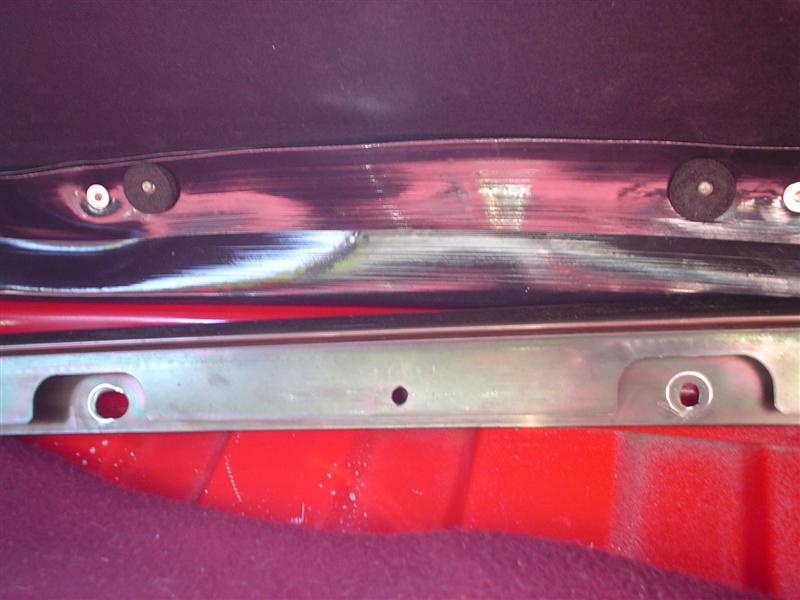
Place the little foam stud seals on the studs. Next place the rain rail onto the studs. The Robbins rain rail is made out of wonderfully flexible rubbery material. This is a huge improvement over the factory hard plastic rain rail that cracks if you even look at it.
Install the strap onto the stud right after the first (outside) stud seal. This means you have to bend the rain rail slightly. If you didn't follow the instructions many, many steps ago, you may find that the hole the factory put in the end of the strap is not big enough to push the stud thru. If you need to enlarge it, you can use a soldering iron to melt the hole a bit bigger.
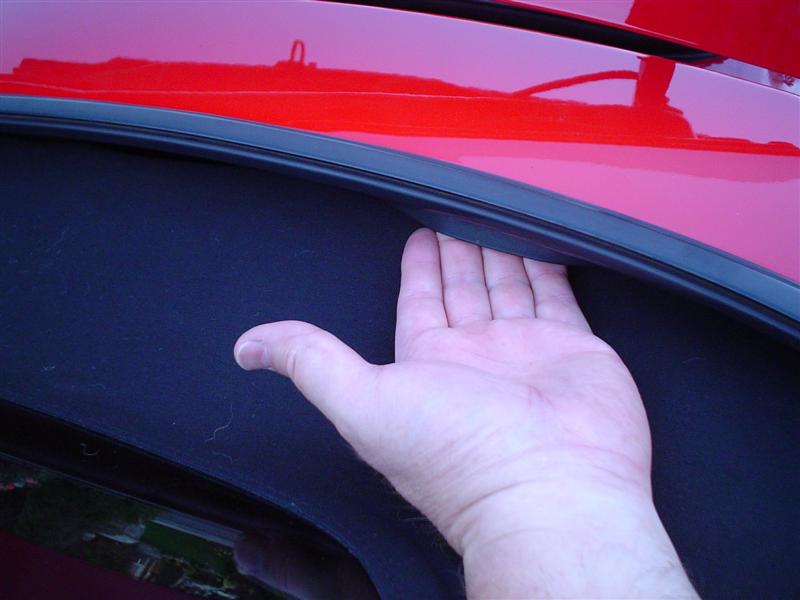
As you place the rain rail onto the studs you must make sure that the rubber flap on the belt line hangs down inside the rain rail. This may require a helper. You may have to remove the rain rail off the studs and try again.
At this point many people comment that they cannot push it all together. I decided to temporarily screw on the nuts to help compress the rain rail to the studs. It also helps to do this on a hot day when the rain rail is very soft and flexible. I was careful not to over tighten the nuts and strip the threads.
I removed the nuts and placed the stud seals on the studs.
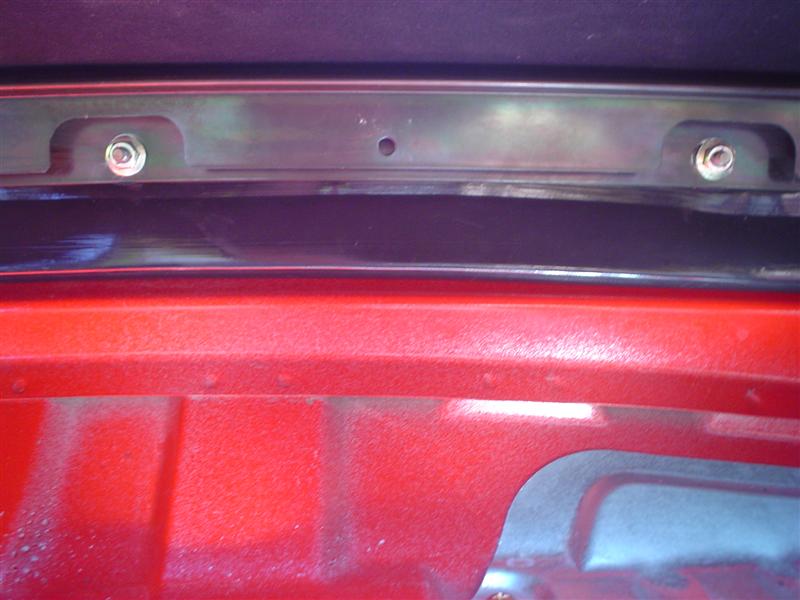
I attached the metal frames onto the studs and tightened them according to the diagrams provided. Since the frames are curved and tightening down one stud may affect the others, it is very important to tighten them as described in the documentation that came withe the top. I was careful not to over tighten the nuts and strip the threads.
Here it is installed but it is so tight I cannot latch it. I have it in the sun to warm up and hopefully it will stretch.
(Although if you look closely you will see that the belt line covers have not been replaced yet.)
For two or three days I left the top unattached and put a half dozen books on the front edge to help stretch it out. IMPORTANT: I adjusted the latches so that they would be as loose as possible. This is so easy to do with no tools, just my fingers. I just pressed the hinged barrel nut holder out of the way. Then I twisted the latch to make it longer and pressed the hinged barrel nut holder back into place. After three days of letting it stretch with the books on top I latched the top but did not tighten the latches. It took three people to help me latch the top. Again, I did not press the latches closed. I left the car in the garage for a few days so that the top would stretch. I drove the car to work (I drove slowly and held on to the top) and let it sit in the hot sun. By the end of just one day the top was much less tight. The next morning I pressed the latches closed and drove it to work to sit in the sun. Now I can latch and unlatch it as I wish.
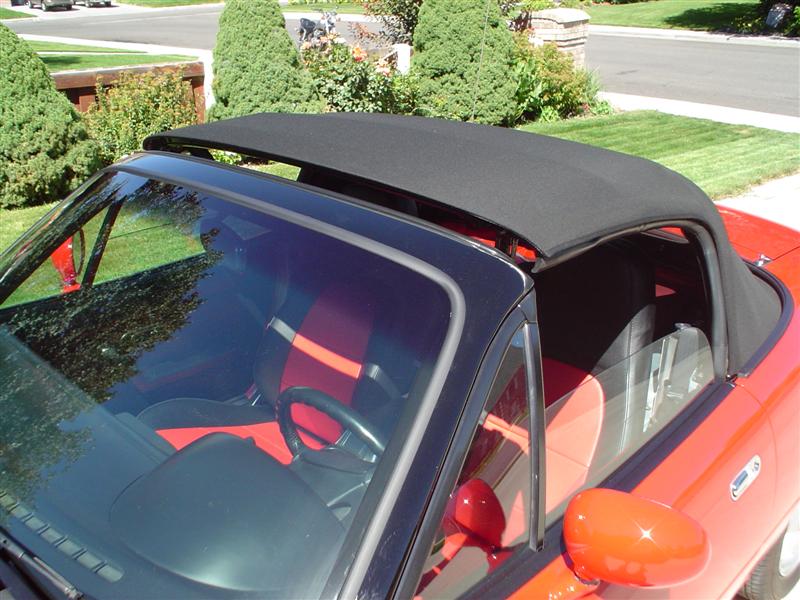
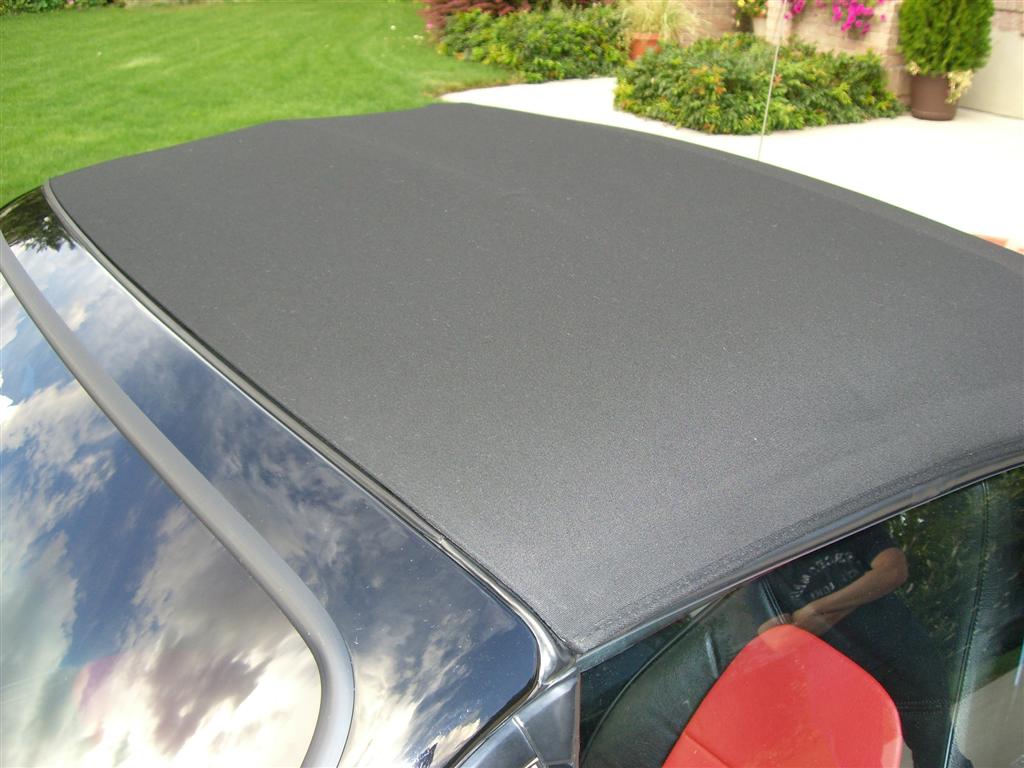
Top is done, the car is shiny.
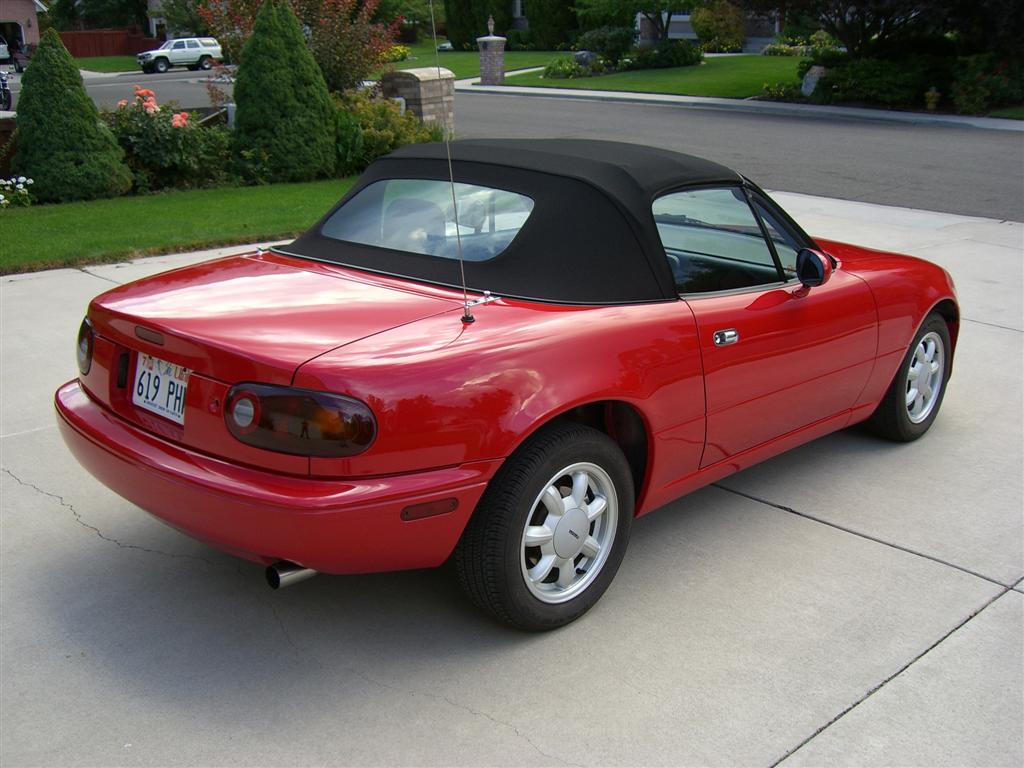
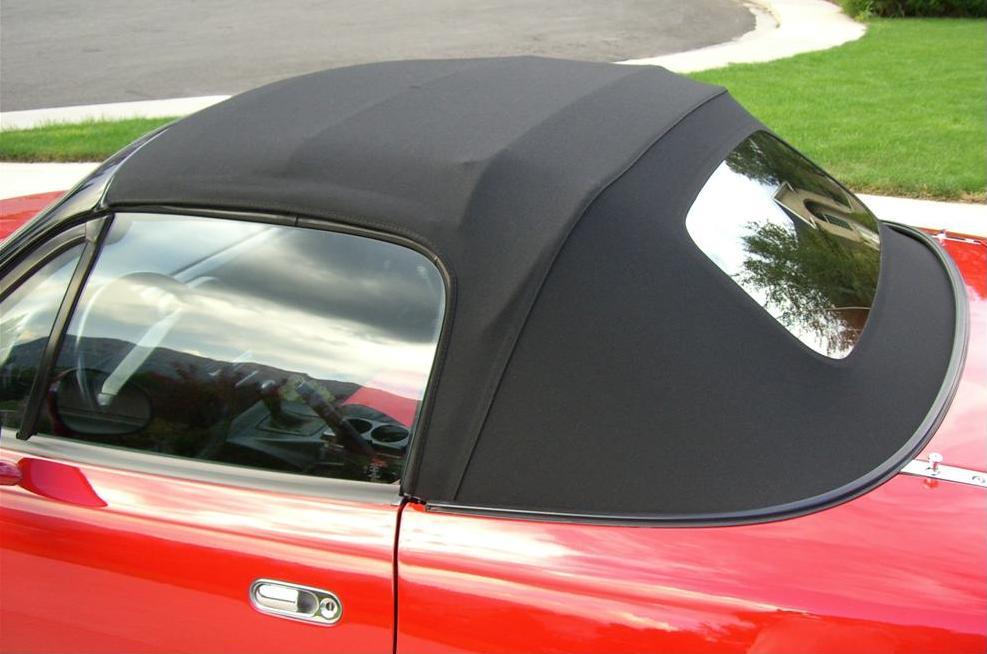
Here is a shot from the back.
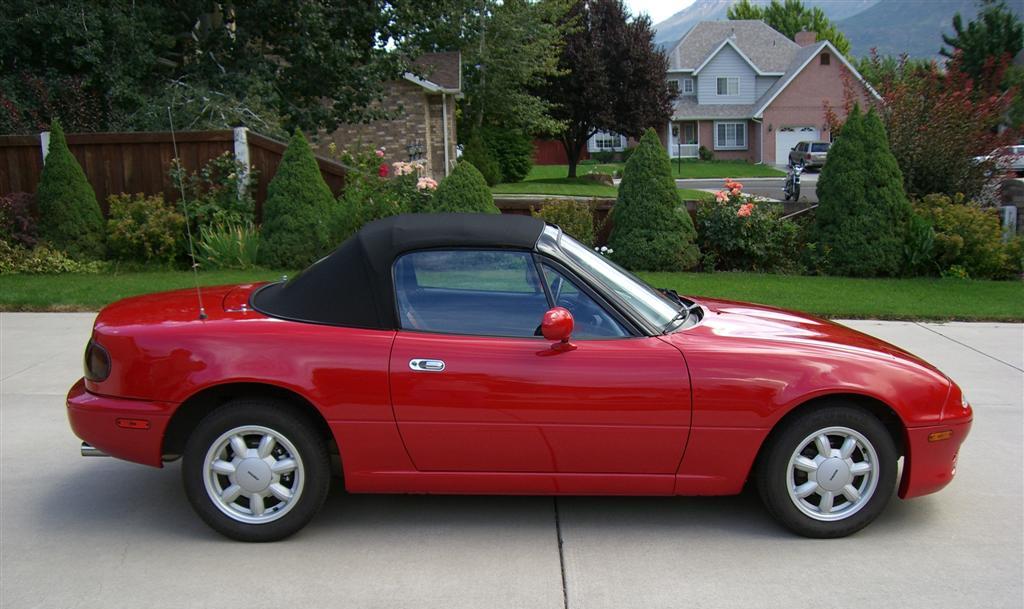
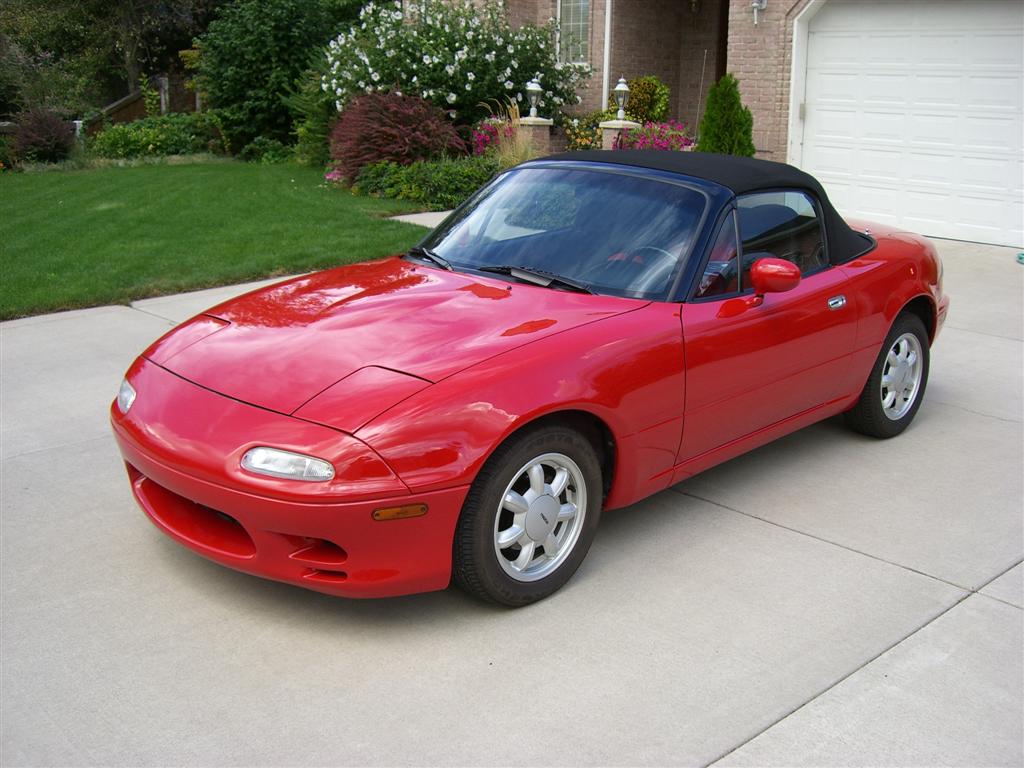
Here it is from the side.
I hope this helps someone else. At the time that I did this I could not find any websites with pictures and instructions for installing this new one piece top design with the straps that require modifying the bows.
If I did something wrong or if there is a better way to do something or if you just want to comment on these instructions, please use the email at the top of the page. I would love to hear from you.