| Image |
Notes
|
|
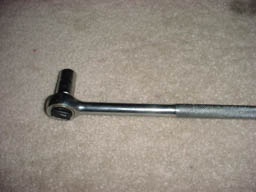
Step 1: Parts Required:
- 14mm Ratchet
- Anti-seize compound (optional)
|
|
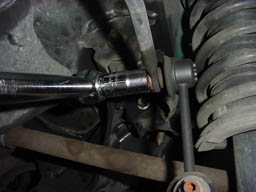
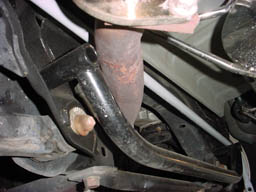
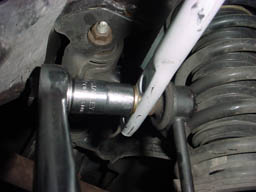
Step 2: First, look at the connection where the sway
bar end connects to the end link. You'll notice that the end of the bar
is slightly twisted inward at the top to meet the angle of the end link.
Remember this for when you put in the new bar.
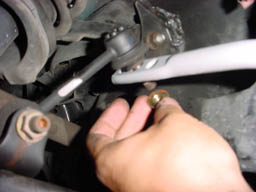
Take the ratchet and loosen the nuts on the end links; when I removed them,
it took only a little amount of force. Facing the rear of the car, the passenger
side endlink nut will be turned so that the top of the nut is turning away
from you. So the ratchet handle should be moving upwards with the handle
pointed to the back of the car. On the driver's side, it should be turning
toward you so the handle should be moving down when facing out to the back
of the car. |
|
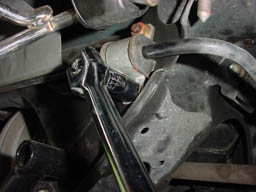
Step 3: Remove the bolts to the sway bar attachments.
These took almost no force at all, though the top, passenger side nut is
difficult to reach if you have a fairly large ratchet. These come off counter-clockwise,
as normal. |
|
Step 4: The sway bar is totally free. You can now remove
it, but save the metal brackets that hold the bushings. |
|
Step 5: Replace with your new sway bar! Remember the
bar's ends are slightly angled, make the top of the bar the area that's
pointed inward to meet the angle of the end links. |
|
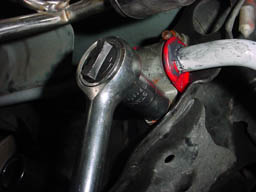
Step 6: We're putting the nut on one endlink. Notice
that the bar end is slightly angled; this is a picture of the driver's side,
so the top of the bar is angled inward, and the bottom outward. Do this
to both sides, loosely, later you can come back and tighten them. The instructions
said to first try the middle hole. |
|
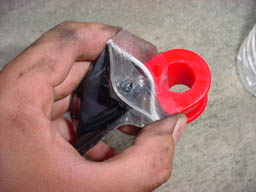
Step 7: The FM package came with a tiny bag of grease.
Apply this to the inside of the bushing to reduce squeeks. The bushings
have a cut on the side, and you'll simply pry it open with your fingers
and place them over the bar. Use a lot of it, because if it squeeks from
too little, you'll regret it and have to go back. |
|
Step 8: Match the location of the bushings up (now installed
on the bar) to the original bracket locations. Replace the original brackets,
and place the nuts back on. Again, no torque specs were given, so I just
tightened them to what I remember it took to remove them. |
|
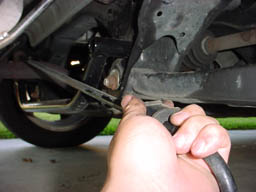
Step 9: To tighten the end links, the car must now
be on the ground if it has been lifted or jacked in some way.Tighten
up both end link bolts on both sides. No torque specs here again, so ask
somebody. |