
by Marino Linardon
I am providing these supplemental comments in the hope of helping people changing the fuel filter on an NB Miata. I used the excellent article in the Garage (https://www.miata.net/garage/NB_fuel_filter/index.html) as my base set of instructions, which in turn referenced the instructions for an NA Miata procedure. I have a few additional comments from my experience with a 2001 Miata and suggest you read the two prior articles cited before reading this document.
You should budget two hours or so if this is your first time replacing the fuel filter. I wish you the best in your endeavor.
By the way, my car is 19 years old with 100K miles and this is the first fuel filter change. The car is not exhibiting any problems but the fuel inside the old filter was very dirty.
1. The "replacement hose retainer clips" are what is used for the NB instead of hose clamps that were used for the NA. It is critical to have spare retainer clips on hand prior to changing the NB fuel filter in case they are damaged in the removal. They did NOT come with the filter I purchased. I used the “Dorman 800-016 Fuel Line Retaining Clips…” which are available on Amazon and also recommended by others.
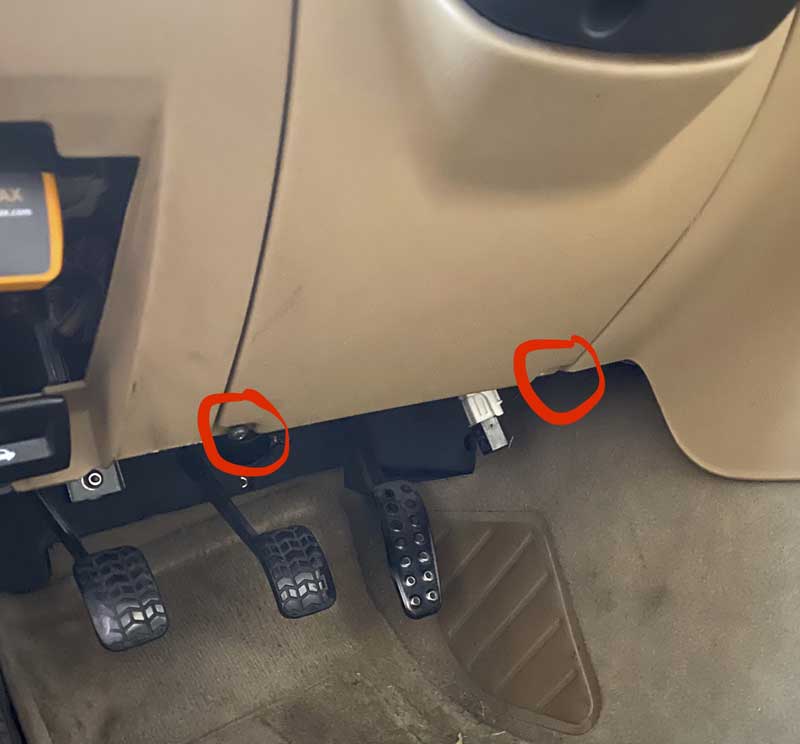
2. Remove the panel under the steering wheel before attempting to access the fuel filter relay. It is easily taken off after removing two phillips screws:
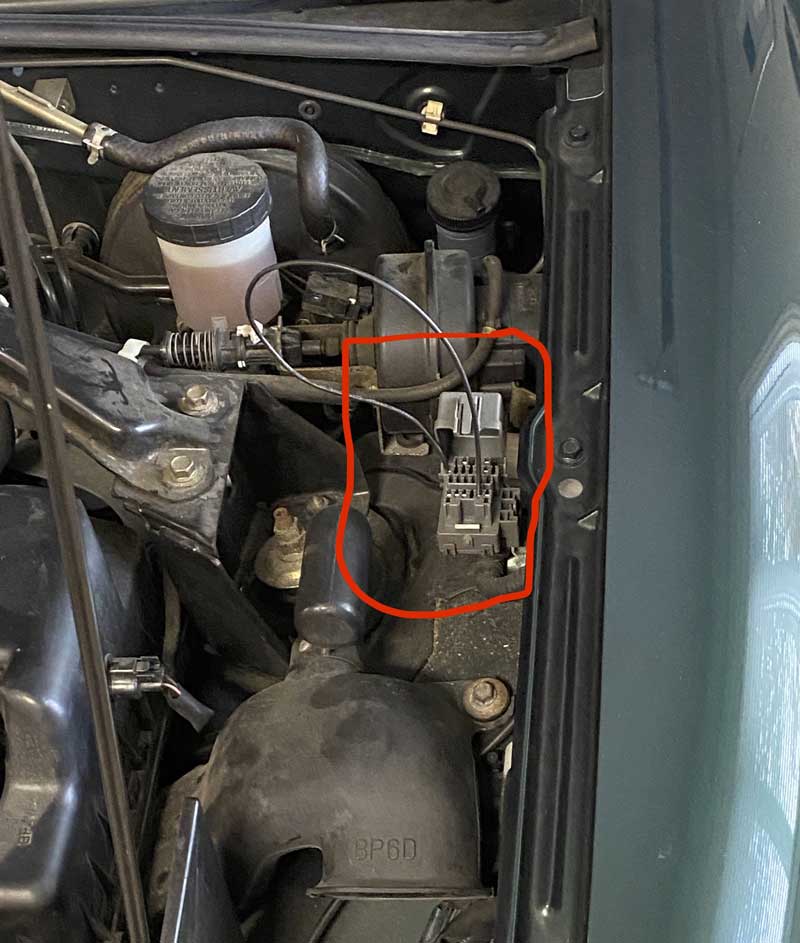
3. The fuel pump relay is located here:
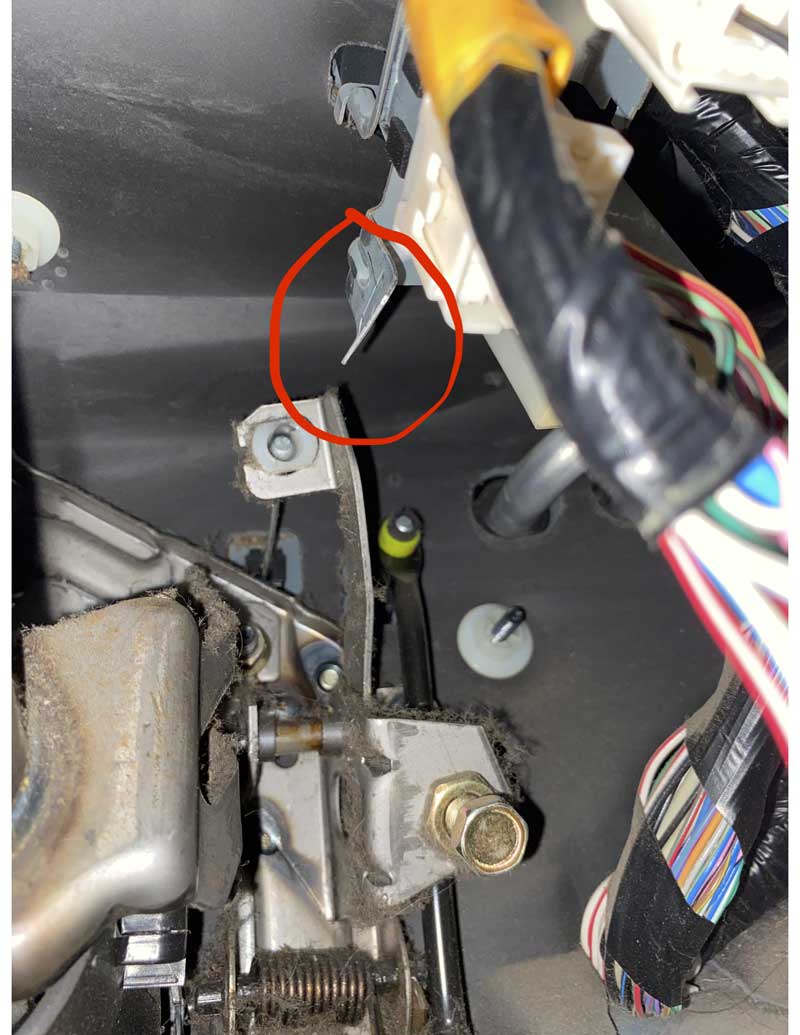
The prior image was taken after the relay was removed. The writers before me did a great job of explaining that the fuel pump relay is located above the accelerator pedal and to the right of the steering column. You’ll need to lay under the steering wheel in a very uncomfortable position to access it. For my car, there are no obviously distinguishing characteristics when looking up at the relay.
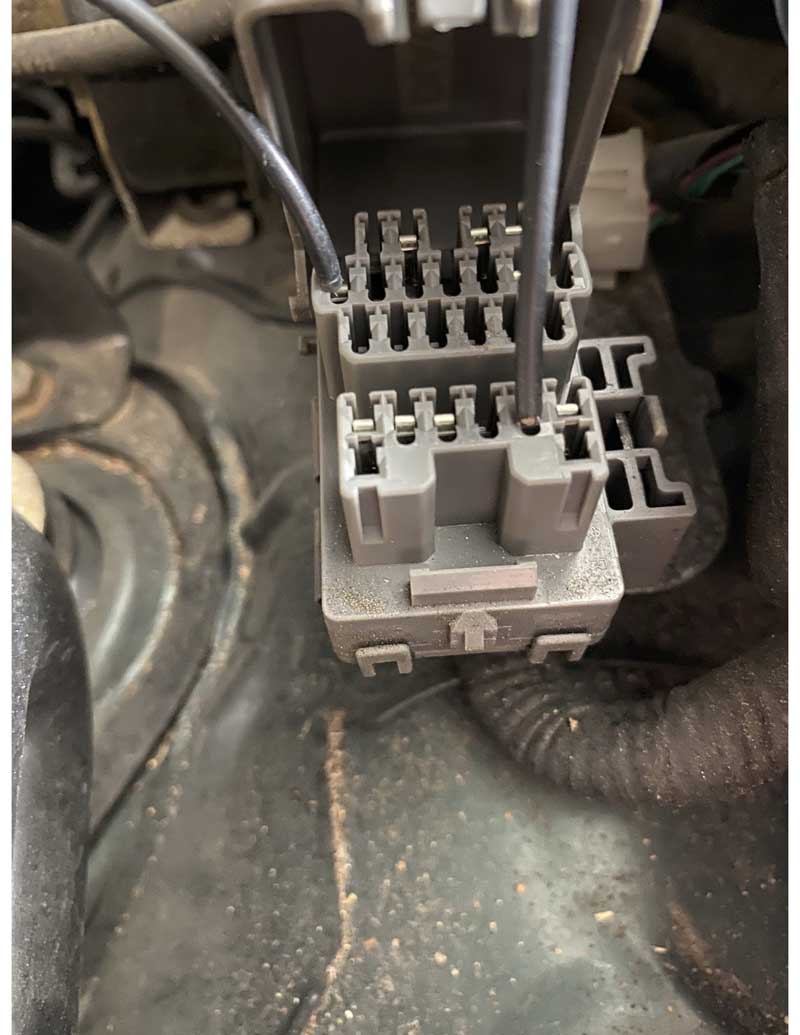
4. This is a picture of the relay after it is removed from the housing:
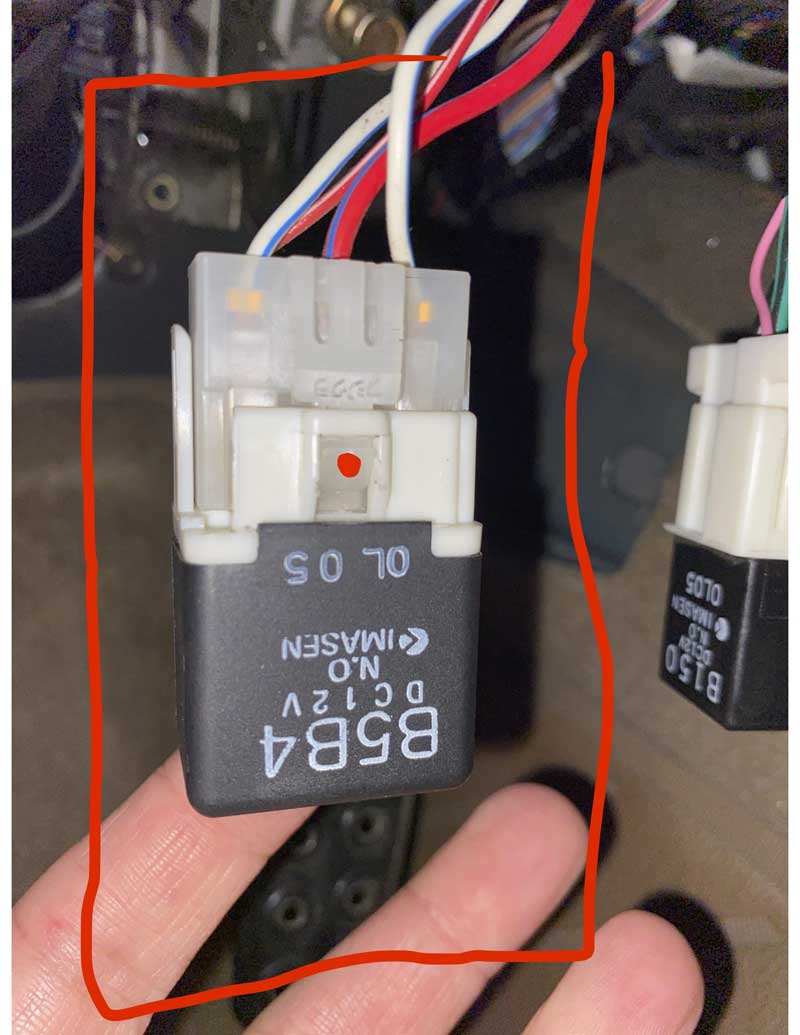
I found that I needed to pry the relay off the metal housing. Once I did that it was easy to separate the relay into its two parts by using a flat head screwdriver to depress the locking mechanism (identified with a red dot in the picture).
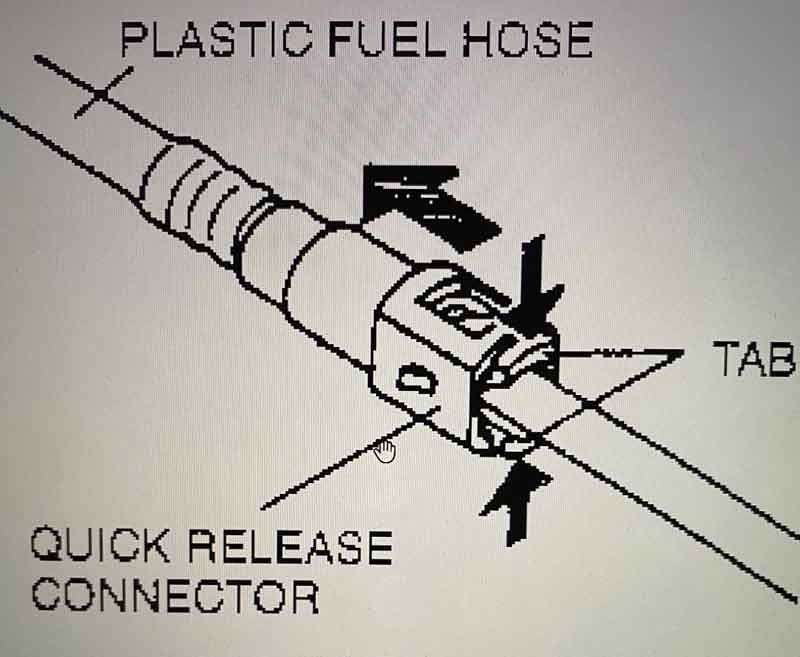
5. The hose retainer clips (identified as “quick release connector” in the drawing below) are removed from the hose by using a pliers to press the tabs of the end of the clip in. While pressing in, pull the line away from the filter. I found it relatively easy to do so. Illustration below:
6. The diagnostic box is located here:
7. This is the proper location for the bridge wire (ground to fuel pump):
As suggested by the NA article, I used this method to prime the system. This step is NOT required.
8. The NA article references clamping the return fuel line in order to test the filter fitment for leaks. The NB does not have a return fuel line and thus this “extra pressure” check cannot be accomplished. I visually inspected the filter while the car was idling to determine that the replacement filter was not leaking.
| [Home] - [FAQ] - [Search] - [Sponsors] - [Forums] |
| [Garage] - [Clubs] - [Contact Us] - [Disclosures] - [More...] |
Copyright
©1994-2024, Eunos Communications LLC
|